Operating an injection blow molding machine requires precise mold adjustment techniques to achieve optimal production quality and efficiency. Whether you are manufacturing pharmaceutical vials, cosmetic containers, or industrial plastic products, understanding how to properly adjust molds on your injection blow molding machine is essential for reducing defects, improving output consistency, and maximizing machine uptime. This comprehensive guide provides detailed instructions, professional tips, and cost considerations for mastering mold adjustment on your injection blow molding equipment.
Understanding the Fundamentals of Mold Adjustment
Mold adjustment on an injection blow molding machine is fundamentally different from traditional injection molding because the process involves two distinct stages: injection of the parison and blow molding of the final container. The mold system must accommodate both functions while maintaining precise alignment throughout the entire cycle. Proper mold adjustment ensures that the preform is correctly positioned, the blow ratio is maintained, and the final container meets dimensional specifications.
The Basic Components of Injection Blow Molding Molds
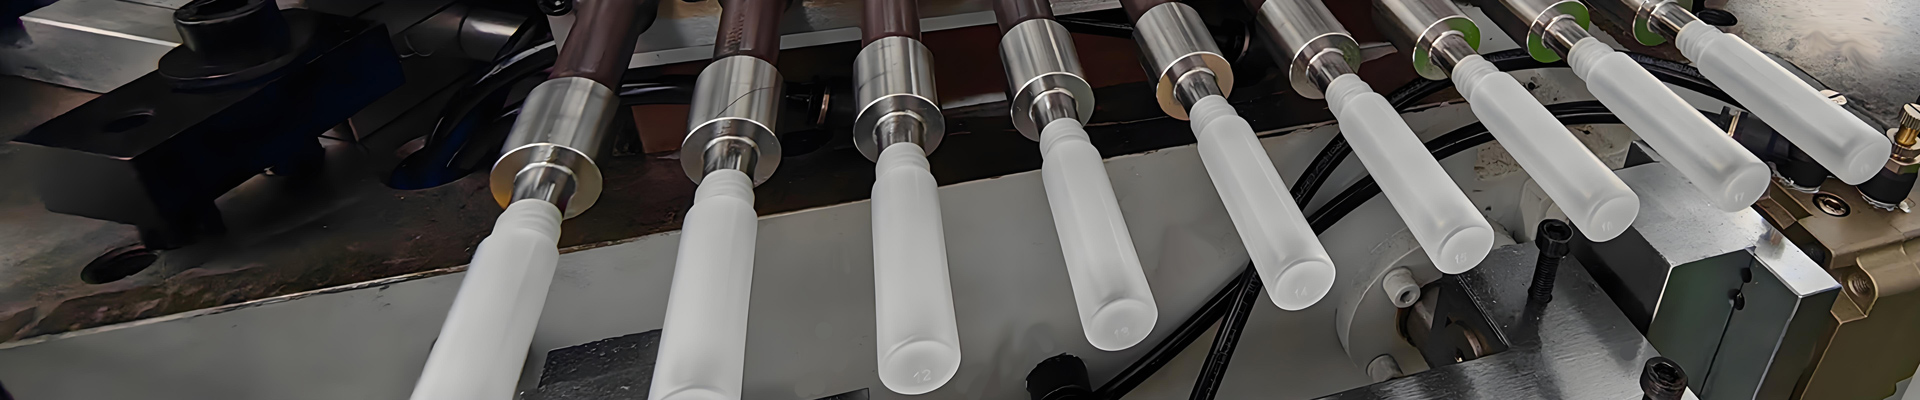
Injection blow molding machine molds consist of several critical components that work together to produce high quality containers. The core rod, also known as the mandrel, serves as the internal forming surface during both the injection and blow stages. The cavity blocks define the external shape of the container and must be precisely aligned with the core rod to ensure uniform wall thickness. The neck ring holds the container neck dimensions during blow molding, which is crucial for achieving proper thread acceptance and sealing performance.
The split cavity design allows the mold to open after blow molding to eject the finished container. Alignment pins and bushings ensure consistent positioning of the cavity blocks relative to the core rod assembly. Understanding each component’s function helps operators identify adjustment needs and diagnose quality issues before they affect production efficiency.
Why Precision Matters in Mold Adjustment
Precision mold adjustment directly impacts several key performance indicators in injection blow molding production. Container wall thickness uniformity affects structural integrity, barrier properties, and material usage efficiency. Poor alignment can cause wall thickness variations exceeding 30 percent, leading to weak points in the container that may fail during filling, shipping, or end use. Dimensional accuracy in neck finish dimensions determines compatibility with closures, caps, and dispensing systems.
Production efficiency also depends heavily on mold adjustment quality. Improperly adjusted molds increase cycle times due to difficulty in part ejection, flash formation requiring trimming, or quality rejection from visual and dimensional inspection. Extended machine downtime for troubleshooting and readjustment reduces overall equipment effectiveness and increases per unit production costs significantly.
Step by Step Mold Adjustment Procedures
Initial Setup and Pre Adjustment Checks
Before beginning any mold adjustment procedure, perform a comprehensive inspection of all mold components. Check the core rod for wear, scoring, or surface damage that could affect part release. Inspect alignment pins for wear and verify that bushing fits are within specification. Clean all mold surfaces thoroughly to remove any residual material, contamination, or parting line flash from previous production runs.
Examine the cavity blocks for signs of wear in the neck ring areas, which experience the most mechanical stress during opening and closing cycles. Verify that cooling channels are clear and flowing properly, as temperature variations affect dimensional stability during production. Document current settings and measurements before making any adjustments to establish a baseline for comparison.
Core Rod Positioning and Alignment
Core rod positioning is the foundation of proper injection blow molding machine mold adjustment. The core rod must be centered within the cavity with consistent clearance around the entire circumference. Begin adjustment by loosening the core rod clamping mechanism and using precision measuring tools to verify center position. Typical tolerance for core to cavity concentricity is 0.05 millimeters or 0.002 inches.
Adjustment is typically accomplished through shim installation or precision jack screws built into the mold base. Add shims to the opposite side of the desired movement direction. For example, to move the core rod toward the left, add shims to the right side. Make incremental adjustments of 0.025 millimeters at a time, then remeasure before proceeding. Over adjustment causes additional problems and wastes production time.
After achieving horizontal positioning, verify vertical alignment by measuring from the core rod centerline to reference surfaces on both the injection station and blow station mold plates. Uneven vertical positioning causes uneven parison wall thickness and subsequent wall thickness variation in the finished container. Use a dial indicator mounted on the stationary platen to check core rod runout, which should not exceed 0.03 millimeters total indicator reading.
Cavity Block Alignment and Split Line Adjustment
Cavity blocks must close precisely at the split line to produce containers without flash or dimensional inconsistency. Check split line alignment by closing the mold manually and observing light transmission along the entire split line surface. Any visible gap indicates misalignment that requires adjustment. Common causes include uneven closing due to mechanical wear, contamination on sealing surfaces, or improper mounting.
Adjustment of cavity block alignment typically involves eccentric bushings or adjustment screws at the parting line. Loosen the cavity clamping mechanism and use the adjustment hardware to close gaps incrementally. After each adjustment, close the mold and recheck alignment. Continue adjustments until light does not transmit through any portion of the split line. Tighten clamping mechanisms to specification torque values to maintain alignment during production.
Neck Ring Positioning and Height Adjustment
The neck ring determines critical neck finish dimensions including outer diameter, inner diameter, and thread profile. Neck ring positioning affects how the container seals with closures and determines whether caps will thread on properly. Improper neck ring positioning is a common cause of closure compatibility issues and leakage in filled containers.
Vertical positioning of the neck ring relative to the core rod tip establishes the container finish height. Use precision height gauges to verify that the neck ring centerline is at the correct height for the specific closure system being used. Adjustment is typically accomplished through shim changes or precision ground spacers installed between the neck ring assembly and the cavity block.
Horizontal positioning of the neck ring must be concentric with the core rod within 0.05 millimeters. Eccentricity in neck ring positioning causes uneven thread walls and sealing surfaces, leading to cross threading, leakage, or cap application failures. Verify neck ring position using a dial indicator or coordinate measuring machine for critical pharmaceutical and food applications.
Parameter Settings for Optimal Mold Performance
Temperature Control and Cooling Adjustment
Mold temperature significantly affects part quality and production efficiency in injection blow molding. The core rod typically operates at a higher temperature than the cavity blocks to facilitate material release and achieve proper material distribution. Standard core rod temperature ranges from 60 to 80 degrees Celsius depending on material selection, while cavity temperatures typically range from 40 to 60 degrees Celsius.
Adjust cooling flow rates to maintain stable temperatures throughout production. Uneven cooling causes differential shrinkage between the container body and neck finish, leading to dimensional problems. Install thermocouples at critical points in the mold to monitor temperature stability continuously. Modern injection blow molding machines feature integrated temperature control systems that automatically adjust cooling parameters based on feedback from embedded sensors.
Injection Pressure and Speed Optimization
Injection pressure requirements vary based on material viscosity, part geometry, and mold design. Initial pressure settings should follow material supplier recommendations, typically ranging from 30 to 80 megapascals for common resins. Adjust injection speed to achieve smooth material flow without hesitation or air entrapment in the preform.
Overly high injection pressure causes excessive flash at the split line and increased stress on mold components. Insufficient pressure results in short shots, incomplete preforms, or poor surface finish. Fine tune pressure and speed parameters in small increments while monitoring part quality. Document optimal settings for each product to facilitate changeover efficiency.
Blow Pressure and Timing Adjustment
Blow pressure in injection blow molding serves to inflate the preform against the cavity walls to achieve final container shape. Typical blow pressures range from 0.6 to 1.0 megapascals for standard containers, with higher pressures required for containers with complex geometries or thick walls. Insufficient blow pressure causes poor surface replication, visible seams, or incomplete formation of detailed features.
Blow timing adjustment controls when the blow pin activates relative to the injection and cooling phases. Premature blow activation can cause material sag and neck deformation, while delayed activation allows material to cool excessively, requiring higher pressures to achieve proper formation. Optimize timing by observing part quality and adjusting in 0.1 second increments until optimal results are achieved.
Advanced Adjustment Techniques for Specialized Applications
Handling Complex Container Geometries
Containers with complex geometries such as recessed handles, undercuts, or non round cross sections require specialized adjustment techniques. Wall thickness distribution becomes more critical as material must flow into detailed areas without creating weak points or excessive material accumulation. Use simulation software to predict material distribution and identify areas requiring adjustment.
For containers requiring variable wall thickness, adjust the injection profile to vary material distribution during the injection phase. Progressive injection fills thick sections first, then transitions to thinner sections as material flows toward details. This technique reduces sink marks and improves overall part quality while reducing material waste from excessive trimming.
Multi Layer and Co Injection Adjustments
Multi layer injection blow molding, which produces containers with barrier layers or recycled content cores, requires additional adjustment considerations. The timing sequence between layers must be precisely controlled to achieve proper adhesion and layer distribution. Core layer and skin layer materials have different viscosity and temperature requirements that must be balanced during adjustment.
Co injection systems require careful synchronization between multiple injection units and the blow mechanism. Layer thickness distribution is affected by injection pressure, speed, and timing parameters for each material stream. Document optimal settings for each multi layer product formulation to ensure consistent quality during production runs and after material changes.
High Speed Production Adjustments
High speed production applications require optimization of all adjustment parameters to maximize output while maintaining quality. Reduced cycle times demand faster mold opening and closing, which can affect alignment stability if mechanical play exists in the system. Increase clamping force slightly above normal settings to ensure positive mold closure at high speeds.
Accelerate injection and blow timing sequences while monitoring for quality degradation. Common issues at higher speeds include air entrapment, incomplete material distribution, and increased flash formation. Use high speed cameras to observe the filling and blow stages when optimizing for maximum production rate. Balance speed against quality to achieve optimal overall equipment effectiveness.
Troubleshooting Common Mold Adjustment Problems
Flash Formation and Prevention
Flash formation indicates that material is escaping past the mold parting line or seal surfaces during injection or blow stages. Primary causes include insufficient clamping force, worn or damaged seal surfaces, and excessive injection pressure. Begin troubleshooting by verifying clamping force is at proper specification, then inspect seal surfaces for wear or contamination.
When adjusting to eliminate flash, make small incremental changes to injection pressure and speed before adjusting clamping force. Over reducing pressure can cause short shots while excessive clamping force stresses machine components and increases wear. If flash persists after pressure adjustment, inspect and measure seal surfaces for wear that requires repair or replacement.
Wall Thickness Variation Diagnosis
Wall thickness variation in injection blow molded containers typically originates from core rod misalignment, uneven cooling, or improper blow timing. Measure wall thickness at multiple points around the container circumference and length to identify the pattern of variation. Consistent thickness on opposite sides indicates core misalignment, while gradual variation from top to bottom indicates cooling or timing issues.
Address wall thickness variation through careful recalibration of core rod positioning and temperature balance. Even minor misalignment of 0.1 millimeters can cause measurable wall thickness variation in sensitive applications. Use ultrasonic thickness measurement equipment to verify improvements after adjustment and document specifications for future reference.
Neck Finish Defects and Correction
Neck finish defects including out of round dimensions, damaged threads, and improper wall thickness in the neck area require specific adjustment procedures. The neck ring assembly often requires independent adjustment from the body cavity to achieve optimal results. Verify neck ring concentricity using a dial test indicator or dedicated neck finish gauge.
Thread profile defects typically indicate problems with neck ring wear or positioning. Worn neck ring inserts must be replaced to restore proper thread geometry. Position the neck ring at the correct height to ensure proper engagement with closure threads and sealing surfaces. Test fit with actual closures during adjustment to verify compatibility before beginning production runs.
Preventive Maintenance for Consistent Mold Adjustment
Regular Inspection Schedules
Preventive maintenance significantly reduces the frequency of mold adjustment problems and extends mold service life. Establish a regular inspection schedule based on production volume rather than calendar time. High volume production may require daily inspections, while lower volume applications can extend intervals to weekly or monthly schedules.
Document all inspection findings and compare results over time to identify wear trends. Measure critical dimensions including core rod runout, split line flatness, and neck ring concentricity at each inspection. Early identification of developing problems allows planned maintenance before production quality is affected.
Cleaning and Lubrication Procedures
Proper cleaning removes material buildup that affects mold function and measurement accuracy. Use approved cleaning agents that do not damage mold surfaces or cooling channel seals. Clean parting line surfaces, cavity interiors, and neck ring areas thoroughly during each maintenance interval. Avoid abrasive cleaning methods that can alter critical dimensions.
Lubrication of moving components ensures consistent operation and reduces wear on adjustment mechanisms. Apply appropriate lubricants to guide surfaces, adjustment screws, and any moving components according to manufacturer recommendations. Over lubrication can attract contamination, so apply only the quantity specified in maintenance procedures.
Calibration and Documentation Standards
Maintain calibration records for all measurement equipment used in mold adjustment procedures. Verify calibration against traceable standards at regular intervals and document all calibration activities. Accurate measurement is essential for achieving and verifying proper adjustment, so investment in quality measurement equipment pays dividends in reduced adjustment time and improved quality consistency.
Create and maintain setup documentation for each mold and product combination. Include photographs of adjustment positions, measurements of critical dimensions, and parameter settings that achieved acceptable quality. This documentation enables rapid changeover when products are repeated and preserves institutional knowledge about optimal adjustment techniques.
Cost Analysis and Return on Investment
Investment in Adjustment Equipment and Training
Professional mold adjustment requires investment in precision measurement equipment, specialized tools, and operator training. Basic tool requirements include dial indicators with magnetic bases, precision measuring micrometers, and specialized gauges for neck finish and container dimensions. Initial equipment investment ranges from 2000 to 8000 dollars depending on accuracy requirements and measurement range.
Operator training investment varies based on current skill levels and training depth. Comprehensive training covering adjustment theory, practical procedures, and troubleshooting techniques typically requires 40 to 80 hours of instruction. Training investment ranges from 1500 to 5000 dollars per operator depending on training source and certification requirements.
Production Cost Savings from Proper Adjustment
Proper mold adjustment reduces production costs through multiple mechanisms. Reduced scrap rates from improved first pass quality can save 5 to 15 percent of material costs depending on current baseline quality levels. Decreased downtime for troubleshooting and readjustment improves equipment utilization, typically by 3 to 8 percent.
Extended mold service life from proper maintenance and adjustment reduces capital expenditure for replacement molds. Properly maintained molds often achieve two to three times the service life of neglected molds. Calculate specific savings based on current production volumes, material costs, and machine hour rates to justify investment in adjustment equipment and training.
Quality Impact on Product Value
Container quality directly affects product value and customer satisfaction in many applications. Pharmaceutical packaging requires stringent quality standards where defects can result in product rejection, recalls, or regulatory compliance issues. The cost of quality failures in these applications far exceeds the cost of preventive adjustment and maintenance.
Consumer product packaging quality affects brand perception and market acceptance. Containers with visible defects, inconsistent dimensions, or poor closure compatibility create negative impressions that can impact sales. Investment in proper mold adjustment supports quality consistency that protects brand reputation and market position.
Conclusion
Mastering mold adjustment on your injection blow molding machine is essential for achieving consistent quality, maximizing production efficiency, and controlling manufacturing costs. The adjustment procedures outlined in this guide provide a systematic approach to achieving and maintaining optimal mold performance. Regular practice of these techniques builds operator expertise that compounds over time, resulting in increasingly efficient and reliable production operations.
Invest in proper training, measurement equipment, and preventive maintenance to support your adjustment activities. Document all settings and procedures to preserve institutional knowledge and enable efficient changeover between products. The return on investment from improved adjustment practices typically pays for itself within three to six months through reduced scrap, improved uptime, and extended mold service life. Implement these practices progressively to build toward world class injection blow molding performance.
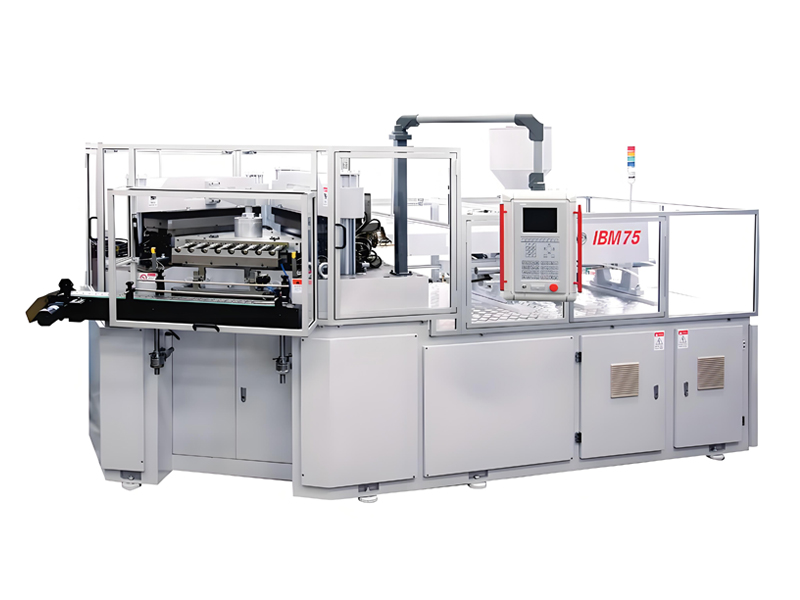
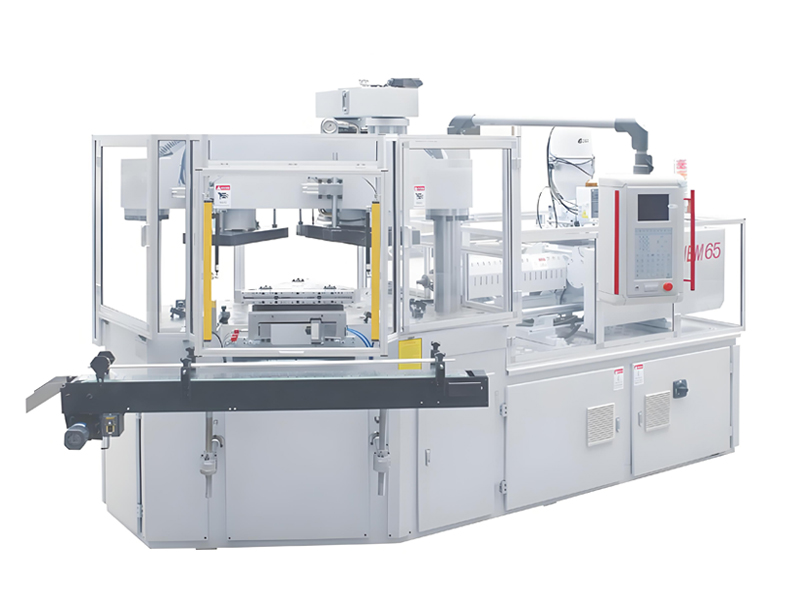
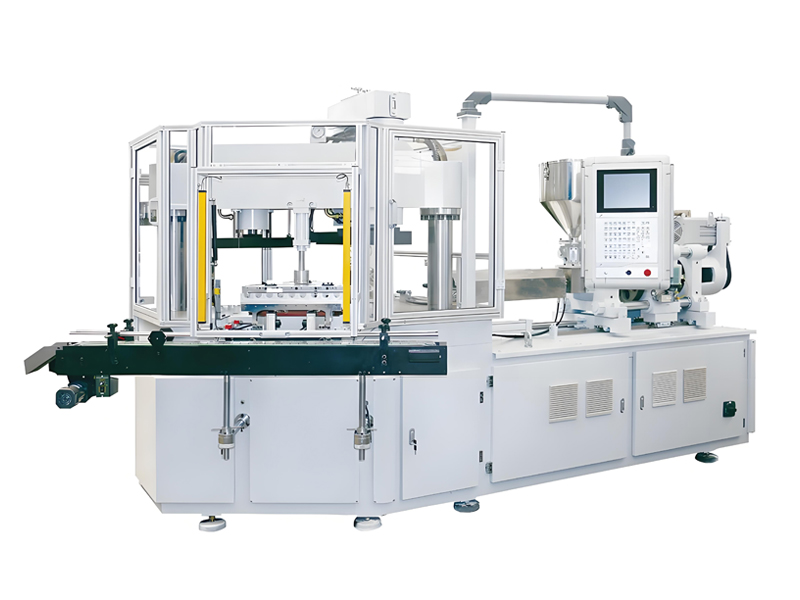
AiBiM specializes in manufacturing injection blow molding machines designed for easy adjustment and consistent performance across a wide range of applications. Contact our technical support team for specific guidance on mold adjustment procedures for your particular equipment configuration and production requirements.
Advanced Adjustment Techniques for Experienced Operators
Micro Adjustment for Critical Quality Requirements
Critical applications in pharmaceutical and food packaging often require micro adjustment precision beyond standard tolerances. These applications demand wall thickness consistency within 5 percent variation across the entire container surface. Achieving this level of precision requires systematic approach to every adjustment variable and careful attention to environmental factors that may affect measurements.
Temperature stability becomes increasingly important at micro adjustment precision levels. Ambient temperature variations can cause thermal expansion that affects dimensional measurements. Professional micro adjustment operations maintain controlled environment temperatures within plus or minus one degree Celsius during adjustment procedures. Measurement equipment should be allowed to stabilize at room temperature before use to prevent thermal reading errors.
Vibration from nearby equipment can affect measurement accuracy during critical adjustments. Install precision measuring equipment on stable surfaces isolated from vibration sources. Magnetic bases for dial indicators should be mounted on heavy, stable surfaces to prevent movement during measurement. These environmental controls may seem excessive but become necessary when seeking sub 0.02 millimeter precision.
Thermal Expansion Compensation
Mold components undergo thermal expansion during production that affects dimensional measurements taken at room temperature. Understanding thermal expansion coefficients enables compensation calculations that predict hot state dimensions from cold measurements. Steel thermal expansion coefficient is approximately 0.000012 millimeters per millimeter per degree Celsius.
For critical applications, measure components at operating temperature to eliminate expansion calculation uncertainties. Infrared thermometers enable non contact temperature measurement during production. Insert probes into blind holes for more accurate internal temperature readings. Document temperature measurements alongside dimensional data to support trend analysis and adjustment decision making.
Adjustment decisions based on cold measurements must account for expected thermal growth during production. If cold measurement indicates dimensions slightly below target, the hot state dimension may achieve target due to thermal expansion. Experience with specific mold and material combinations develops intuitive understanding of these relationships that improves adjustment efficiency.
Dynamic Balancing of Multi Station Systems
Rotary injection blow molding machines with multiple stations require dynamic balancing to ensure consistent quality across all positions. Station to station variation results from mechanical differences in alignment mechanisms, temperature variations from cooling system design, and subtle differences in mold component dimensions. Systematic balancing identifies and corrects these variations.
Production sampling protocols should include containers from every station to enable comparative analysis. Measure key dimensions from samples from each station and calculate statistical measures of central tendency and variation. Significant differences between stations indicate need for targeted adjustment of specific positions. Document optimal settings for each station to facilitate rapid setup after mold changes.
Cooling system balancing ensures equal thermal conditions across all stations. Flow meters verify that coolant distribution is uniform across stations. Temperature sensors at each station enable comparison and adjustment if imbalances exist. Balanced cooling reduces station to station variation and improves overall quality consistency.
Quality Verification After Adjustment
Dimensional Verification Procedures
After completing mold adjustment, systematic verification confirms that adjustments achieved intended results. Develop verification procedures that cover all critical dimensions identified in product specifications. Include dimensions from multiple samples to account for within mold variation. Document all verification measurements for quality records and future reference.
Critical dimensions for verification typically include neck finish dimensions, overall container height, body diameter at key locations, wall thickness distribution, and sealing surface flatness. Create inspection checklists that guide verification activities and ensure consistent coverage. Checklists also support training of new operators by documenting required verification steps.
Statistical sampling plans determine appropriate sample sizes for verification based on risk levels and production volumes. For critical applications, 100 percent verification may be appropriate during initial production after major adjustments. Transition to sampling based verification after confidence is established through consistent quality results.
Functional Testing Protocols
Functional testing verifies that adjusted molds produce containers that perform correctly in end use applications. Closure compatibility testing ensures that containers accept and retain caps properly. Perform torque testing to verify application and removal torque values fall within specified ranges. Test samples from multiple positions within the production cycle to account for variation over time.
Leak testing verifies barrier integrity for containers requiring product protection. Vacuum decay testing, helium leak detection, and dye penetration methods provide increasing levels of sensitivity for leak identification. Select test methods appropriate to the sensitivity requirements of the specific application. Document all functional test results alongside dimensional data.
Drop testing and compression testing verify structural integrity for containers subject to handling stresses. Test protocols should simulate actual handling conditions including transportation vibration, stacking pressure, and accidental dropping. Structural testing provides confidence that containers will survive real world conditions without failure.
Production Trial and Qualification
Production trials validate that adjusted molds can produce acceptable quality over extended production runs. Establish trial protocols that define run length, sampling frequency, and acceptance criteria. Monitor quality trends throughout trials to identify any drift that might indicate developing problems. Extended trials of 10000 or more cycles provide confidence in long term performance.
Qualification procedures formalize approval of adjusted molds for production use. Quality assurance review of trial data confirms that all requirements are satisfied. Document qualification decisions and any conditions or limitations on production use. Re qualification may be required after significant changes to operating parameters or after extended downtime.
First article inspection at the beginning of each production run verifies continued proper function. Compare first article measurements against qualification standards to confirm consistency. Any deviation from qualification conditions should trigger investigation before continuing production. Disciplined first article procedures prevent quality problems from affecting large production volumes.
Cost Effective Adjustment Practices
Reducing Adjustment Time Through Systematic Approaches
Adjustment time directly impacts production efficiency and machine utilization. Systematic approaches reduce adjustment time by identifying problems quickly and implementing effective corrections efficiently. Develop standard procedures for common adjustment scenarios that experienced operators can execute rapidly. Documentation of successful approaches enables knowledge transfer and continuous improvement.
Setup time studies identify specific activities consuming the most time during adjustment procedures. Common time consuming activities include cooling to stable temperatures, iterative adjustment and measurement cycles, and trial production to verify results. Address bottlenecks systematically to reduce overall adjustment time. Equipment investments that accelerate specific steps may be justified by productivity improvements.
Quick changeover techniques reduce adjustment time when switching between products. Pre staging materials, tools, and documentation before beginning changeovers prevents delays from searching for items. Standardized positioning of adjustment mechanisms facilitates rapid location and operation. Post changeover review identifies improvement opportunities for future changeovers.
Investment in Measurement and Tooling
Quality measurement equipment enables accurate adjustment and reduces iteration cycles. Investment in better measurement capability often pays for itself through reduced adjustment time and improved quality outcomes. Digital measurement systems with data logging capabilities improve both accuracy and efficiency compared to manual methods.
Specialized adjustment tools improve efficiency and reduce likelihood of errors. Complete tool sets maintained in good condition prevent delays from searching for appropriate tools. Custom tools for specific molds may be justified for high volume products. Tool organization systems ensure tools are available when needed and returned to proper locations after use.
Calibration of measurement equipment requires ongoing investment to maintain accuracy. External calibration services provide traceable certification but involve equipment downtime. In house calibration capabilities reduce costs for frequent calibration needs. Balance external and internal calibration based on capability requirements and cost effectiveness.
Training Investment for Operator Development
Skilled operators achieve better adjustment results in less time than inexperienced personnel. Comprehensive training programs develop adjustment skills systematically. Include theoretical knowledge of adjustment principles alongside hands on practice with representative equipment. Certification requirements verify competency before operators assume independent adjustment responsibilities.
Cross training enables flexibility in operator deployment and provides backup capability for critical positions. Develop training plans that bring all operators to consistent skill levels. Mentorship programs pair experienced operators with developing personnel to accelerate skill development. Knowledge sharing sessions distribute effective techniques throughout the organization.
Continuous skill development maintains and enhances capabilities over time. Advanced training for experienced operators introduces new techniques and technologies. Attendance at industry conferences and training events provides exposure to broader perspectives and emerging best practices. Invest in operator development as a strategic priority that yields ongoing returns.
Digital Technologies in Mold Adjustment
Computer Aided Alignment Systems
Computer aided alignment systems utilize electronic sensors and software to guide adjustment procedures with enhanced precision. Laser alignment systems project reference lines that enable rapid positioning verification. Electronic dial indicators interface with computers to record measurements and calculate adjustment requirements automatically.
Coordinate measuring machines with computer control enable precise dimensional verification that supports accurate adjustment. Automated measurement routines reduce human error and improve consistency. Measurement data links directly to adjustment software that calculates required corrections. These integrated systems significantly improve adjustment efficiency and accuracy.
Investment in computer aided alignment technology ranges from 15000 to 100000 dollars depending on capability and integration level. Payback periods typically range from one to three years based on productivity improvements and quality benefits. Consider total cost of ownership including training, maintenance, and software updates when evaluating investments.
Real Time Monitoring and Feedback Systems
Real time monitoring systems continuously track critical parameters during production, enabling rapid detection of variation that might indicate adjustment needs. Pressure sensors, temperature sensors, and position sensors provide data streams that support process control and troubleshooting. Data logging enables historical analysis that supports continuous improvement.
Statistical process control software analyzes monitoring data to identify trends before specifications are violated. Alarm notifications alert operators to developing problems, enabling preventive action before defects occur. Advanced analytics can predict quality outcomes based on process parameter patterns, enabling proactive adjustment.
Integration of monitoring systems with adjustment procedures creates closed loop control that maintains quality automatically. Machine learning algorithms refine control parameters based on accumulated data, improving performance over time. These advanced capabilities represent the future direction of injection blow molding quality management.
Simulation and Modeling Tools
Mold flow simulation software predicts material flow and distribution based on mold design and process parameters. Simulation enables optimization of gate location, runner design, and process settings before mold manufacturing. This predictive capability reduces trial and error during adjustment and startup.
Process simulation models predict quality outcomes based on parameter settings. These models enable optimization of process windows for specific products. Simulation based optimization reduces experimentation time and material waste during process development. Investment in simulation capability typically ranges from 10000 to 50000 dollars for software licenses and training.
Digital twin concepts create virtual representations of physical molds and processes. Digital twins enable scenario analysis and optimization without affecting production. As these technologies mature, they will increasingly support automated adjustment and continuous optimization of injection blow molding processes.
Industry Specific Adjustment Considerations
Pharmaceutical Packaging Adjustments
Pharmaceutical packaging requires adjustments that satisfy regulatory requirements in addition to quality objectives. Documentation requirements include adjustment records that demonstrate validated process conditions. Change control procedures govern any adjustments that might affect validated parameters. Understanding regulatory requirements is essential for pharmaceutical applications.
Clean room compatibility affects adjustment procedures and tooling choices in pharmaceutical applications. Tools and materials must be compatible with clean room environments. Adjustment activities may require gowning and clean room protocols. Plan adjustment procedures to minimize clean room exposure time and maintain contamination control.
Validation requirements may include confirmation of adjustment capability as part of equipment qualification. Adjustment procedures should be documented in validation protocols with defined acceptance criteria. Regulatory inspections may review adjustment records and procedures. Maintain adjustment documentation with appropriate retention periods.
Food Packaging Adjustments
Food packaging adjustments must consider food safety requirements including material compatibility and contamination prevention. Material selection for food contact must satisfy regulatory requirements. Adjustment procedures should prevent introduction of contaminants into production areas. Sanitary design principles influence equipment and tooling choices.
High speed production for food packaging applications demands efficient adjustment procedures that minimize production interruption. Quick changeover capabilities are essential for food manufacturers with diverse product portfolios. Invest in adjustment efficiency to support competitive positioning in high volume food packaging markets.
Traceability requirements may link adjustment activities to specific production batches. Record adjustment events with timestamps that enable correlation with production records. Electronic records may be required for compliance with food safety standards. Design adjustment procedures to support traceability requirements from the beginning.
Cosmetic Packaging Adjustments
Cosmetic packaging adjustments prioritize appearance quality alongside functional requirements. Surface finish defects receive greater scrutiny in cosmetic applications. Adjustment procedures should include appearance evaluation as well as dimensional verification. Operator training for cosmetic applications emphasizes visual quality assessment.
Premium cosmetic products may require adjustment to tighter tolerances than standard applications. Investment in precision adjustment capability supports premium market positioning. Higher quality requirements may justify longer adjustment times to achieve optimal results. Balance quality requirements against production efficiency considerations.
Aesthetic considerations including color consistency and surface appearance may require adjustments beyond standard specifications. Material color measurement and appearance evaluation should be included in adjustment verification procedures. Develop specifications that address appearance requirements as well as functional dimensions.
Conclusion
Mastering mold adjustment on your injection blow molding machine is essential for achieving consistent quality, maximizing production efficiency, and controlling manufacturing costs. The adjustment procedures outlined in this guide provide a systematic approach to achieving and maintaining optimal mold performance. Regular practice of these techniques builds operator expertise that compounds over time, resulting in increasingly efficient and reliable production operations.
Investment in proper training, measurement equipment, and preventive maintenance to support your adjustment activities yields returns through improved quality, reduced downtime, and enhanced operator satisfaction. Documentation of all settings and procedures preserves institutional knowledge and enables efficient changeover between products. The compounding benefits of skilled adjustment practices create sustainable competitive advantage.
The technologies and techniques available for mold adjustment continue to evolve, offering new capabilities for achieving precision and efficiency. Stay current with developments in measurement technology, process monitoring, and digital tools that enhance adjustment capabilities. Embrace continuous improvement in adjustment practices as a strategic priority for injection blow molding excellence.
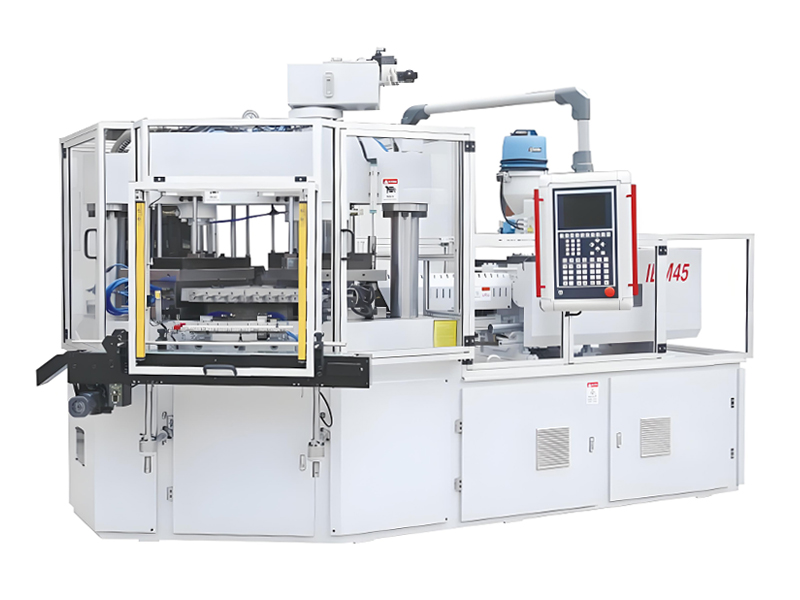
AiBiM specializes in manufacturing injection blow molding machines designed for easy adjustment and consistent performance across a wide range of applications. Contact our technical support team for specific guidance on mold adjustment procedures for your particular equipment configuration and production requirements.