- Why injection blow molding needs its own operator curriculum
- The four-level competency framework at a glance
- Level 1 Foundation Operator: 5 days, 40 hours
- Level 2 Proficient Operator: 8 days, 64 hours
- Level 3 Advanced Process Technician: 10 days, 80 hours
- The defect, root cause and countermeasure matrix
- Level 4 Expert Troubleshooting and Maintenance: 12 days, 96 hours
- Structured fault diagnosis methodology
- Training differences across Aibim machine platforms
- The five-tier preventive maintenance program
- Skill matrix, staffing and shift coverage
- Industry-specific training content and end products
- Choosing a training program for your plant
- Delivery mechanics: instructors, e-learning, recertification, records
- Measuring training effectiveness without guesswork
- Standards and certification context
- Training, service and support from Aibim
- Frequently asked questions
- Conclusion and next step
An injection blow molding machine does not fail because the technology is difficult. It underperforms because the people running it were trained by watching someone else run it. The gap between a plant that holds 98 percent yield on a 30 ml pharmaceutical bottle and a plant that fights 6 percent scrap on the same mold is almost never the machine. It is the depth, sequence and verifiability of operator training. This curriculum sets out a complete four-level program for injection blow molding personnel, from the first day a new hire touches the safety gate to the day a senior technician diagnoses a proportional valve drift without opening a manual.
The program described here totals 280 hours of structured instruction across four competency levels, each with defined duration, learning objectives, content modules, hands-on tasks and measurable pass criteria. It is written so a production manager can lift it directly into a training plan, a quality manager can attach it to an audit file, and a technical trainer can teach from it without inventing content.
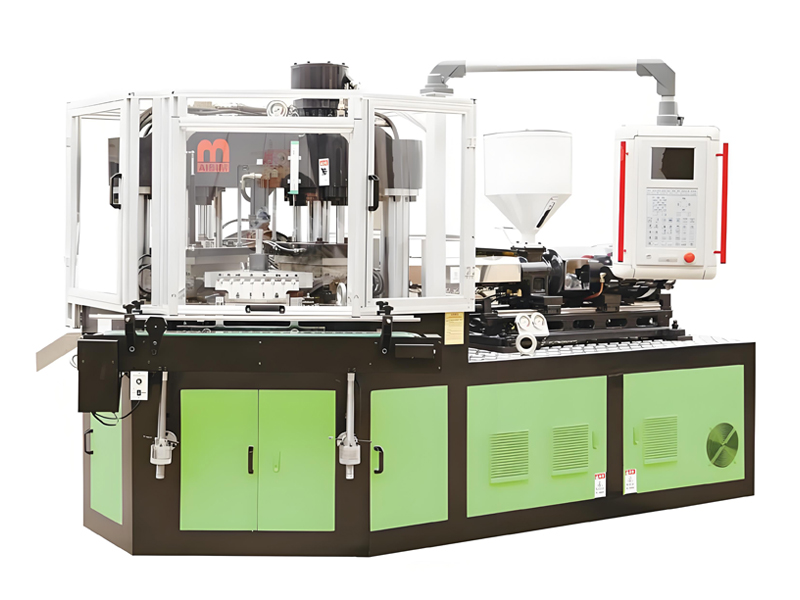
Aibim, a Wanplas factory, has manufactured injection blow molding machines for more than twelve years, with roughly twenty years of accumulated experience in the injection blow molding process specifically. The factory operates its own CNC center for machine part production, moved into a new plant in 2022 with an annual capacity of more than 100 machines, and supplies customers in over 40 countries. The curriculum below reflects what Aibim engineers actually teach during installation, commissioning and follow-up visits on three-station one-step machines producing containers from 3 ml to 1000 ml.
1. Why injection blow molding needs its own operator curriculum
Injection blow molding is a hybrid process, and hybrid processes create hybrid skill gaps. An operator recruited from an injection molding shop understands the injection unit, clamping and cycle logic but has never managed a core rod, a blow station or a stripper. An operator recruited from an extrusion blow molding shop understands blow pressure and mold cooling but has never set an injection pressure profile or judged a neck finish to plus or minus 0.05 mm. Neither arrives competent, and both arrive confident. That combination is exactly what a structured curriculum exists to correct.
The three-station one-step principle in training terms
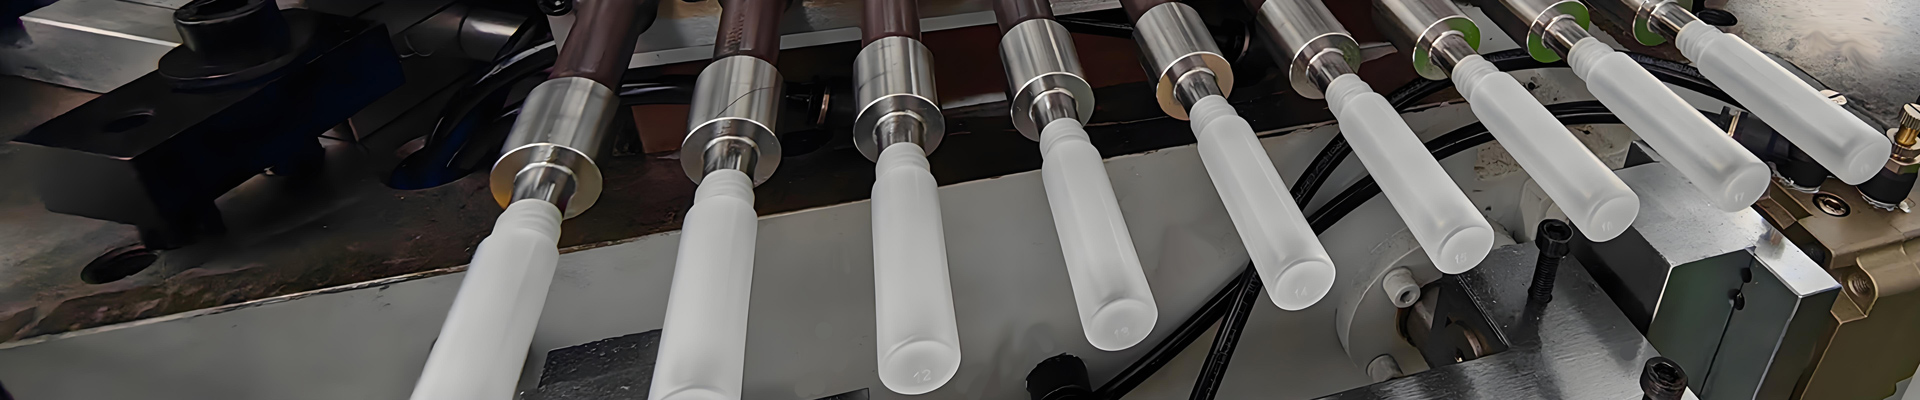
The machine indexes a set of core rods through three stations on a rotating indexing table. At station one, the injection unit fills a preform around the core rod. At station two, the still-hot preform is transferred into the blow mold and inflated against the cavity wall. At station three, the finished container is stripped from the core rod and discharged. Everything the operator does traces back to this sequence, and a trainee who cannot draw the sequence from memory cannot reason about a defect.
Three consequences follow, and every one of them shapes the training content:
- There is no flash and no trimming. The container leaves the machine finished. That removes an entire downstream department, but it also removes the buffer that hides upstream mistakes. A short shot in injection blow molding is a scrapped bottle, not a trimmable defect.
- The neck finish is injection molded, not blown. Neck dimensional accuracy on the order of plus or minus 0.05 mm is achievable because the finish is formed in a steel cavity under injection pressure. Holding that accuracy is a training subject in its own right, covering thread fill, core rod alignment and cooling balance.
- Preform temperature is the master variable. The preform carries its heat from station one to station two. Core rod temperature, typically controlled between 80 and 130 degrees Celsius through an oil temperature controller, sets how the material stretches in the blow mold. Operators who treat core rod temperature as a set-and-forget number never gain real process control.
What untrained operation actually costs a plant
Cost here is expressed as operational indicators rather than currency, because every plant converts those indicators differently. The pattern below is consistent across plants that install a structured curriculum after running informally for a year or more.
| Indicator | Typical before structured training | Typical after full four-level rollout | Improvement mechanism |
|---|---|---|---|
| Scrap rate, steady-state production | 5 to 7 percent | 1.5 to 2.5 percent | Correct first-article verification, defect recognition, parameter discipline |
| Mold changeover time | 150 to 240 minutes | 45 to 90 minutes | SMED separation of internal and external work, quick-connect discipline |
| Start-up scrap per changeover | 300 to 800 pieces | 80 to 200 pieces | Structured warm-up sequence and parameter recall from stored recipes |
| Unplanned downtime share | 8 to 15 percent of scheduled time | 3 to 6 percent | Five-tier preventive maintenance plus faster fault localization |
| Mean time to repair, common faults | 120 to 300 minutes | 40 to 90 minutes | Structured diagnosis methodology, spare parts discipline |
| Energy per 1000 pieces | Baseline | 8 to 20 percent lower | Cycle optimization, correct heating and standby practice |
| Safety incidents involving the clamp or hot zone | Occasional | Target zero | Lockout tagout discipline, guard and light curtain verification |
How to read the numbers in this article. Every figure is either a process parameter with an engineering basis, an assessment threshold you can set in your own plant, or a relative index. No currency amounts appear anywhere. Where investment or return is discussed, it is expressed as Low, Medium, High, Very High or Premium, as a percentage change, as man-hours, or against a training program cost index where a five-day on-site course equals 100 points.
Who the four levels are for
The framework maps to real shop-floor roles rather than to abstract grades. A plant running two machines on two shifts typically needs four Level 1 operators, two Level 2 operators, one Level 3 technician shared across the plant and access to Level 4 capability either internally or through supplier support. A plant running eight or more machines almost always needs Level 4 capability resident on site.
- Level 1, Foundation Operator. Runs a stable machine on an established recipe, performs daily checks, escalates anything abnormal. Does not change parameters.
- Level 2, Proficient Operator. Runs multiple products, performs mold changeover, adjusts parameters within defined boundaries, judges quality independently.
- Level 3, Advanced Process Technician. Owns the process window, runs designed experiments, performs root cause analysis, manages mold maintenance and statistical process control.
- Level 4, Expert Troubleshooting and Maintenance. Owns hydraulic, electrical and mechanical fault diagnosis, writes and audits the preventive maintenance system, trains the levels below.
2. The four-level competency framework at a glance
The framework is deliberately cumulative: each level assumes certification at the level below, and no level can be skipped by seniority. A production supervisor with fifteen years of experience who has never been formally assessed still starts at Level 1, although in practice such a candidate will clear it in two days rather than five. The value of the rule is that the skill matrix means the same thing for every name on it.
| Level | Duration | Primary learning objective | Assessment criteria to pass | Typical role after certification |
|---|---|---|---|---|
| Level 1 Foundation Operator |
5 days 40 hours |
Operate a running machine safely and correctly on an established recipe without altering the process | Independent start-up and shutdown; one 8-hour shift with no major error; daily check sheet completed with 100 percent accuracy; written safety test at least 90 percent | Machine operator, single product, supervised parameter changes |
| Level 2 Proficient Operator |
8 days 64 hours |
Run multiple products, execute mold changeover, adjust parameters inside defined boundaries and judge quality independently | Mold changeover completed independently within the target window; single-shift yield at least 96 percent; defect identification accuracy at least 90 percent on a blind sample set | Senior operator, multi-machine or multi-product responsibility |
| Level 3 Advanced Process Technician |
10 days 80 hours |
Own and optimize the process window, apply designed experiments and statistical process control, manage mold condition | Lead one documented optimization project delivering at least 8 percent improvement in yield, cycle time or energy per 1000 pieces; build one control chart set with process capability index at least 1.33 | Process technician or process engineer, plant-wide |
| Level 4 Expert Troubleshooting |
12 days 96 hours |
Diagnose and repair hydraulic, electrical, control and mechanical faults; design and audit the preventive maintenance system | Locate and repair three simulated faults from different subsystems within 90 minutes each; author a complete five-tier preventive maintenance plan accepted by the plant engineer | Maintenance engineer, technical trainer, shift technical lead |
Program totals. 35 training days, 280 hours, 4 certification gates, 30 percent theory and 70 percent hands-on delivery, recertification every 12 to 24 months depending on level and regulatory environment. A plant does not run all four levels for every person: a realistic distribution is 100 percent of operators at Level 1, 40 to 60 percent at Level 2, 10 to 15 percent at Level 3 and 5 to 10 percent at Level 4.
Prerequisites and entry screening
Screening candidates before they enter the program saves more time than any efficiency gained inside it. Four checks are worth making. First, basic numeracy sufficient to read a caliper, compute a percentage and interpret a temperature deviation. Second, color vision adequate to distinguish black specks, haze and color shift on transparent containers, which matters more than most plants expect. Third, physical capability to work near hot surfaces in personal protective equipment for a full shift. Fourth, for Level 3 and Level 4 entry, demonstrated ability to read an electrical schematic and a hydraulic circuit diagram, or willingness to complete a preparatory module before the main course.
How the levels connect to the machine lifecycle
Timing matters as much as content. The most effective sequence ties training delivery to the machine installation timeline rather than to the human resources calendar.
| Project phase | Training delivered | Audience | Delivery location | Why this timing |
|---|---|---|---|---|
| Before shipment, during factory acceptance testing | Level 1 theory plus Level 2 process theory | 2 to 3 key staff | Aibim factory | Machine is accessible from all sides, no production pressure, trainers and design engineers in the same building |
| Installation and commissioning week | Level 1 full course plus Level 2 changeover practice | All operators on the machine | Customer plant | Trainees learn on their own machine, their own mold and their own material |
| Weeks 2 to 8 after start-up | Mentored floor time, daily check discipline | Level 1 trainees | Customer plant | Consolidation period where habits form or fail to form |
| Month 3 to 6 | Level 2 certification, Level 3 course | Selected operators and technicians | Customer plant or Aibim factory | Enough production history exists to make defect and capability analysis meaningful |
| Month 6 to 12 | Level 4 course, preventive maintenance system handover | Maintenance staff | Customer plant, remote support follow-up | Wear patterns and real fault history now exist to teach against |
| Every 12 to 24 months | Recertification and refresher | All certified staff | Internal, supplier-supported | Skill decay, staff turnover, new molds and materials, control revisions |
3. Level 1 Foundation Operator: 5 days, 40 hours
Level 1 exists to produce an operator who can be left alone with a running machine for eight hours without endangering themselves, the machine or the product. It deliberately does not teach parameter adjustment. A Level 1 operator who changes an injection pressure because a bottle looked thin has failed the course regardless of the outcome. The discipline of running to recipe and escalating deviations is the single most valuable habit the foundation level installs.
Module 1.1 — Machine safety and energy isolation (8 hours)
Safety is taught first, taught longest and re-tested at every subsequent level. An injection blow molding machine concentrates four independent hazard classes into a footprint of a few square meters: a clamping mechanism with tonnage sufficient to crush, molten polymer at up to about 230 degrees Celsius, mold and manifold surfaces held near 130 degrees Celsius, and a hydraulic circuit operating in the region of 14 to 21 MPa.
The lockout tagout module is procedural and physically practiced, not lectured. Trainees perform the full sequence on a de-energized machine: identify all energy sources including main electrical supply, hydraulic accumulator stored energy, compressed air at 0.6 to 1.0 MPa, and thermal energy in the barrel and manifold; shut down in the correct order; isolate; apply personal locks and tags; verify zero energy state by attempting a start; and only then work. The most commonly missed item in real plants is the accumulator, which can hold pressure long after the pump stops. Trainees are taught to bleed it and to confirm the gauge reads zero, not to assume.
Guarding is taught as a verification duty rather than as a fact. Every shift start includes a functional test of the safety gate interlocks, the light curtain protecting the operator approach at the stripper station, and the emergency stop circuit. The trainee learns that a light curtain that has been muted, taped or realigned informally is a reportable condition, and that a guard door which allows movement when open is a stop-production event. Aibim machines carry CE certification with a long-distance digital laser sensor at the stripper station for mold protection and a light curtain for personal protection, and the training makes clear that these devices protect the operator only if they are verified daily.
Thermal and hydraulic hazard training covers the practical reality of the job: purging a barrel discharges material at melt temperature and can spit; opening a hot manifold requires cool-down time that cannot be shortened by impatience; a pinhole hydraulic leak at 21 MPa produces an invisible jet capable of injecting fluid under the skin, so leaks are found with cardboard, never with a hand. Personal protective equipment is specified item by item: heat-resistant gloves rated for the melt temperature, a full face shield during purging, safety footwear, hearing protection where the granulator runs nearby, and no loose clothing or jewelry near the indexing table.
Module 1.2 — Machine anatomy and process principle (8 hours)
The trainee must be able to name, locate and explain the purpose of every major assembly before touching a control. The assemblies taught are the injection unit with barrel, screw and nozzle; the core rods and core rod carrier; the clamping unit with its single-crossbeam, double-pole framework; the indexing table that rotates the core rods between stations; the injection mold at station one; the blow mold at station two; the stripper at station three; the hydraulic power unit; the oil temperature controller feeding the core rods; and the chilled water circuit feeding the blow mold.
The comparison with extrusion blow molding is taught explicitly, because most trainees will have heard of the other process and will carry assumptions from it.
| Aspect | Injection blow molding | Extrusion blow molding | Training implication |
|---|---|---|---|
| Preform formation | Injection molded around a core rod in a steel cavity | Extruded as a hanging parison | Injection parameters matter; parison programming does not exist |
| Flash | None | Pinch-off flash at base and neck | No trimming station, no regrind loop from flash, scrap is absolute |
| Neck finish accuracy | Typically plus or minus 0.05 mm, injection molded | Formed by pinch or post-trimmed, wider tolerance | Dimensional inspection of the finish becomes a core operator skill |
| Wall thickness control | Set by preform geometry and stretch ratio | Set by die gap programming during extrusion | Wall problems are traced back to preform and temperature, not to a die gap profile |
| Typical container range | 3 ml to 1000 ml | Small containers to very large volumes | Curriculum focuses on small and medium containers, high cavitation |
| Handle capability | Not produced with an integral handle | Integral handles achievable | Product scope discussion avoids unrealistic expectations |
| Typical cavity count | Multi-cavity, often 4 to 16 depending on container size | Lower cavity counts typical | Cavity-to-cavity balance is a recurring training theme |
Module 1.3 — Start-up, shutdown and material handling (10 hours)
The heating and start-up sequence is drilled until it is automatic, because most start-up damage happens in the first ten minutes of a shift. The taught sequence is: verify utilities first, meaning cooling water flow and temperature, compressed air pressure between 0.6 and 1.0 MPa, and hydraulic oil level; energize heating by zone from the nozzle backward through the barrel zones with the correct set points for the material in use; hold a soak period of 20 to 30 minutes after all zones reach set point, because reaching temperature is not the same as being at temperature through the full metal section; bring the oil temperature controller for the core rods up to its set point in the 80 to 130 degrees Celsius band; then rotate the screw at low speed to confirm free movement before any injection; then index the table slowly through one full cycle in manual to confirm mechanical clearance; then run the first automatic cycles at reduced speed.
Trainees learn the physical reason behind the soak period. Attempting to turn a screw in a barrel where the outer metal has reached set point but the polymer core has not is the classic cause of a snapped screw or a sheared drive coupling, and it is entirely avoidable. Likewise, indexing at full speed on a cold machine drives the table against unexpanded clearances.
Shutdown is taught in two versions. The normal shutdown sequence purges the barrel of processing material, drops heating zones in a controlled order, parks the core rods clear of the molds, relieves hydraulic pressure and isolates utilities according to the shift plan. The emergency shutdown sequence is a single decision followed by a single action: strike the nearest emergency stop, then notify. Trainees are explicitly taught not to attempt to save the shot, the mold or the batch when a person is at risk.
Material change and purge is the other half of this module. Trainees learn to identify the resin in the hopper against the work order, to verify drying status where the material requires it, to purge with an appropriate sequence when changing between materials with different processing temperatures, and to confirm complete color and material transition visually before running to the production bin. First-article confirmation closes the module: the first acceptable container from a start-up or changeover is inspected against the control sample and the specification, signed off, and retained.
Module 1.4 — Daily inspection and check sheet discipline (8 hours)
The daily check sheet is where a training program either becomes real or becomes paperwork. Trainees are taught the reason behind each check, then required to complete the sheet correctly for four consecutive shifts.
| Check item | Method | Acceptance limit | Action if out of limit |
|---|---|---|---|
| Hydraulic oil level | Sight glass, machine at rest | Between minimum and maximum marks | Report before start-up, do not top up without approval of the fluid grade |
| Hydraulic oil temperature | Machine display during production | Below 55 degrees Celsius | Check cooler water flow, report if trend continues to rise |
| Cooling water flow to blow mold | Flow meter on manifold | Per mold data sheet, all circuits flowing | Stop and report a dead circuit, do not run a mold with a blocked line |
| Chilled water temperature | Manifold gauge | Typically 8 to 20 degrees Celsius depending on material and product | Report, expect wall thickness and cycle deviation |
| Compressed air pressure | Machine inlet gauge | 0.6 to 1.0 MPa | Report; low pressure causes incomplete blow and stripper faults |
| Heating zone deviation | Controller display, all zones | Within plus or minus 2 degrees Celsius of set point | Report; a drifting zone usually means a failing thermocouple or heater |
| Core rod oil temperature | Oil temperature controller display | Within plus or minus 3 degrees Celsius of recipe value | Report before adjusting anything on the machine |
| Safety gate and light curtain | Functional test at shift start | Machine stops on interruption every time | Stop production immediately, tag the machine |
| Emergency stop circuit | Functional test, one device per shift on rotation | Immediate stop, correct reset behavior | Stop production immediately |
| Visible leaks, oil or water | Visual walk-around | None | Report and mark; never search a pressure leak by hand |
| Granulator and material area | Visual | Clean, correct material, no cross-contamination | Segregate and report |
| Product against control sample | Visual plus caliper on the finish | Matches control sample and specification | Quarantine output since last good check, notify Level 2 or above |
Module 1.5 — Assessment (6 hours)
Assessment is practical first and written second. The trainee performs an unassisted start-up from cold, runs a scheduled product for a supervised period, performs a normal shutdown, and completes the check sheet. The assessor scores against a fixed rubric rather than an impression. Pass requires: correct start-up sequence with no step omitted; correct response to one injected abnormality, typically a deliberately lowered air pressure or a hidden interlock condition; one full eight-hour shift completed with no major error, where a major error is defined in advance as any safety violation, any unapproved parameter change, or any unreported out-of-limit condition; a daily check sheet completed with 100 percent accuracy; and a written safety examination scored at 90 percent or better.
| Module | Hours | Content focus | Hands-on task | Pass criterion |
|---|---|---|---|---|
| 1.1 Safety and energy isolation | 8 | Lockout tagout, guards, light curtain, emergency stop, hot and hydraulic hazards, personal protective equipment | Complete a full lockout tagout on a de-energized machine including accumulator bleed | All isolation points identified and verified; written test at least 90 percent |
| 1.2 Machine anatomy and principle | 8 | Three-station sequence, main assemblies, comparison with extrusion blow molding | Draw the three-station cycle from memory and identify ten components on the machine | Correct sequence and at least 9 of 10 components named |
| 1.3 Start-up, shutdown, material change | 10 | Heating sequence, soak period, low-speed rotation, normal and emergency shutdown, purge, first article | Cold start-up, product run, controlled shutdown, one material changeover with purge | Sequence performed with no omitted step and no damage event |
| 1.4 Daily inspection | 8 | Twelve check items, limits, escalation rules | Complete the daily check sheet for four consecutive shifts | 100 percent completion accuracy, all deviations escalated |
| 1.5 Assessment | 6 | Practical and written examination | Unassisted start-up, supervised shift, abnormality response | Full rubric met; certification valid 12 to 24 months |
4. Level 2 Proficient Operator: 8 days, 64 hours
Level 2 converts an operator into a production asset who can change the plant over to a different product without calling for help. Two capabilities define it: understanding what each process parameter actually does to the polymer, and executing a mold changeover to a repeatable time target. Everything else in the level supports these two.
Module 2.1 — Materials and their processing windows (10 hours)
Operators do not need polymer chemistry, but they do need to know why a material behaves as it does, because every defect conversation eventually returns to the material. The module covers the four families most common on injection blow molding lines and the practical consequences of each.
| Material | Typical melt flow rate | Melt temperature range | Core rod temperature guidance | Drying requirement | Operator-visible behavior |
|---|---|---|---|---|---|
| PP homopolymer and random copolymer | 8 to 35 g/10 min | 190 to 230 degrees Celsius | 90 to 120 degrees Celsius | Usually none; dry only if surface moisture present | Good clarity with random copolymer; sensitive to cooling rate; prone to sink marks in thick sections |
| HDPE | 4 to 20 g/10 min | 180 to 220 degrees Celsius | 80 to 110 degrees Celsius | None under normal storage | Higher shrinkage; opaque; forgiving process window; stress whitening if over-stretched |
| PS, general purpose and high impact | Grade dependent | 190 to 230 degrees Celsius | 85 to 110 degrees Celsius | Light drying advisable in humid climates | Brittle at the finish if over-packed; excellent surface reproduction; sensitive to residence time |
| PETG and PCTG | Grade dependent | 220 to 250 degrees Celsius | 100 to 130 degrees Celsius | Mandatory, 4 hours typical, low dew point | Hydrolysis if wet, showing as haze, splay and loss of strength; excellent clarity when dry |
The regrind module is deliberately conservative. Operators learn that regrind from injection blow molding comes only from rejected containers and purge, not from flash, so its availability is limited and its history is variable. The taught policy is a maximum blend ratio defined per product by the quality function, commonly capped in the range of 10 to 20 percent for non-critical containers and at zero for pharmaceutical primary packaging, with mandatory metal separation, consistent particle size, and documented traceability of the batch. The physical reason is explained: each heat history cycle reduces molecular weight and shifts the melt flow rate, so an uncontrolled regrind ratio makes the process window move underneath the operator.
Module 2.2 — Process parameters and their adjustment boundaries (14 hours)
This module is the intellectual center of Level 2. Each parameter is taught with four attributes: what it physically does, which defects it causes when too high, which defects it causes when too low, and the boundary within which a Level 2 operator may adjust it without escalation.
| Parameter | Physical function | Symptom when too high | Symptom when too low | Level 2 adjustment boundary |
|---|---|---|---|---|
| Injection pressure, stage 1 | Fills the preform cavity against flow resistance | Flash at the parting line, stressed finish, core rod deflection | Short shot, incomplete thread fill | Plus or minus 5 percent of recipe value |
| Injection speed profile | Controls shear and fill pattern along the preform | Burn marks, black streaks from shear heating, jetting | Cold flow lines, hesitation marks, weak weld areas | Plus or minus 10 percent on individual stages, profile shape unchanged |
| Holding pressure | Compensates shrinkage while the gate is open | Over-packed finish, difficult stripping, high internal stress | Sink marks, weight below tolerance, voids | Plus or minus 5 percent |
| Holding time | Duration of compensation until gate freeze | Wasted cycle time, no quality benefit after gate freeze | Weight variation, sink marks | Plus or minus 0.3 seconds |
| Barrel temperature profile | Melts and homogenizes the polymer | Degradation, black specks, odor, long cooling | Unmelted granules, high pressure, streaking | Plus or minus 5 degrees Celsius per zone, escalate beyond |
| Core rod temperature | Sets preform surface temperature entering the blow station | Sagging preform, uneven wall, sticking on the rod | Poor stretch, thick base, blow-out, stress whitening | Plus or minus 5 degrees Celsius |
| Blow mold temperature | Sets cooling rate and surface finish | Long cycle, hazy surface on some materials | Frozen skin, poor definition, high stress | Plus or minus 2 degrees Celsius within the 8 to 20 degrees Celsius band |
| Blow pressure | Inflates the preform against the cavity | Blow-out at thin points, mold seam stress, air consumption | Incomplete definition, soft shoulders, poor base detail | Plus or minus 0.05 MPa |
| Blow delay | Time between mold close and air admission | Preform cools too far, poor stretch | Air admitted before seal, distortion or flash of air | Plus or minus 0.1 seconds |
| Cooling time at blow station | Sets container rigidity at ejection | Unnecessary cycle time | Deformation at stripping, oval necks, shrink distortion | Plus or minus 0.5 seconds |
| Screw speed and back pressure | Plasticizing rate and melt homogeneity | Shear degradation, long recovery variability | Unmelted material, color streaking | Escalate to Level 3 |
| Indexing speed | Table rotation between stations | Preform whip, positional overshoot, mechanical wear | Preform cooling loss between stations, longer cycle | Escalate to Level 3 |
Cycle decomposition is taught alongside the parameter table, because operators who cannot break a cycle into its elements cannot reason about where time is going.
| Cycle element | Typical share of total cycle | Primary driver | Compression potential |
|---|---|---|---|
| Injection fill | 8 to 15 percent | Preform volume, gate size, injection speed | Low, limited by shear and quality |
| Holding and gate freeze | 10 to 18 percent | Gate geometry, melt and mold temperature | Medium, verify by gate freeze study |
| Preform cooling on core rod | 20 to 30 percent | Wall thickness, core rod oil temperature | Medium, balanced against stretch requirement |
| Indexing between stations | 8 to 12 percent | Table drive, positioning accuracy | Low to medium, mechanical limit |
| Blow and container cooling | 25 to 40 percent | Chilled water temperature, mold cooling design | High, the largest single lever |
| Stripping and discharge | 5 to 10 percent | Stripper design, container rigidity | Low |
Module 2.3 — Mold changeover standard operating procedure (16 hours)
The target taught at Level 2 is a complete changeover in 45 to 90 minutes depending on cavity count and container size, achieved through separation of internal and external work rather than through hurrying. The module is built on single-minute exchange of die principles adapted to a three-station machine, where the changeover involves an injection mold, a blow mold, a set of core rods and the associated water, oil and air connections.
External work, meaning everything that can be done while the machine is still producing the previous product, includes: staging the incoming mold set on a preheated cart with the correct oil temperature already applied to the core rod carrier; verifying all fasteners, eye bolts and lifting equipment; preparing quick-connect hoses matched and labeled; retrieving the target recipe and confirming it against the master; preparing the incoming material and confirming drying status; staging inspection gauges and the control sample; and briefing the changeover team on roles.
Internal work, performed with the machine stopped, follows a fixed sequence: safe shutdown and isolation; disconnect water, oil and air with quick couplers; unbolt and lift out the blow mold; unbolt and lift out the injection mold; exchange the core rod set with alignment verification; install the incoming injection mold with centering to the machine axis; install the incoming blow mold; reconnect services and pressure-test for leaks; restore heating and oil temperature; verify core rod to cavity alignment manually before any automatic cycle; load the recipe; run first cycles at reduced speed; and perform first-article verification.
The alignment step deserves emphasis because it is where changeover damage concentrates. A core rod that is not concentric with the injection cavity produces an eccentric preform, which produces an eccentric container wall, and in the worst case bends the rod. Trainees are taught to verify alignment by slow manual indexing with visual clearance checks at every station before the machine is allowed to run automatically.
| Changeover type | Target internal time | External preparation time | Team size | Critical success factor |
|---|---|---|---|---|
| Same mold, color change only | 15 to 30 minutes | 10 minutes | 1 operator | Purge discipline and confirmation of full color transition |
| Same family, different cavity insert | 30 to 45 minutes | 20 minutes | 1 operator plus 1 helper | Insert handling and alignment verification |
| Full mold set, similar container size | 45 to 60 minutes | 45 minutes | 2 people | Preheated staging cart and labeled quick connections |
| Full mold set, different container size and core rods | 60 to 90 minutes | 60 to 90 minutes | 2 to 3 people | Core rod alignment and full recipe verification |
| Material family change plus mold change | 75 to 120 minutes | 90 minutes | 2 to 3 people | Purge sequence between incompatible processing temperatures |
Module 2.4 — Quality judgment and dimensional control (16 hours)
Operators are the plant’s highest-frequency inspectors, and defect recognition accuracy of at least 90 percent is the assessment threshold. Training uses a physical defect library: a boxed set of real containers showing each defect at threshold severity, borderline severity and clear reject severity, so the trainee calibrates against objects rather than photographs.
Appearance defects covered are sink marks, flash at the parting line or finish, stringing and gate strings, black specks and streaks, haze and loss of clarity, stress whitening, weld and flow lines, surface drag from a damaged cavity, and contamination inclusions. Dimensional checks covered are neck inner diameter, thread profile and thread engagement, neck perpendicularity to the body axis, overall height, body diameter, base clearance, and container weight controlled within plus or minus 1.5 percent of the standard. Functional checks covered are leak and seal testing against the intended closure, top-load resistance where relevant, and drop testing for logistics-critical containers.
| Module | Hours | Content focus | Hands-on task | Pass criterion |
|---|---|---|---|---|
| 2.1 Materials and processing windows | 10 | PP, HDPE, PS, PETG and PCTG behavior, drying, regrind policy | Set up and verify a drying cycle; identify four unmarked materials by behavior and appearance | Correct identification and correct drying decision for each material |
| 2.2 Parameters and adjustment boundaries | 14 | Twelve parameters, effects, boundaries, cycle decomposition | Correct three deliberately mis-set parameters within boundary rules | Correct diagnosis and correction without exceeding authority |
| 2.3 Mold changeover | 16 | Internal and external work separation, lifting, centering, quick connections, first article | Complete one full changeover as lead, one as assistant | Independent changeover inside the target window with no damage and a passing first article |
| 2.4 Quality judgment | 16 | Appearance, dimensional and functional inspection; weight control at plus or minus 1.5 percent | Blind sort of a 50-piece mixed sample set | Defect identification accuracy at least 90 percent |
| 2.5 Assessment and shift trial | 8 | Supervised independent shift | Run a full shift with one planned changeover | Shift yield at least 96 percent; all documentation complete |
5. Level 3 Advanced Process Technician: 10 days, 80 hours
Level 3 is where the plant stops reacting and starts engineering. A Level 2 operator corrects a known deviation against a known recipe. A Level 3 technician establishes what the recipe should be in the first place, proves it with data, defends the process window against drift, and compresses the cycle without borrowing quality to pay for speed. The course is 80 hours and it is the most intellectually demanding level in the program.
Module 3.1 — Systematic process optimization and designed experiments (18 hours)
The module opens by dismantling the most common bad habit in blow molding plants: changing one parameter, watching one shot, and drawing a conclusion. Trainees learn that injection blow molding parameters interact strongly, that a single-factor change often masks a second-order effect, and that the fastest route to a robust window is a structured experiment rather than a fast guess.
The taught method is a fractional factorial or orthogonal array design sized for shop-floor reality. A typical exercise uses four factors at two or three levels each: melt temperature, core rod temperature, holding pressure and blow delay. Trainees define the response variables in advance, usually container weight, wall thickness at three measured positions, neck inner diameter and a visual defect score. They run the array, record the data, compute main effects, identify interactions, select the operating point, then run a confirmation run at that point and verify that the predicted response is achieved.
Two disciplines are enforced throughout. First, only one variable set changes per run, and the machine reaches steady state before samples are taken, which in practice means discarding the first five to ten cycles after any change. Second, every run is documented in a standard form so that the experiment is reproducible by a colleague six months later. The deliverable from this module is a completed experiment file, not a set of remembered settings.
Cycle compression is taught as a systematic path rather than as a set of tricks. Because blow station cooling typically accounts for 25 to 40 percent of total cycle and preform cooling on the core rod another 20 to 30 percent, cooling optimization holds roughly 40 to 60 percent of the available compression. The taught sequence is: verify gate freeze experimentally and remove any holding time beyond it; measure actual cooling water flow and temperature at the mold rather than at the chiller; check cooling circuit balance and clean any restricted channel; evaluate a modest reduction of chilled water temperature within the 8 to 20 degrees Celsius band while watching for condensation and stress; reduce cooling time in 0.2 second steps with dimensional verification after each step; and only then examine mechanical elements such as indexing speed and stripper timing.
| Step | Action | Typical cycle gain | Risk if pushed too far | Verification required |
|---|---|---|---|---|
| 1 | Gate freeze study, trim excess holding time | 3 to 8 percent | Weight drop, sink marks | Weight trend over 30 consecutive cycles |
| 2 | Restore cooling circuit flow and clean scaled channels | 2 to 10 percent | None, this is recovery of lost capability | Flow measurement per circuit, thermal imaging of the mold |
| 3 | Rebalance circuit flow between cavities | 2 to 6 percent | Cavity-to-cavity weight spread if mis-set | Cavity weight study, at least 20 shots per cavity |
| 4 | Optimize chilled water temperature within band | 3 to 8 percent | Condensation, frozen skin, internal stress | Dew point check, stress and drop testing |
| 5 | Reduce blow station cooling time in 0.2 s steps | 4 to 12 percent | Oval necks, deformation at stripping | Neck inner diameter on 30 pieces per step |
| 6 | Optimize core rod temperature for faster preform conditioning | 2 to 6 percent | Poor stretch, wall thickness imbalance | Wall thickness map at three heights |
| 7 | Trim indexing and stripper timing | 1 to 4 percent | Positional overshoot, mechanical wear | Indexing repeatability measurement |
Module 3.2 — Root cause analysis for molding defects (16 hours)
Level 2 recognizes defects. Level 3 explains them. The module teaches a causal structure in which every defect is traced through four possible domains: material, process parameters, mold condition, and machine condition. The technician learns to ask which domain a symptom belongs to before touching a control, because the single most expensive error in a molding plant is fixing a mold problem with a parameter change and then living with the compromised parameter for two years.
Black streaks illustrate the method. A black streak is carbonized polymer, and carbonization requires excessive temperature, excessive residence time, or both. The technician works the causal chain: is the barrel profile too hot, has the material been sitting in the barrel through a stoppage, is there a dead spot in the nozzle or manifold where material stagnates, is there a worn check ring allowing back-flow and recirculation, is there contamination from a previous material with a higher processing temperature, or is a heater band running away because a thermocouple has failed open. Each hypothesis has a specific test, and the training gives the test rather than the guess.
Module 3.3 — Mold condition and maintenance (14 hours)
The mold set on an injection blow molding machine consists of the injection cavity, the core rods, and the blow cavity, and each wears differently. Core rods carry the highest technical risk because they are slender, they are heated, they are handled at every changeover, and they define both the container interior and the neck finish.
Core rod topics covered are surface wear and the role of hard plating or surface treatment in extending life, straightness verification and the consequences of a bent rod on wall distribution, the internal temperature control channel and how scale reduces its effectiveness, alignment to the injection cavity, and the inspection interval that catches wear before it reaches the product. Trainees learn to measure rather than to judge visually, using a dial indicator on a rotation fixture for straightness and a micrometer at defined stations along the rod for diameter loss.
Vent maintenance is taught with specific numbers because vents are the most common silent failure in an injection cavity. Vent depths in the range of 0.01 to 0.02 mm allow air to escape while blocking polymer, and once they fill with degraded polymer and mold release residue, the symptoms are burn marks at the last-fill area, short shots that resist parameter correction, and rising injection pressure. Cleaning is a defined procedure using non-abrasive methods that do not deepen the vent, followed by verification with a feeler gauge or shim stock.
Cooling channel maintenance is taught as a measurable discipline. Scale of even a fraction of a millimeter on a channel wall has a disproportionate insulating effect, and the practical symptom is a cycle that has quietly lengthened by 10 percent over eighteen months without anyone noticing. Trainees learn to log flow rate and inlet-to-outlet temperature differential per circuit at a fixed interval, to compare against the commissioning baseline, and to schedule descaling when the differential drifts.
| Mold class | Design life, shots | Typical steel and treatment | Inspection interval | Scheduled overhaul point | Cost level to maintain |
|---|---|---|---|---|---|
| Entry class, short run or trial | Up to about 3 million | Pre-hardened tool steel, standard finish | Every 100,000 shots | 1.5 million shots | Low |
| Standard production class | 3 to 5 million | Hardened tool steel, polished cavity, treated core rods | Every 150,000 shots | 2.5 million shots | Medium |
| High-output class | 5 to 8 million | High-grade hardened steel, plated core rods, optimized cooling | Every 200,000 shots | 4 million shots | High |
| Premium pharmaceutical or high-cavitation class | 8 to 10 million and above | Corrosion-resistant hardened steel, surface-treated rods, individually verified cavities | Every 250,000 shots with documented records | 5 million shots | Very High |
Module 3.4 — Statistical process control (16 hours)
The Level 3 technician must be able to prove that a process is capable, not merely assert that the parts look fine. The module covers variable control charts, capability indices, sampling plans and alarm response, taught with data taken from the plant’s own machines rather than from textbook data sets.
Control charting focuses on the average and range chart applied to the measurements that matter most in injection blow molding: container weight, neck inner diameter and wall thickness at a defined position. Trainees learn subgroup selection, why a subgroup should be drawn from consecutive cycles rather than spread across a shift, how to compute control limits from the process rather than from specification limits, and the four classic out-of-control signals: a point beyond a control limit, a run of seven points on one side of the center line, a trend of seven increasing or decreasing points, and cyclic patterns that suggest a periodic disturbance such as a chiller cycling.
Capability analysis targets a process capability index of at least 1.33 for controlled dimensions, with the pharmaceutical and medical packaging environment often demanding 1.67 for critical characteristics. Trainees learn the distinction between capability and performance indices, why a capable process with a shifted mean still produces rejects, and how cavity-to-cavity variation inflates apparent variation when cavities are pooled into a single study. The taught practice is to chart cavities separately when the cavity count allows, because a single bad cavity in a twelve-cavity tool is invisible in pooled data and obvious in separated data.
Sampling is taught with acceptance quality limit tables applied realistically. Trainees learn how sample size scales with lot size, how a tightened inspection level is triggered, and above all that sampling detects a problem, it does not prevent one. The alarm response protocol is drilled: on an out-of-control signal, quarantine the output back to the last verified good check, identify the assignable cause, correct it, verify with a fresh subgroup, document, and only then release.
Module 3.5 — Energy, utilization and overall equipment effectiveness (10 hours)
Level 3 owns the two performance numbers a plant manager cares about: overall equipment effectiveness and energy per unit produced. The module decomposes effectiveness into availability, performance and quality, then teaches the technician to attribute each loss to a specific cause with a specific owner.
| Loss category | Component | Typical loss share | Countermeasure | Responsible level |
|---|---|---|---|---|
| Availability | Unplanned breakdown | 3 to 10 percent | Five-tier preventive maintenance, spare parts readiness | Level 4 |
| Availability | Mold changeover | 2 to 8 percent | Internal and external work separation, target 45 to 90 minutes | Level 2 |
| Availability | Material change and purge | 1 to 3 percent | Production sequencing by material and color | Planning with Level 3 |
| Performance | Cycle longer than optimum | 3 to 12 percent | Cycle compression pathway | Level 3 |
| Performance | Minor stops and stripper jams | 1 to 5 percent | Stripper timing, container rigidity at ejection, sensor cleaning | Level 2 and 4 |
| Quality | Start-up scrap | 1 to 4 percent | Structured warm-up, stored recipes, first article discipline | Level 1 and 2 |
| Quality | In-run scrap | 1 to 6 percent | Statistical process control, defect matrix, mold condition | Level 3 |
Energy work is expressed in kWh per 1000 pieces so that comparisons survive changes in production volume. Trainees learn to measure rather than to model: install or read a machine-level meter, log consumption against production counts for a full week, and separate the load into heating, hydraulic drive, cooling and compressed air. The most common findings are worth teaching in advance, because they repeat across plants. Standby consumption during breaks and changeovers is usually far higher than expected because heaters and pumps continue to run. Compressed air leakage is often the single largest recoverable loss on a blow molding floor, and it is audible during a quiet shutdown. And a hydraulic system whose oil temperature runs above 55 degrees Celsius is consuming energy to create heat that the cooler then consumes energy to remove.
The energy saving available from modern drive technology is significant and worth quantifying honestly. Aibim machines apply a variable displacement pump pressurizing system together with the factory’s PREFILL technology in the hydraulic circuit, which delivers a minimum 35 percent reduction in energy consumption compared with a conventional fixed-displacement hydraulic arrangement. The Level 3 module teaches the technician to verify that saving on their own machine with their own meter, because a verified number is worth more in an internal review than a specification sheet claim.
| Module | Hours | Content focus | Hands-on deliverable | Pass criterion |
|---|---|---|---|---|
| 3.1 Process optimization and designed experiments | 18 | Orthogonal array design, main effects, interactions, confirmation runs, cycle compression pathway | Completed experiment file with confirmation run | Predicted response achieved within stated tolerance |
| 3.2 Root cause analysis | 16 | Four-domain causal structure, defect matrix, hypothesis testing | Two documented root cause investigations | Correct domain identified and verified fix |
| 3.3 Mold condition and maintenance | 14 | Core rod wear, vent depth 0.01 to 0.02 mm, cooling channel scaling, mold life tiers | Full mold inspection report with measurements | All measurements taken correctly, wear trend interpreted |
| 3.4 Statistical process control | 16 | Average and range charts, capability index at least 1.33, sampling plans, alarm response | Control chart set for one product with capability study | Capability index at least 1.33 demonstrated or corrective plan written |
| 3.5 Energy and effectiveness | 10 | Effectiveness decomposition, kWh per 1000 pieces, standby and air leakage | One week of measured energy and effectiveness data with analysis | Losses correctly attributed with owners assigned |
| 3.6 Optimization project and assessment | 6 | Project presentation and defense | Lead one improvement project | At least 8 percent quantified improvement in yield, cycle or energy |
6. The defect, root cause and countermeasure matrix
This matrix is the single most-used artifact of the entire curriculum. It is taught at Level 2 for recognition, mastered at Level 3 for causation, and posted at the machine as a working reference. It is organized so that a technician reads left to right: observed symptom, the domain most likely responsible, the specific causes ranked by frequency, the diagnostic check that discriminates between them, and the countermeasure with the level authorized to apply it.
| Defect | Most likely domain | Ranked causes | Diagnostic check | Countermeasure | Authorized level |
|---|---|---|---|---|---|
| Short shot in the preform | Process, then mold | Insufficient injection pressure or speed; melt temperature too low; blocked vent; undersized gate; check ring leakage | Compare actual injection pressure against recipe; inspect vent depth; check cushion consistency over 20 shots | Restore pressure and profile within boundary; clean vents to 0.01 to 0.02 mm; replace check ring if cushion is unstable | Level 2 for parameters, Level 3 for mold, Level 4 for check ring |
| Sink mark on the container body | Process | Insufficient holding pressure or time; melt too hot; preform wall too thick locally; premature gate freeze | Weight trend versus recipe; gate freeze study; wall thickness map | Increase holding pressure or time to gate freeze; reduce melt temperature; review preform geometry | Level 2 within boundary, Level 3 beyond |
| Flash at the injection parting line | Machine, then mold | Clamping force insufficient; parting line damage or debris; excessive injection pressure; platen parallelism drift | Verify clamp pressure; inspect and clean parting line; measure platen parallelism | Restore clamp setting; repair parting line; correct parallelism | Level 3 and Level 4 |
| Flash or burr at the neck finish | Mold | Core rod not seated or misaligned; worn neck insert; contamination on the sealing face | Manual index with visual clearance check; measure rod concentricity; inspect insert edge | Realign or replace core rod; refurbish neck insert; clean sealing faces at every changeover | Level 3 |
| Stringing and gate strings | Process | Nozzle temperature too high; insufficient decompression; melt too fluid for the gate size | Check nozzle zone temperature and decompression setting | Reduce nozzle temperature in small steps; add decompression; review gate dimension | Level 2 and Level 3 |
| Black specks | Material, then machine | Contaminated regrind; degraded material in a dead spot; worn barrel or screw; carbon from a previous material | Purge and observe speck trend; inspect nozzle and manifold; check regrind source | Isolate regrind batch; full purge with cleaning compound; eliminate dead spots; schedule screw inspection | Level 3 and Level 4 |
| Black streaks, continuous | Machine | Thermal degradation from overheated zone; long residence after a stoppage; worn check ring recirculating melt; runaway heater from failed thermocouple | Verify each zone actual against set point; measure heater band current; cushion stability test | Correct temperature control; replace failed thermocouple or solid-state relay; replace check ring | Level 4 |
| Haze on a clear container | Material, then process | Moisture in hygroscopic material; blow mold too cold or too hot for the grade; contamination; mold surface condition | Moisture measurement on the dried material; mold surface temperature map; inspect cavity polish | Correct drying; adjust blow mold temperature inside the 8 to 20 degrees Celsius band; repolish cavity | Level 2 for drying, Level 3 for mold |
| Uneven wall thickness | Process, then mold | Core rod temperature imbalance; eccentric preform from rod misalignment; uneven blow mold cooling; asymmetric blow air entry | Wall thickness map at three heights and four radial positions; rod concentricity; circuit-by-circuit mold temperature | Rebalance core rod oil temperature; realign rod; clean or rebalance cooling circuits | Level 3 |
| Deformation at stripping | Process | Cooling time too short; blow mold temperature too high; stripper timing too early; container geometry marginal | Neck inner diameter measurement on 30 consecutive pieces; container surface temperature at ejection | Extend cooling in 0.2 second steps; lower blow mold temperature; retime stripper | Level 2 within boundary, Level 3 beyond |
| Neck inner diameter out of tolerance | Mold, then process | Core rod wear; over-packing at holding; insufficient cooling before stripping; thermal expansion mismatch | Micrometer on the rod at defined stations; capability study on neck inner diameter | Replace or refurbish rod; reduce holding pressure; extend cooling | Level 3 |
| Container weight drifting | Machine, then material | Check ring wear causing inconsistent cushion; feed variation; melt temperature drift; regrind ratio variation | Cushion stability over 50 shots; melt temperature log; feed throat inspection | Replace check ring; stabilize feeding; lock regrind ratio; verify temperature control | Level 4 |
| Stress whitening at the shoulder or base | Process | Preform too cold at the blow station; excessive stretch ratio; blow pressure applied too early | Preform surface temperature measurement; blow delay timing review | Raise core rod temperature; adjust blow delay; review preform design if persistent | Level 3 |
| Burn mark at the last-fill area | Mold | Blocked vent trapping compressed air; injection speed too high at end of fill | Vent inspection with feeler gauge; observe burn location relative to fill pattern | Clean or recut vents to 0.01 to 0.02 mm; profile injection speed down at end of fill | Level 3 |
| Cavity-to-cavity weight spread | Mold | Unbalanced manifold or runner; differential cooling; one worn cavity or rod; partially blocked circuit | Twenty-shot weight study per cavity; circuit flow measurement | Rebalance cooling; refurbish the outlier cavity; verify manifold heater zones | Level 3 and Level 4 |
7. Level 4 Expert Troubleshooting and Maintenance: 12 days, 96 hours
Level 4 is the level that decides whether a breakdown costs 40 minutes or four hours. It is taught to maintenance technicians and to the most capable process technicians, and it covers the three physical subsystems of the machine, hydraulic, electrical and mechanical, plus the diagnostic methodology that ties them together and the preventive maintenance system that reduces how often they are needed.
Module 4.1 — Hydraulic system diagnosis (22 hours)
The hydraulic circuit of an injection blow molding machine typically operates in the 14 to 21 MPa range and drives clamping, injection, indexing and stripping. Level 4 begins with circuit reading: the trainee must be able to follow the machine’s hydraulic schematic from pump through relief, directional and proportional valves to each actuator, and to identify test points where a gauge can be inserted.
The taught fault set covers the conditions that account for the majority of hydraulic downtime.
Insufficient pressure. The diagnostic sequence is to confirm the pressure at the pump outlet first, because that single measurement splits the fault space in half. If pump outlet pressure is correct, the loss is downstream in a valve, actuator seal or line. If it is not, the cause lies in the pump, its drive, its suction, or the main relief setting. Trainees learn to check suction strainer condition and oil level before condemning a pump, since a starved pump produces exactly the symptom of a worn pump and costs far less to fix.
Creeping and jerky motion. Slow, stick-slip movement of the clamp or injection carriage almost always indicates air in the circuit, contaminated oil affecting valve spool movement, or worn seals allowing internal bypass. The discriminating test is to observe whether the creeping is direction-dependent and load-dependent, and to bleed the circuit systematically before disassembling anything.
High oil temperature. Oil above 55 degrees Celsius accelerates oxidation, thins the fluid, increases internal leakage and shortens seal life, and it is a symptom rather than a fault in itself. The diagnostic tree covers cooler water flow and fouling, thermostatic valve function, relief valve set too low so that flow dumps continuously across it, internal leakage in an actuator or valve, and undersized reservoir cooling capacity for the ambient conditions.
Proportional valve zero drift. A proportional valve whose null point has drifted produces slow creep with no command, position overshoot, or asymmetric speed between extend and retract. The training covers reading the command signal against the actual spool feedback, performing the zero calibration procedure in the control system, and recognizing when drift indicates contamination rather than a calibration need.
Accumulator condition. Where an accumulator is fitted, the pre-charge nitrogen pressure must be verified at a defined interval with the hydraulic side depressurized. Low pre-charge shows as reduced peak injection or blow performance and increased pump cycling. Trainees are taught the safety sequence first, because an accumulator holds stored energy after the machine appears to be off.
Fluid cleanliness. A cleanliness target around NAS class 8 is taught as the working standard for machines with proportional control. The module covers sampling technique, why a sample taken from the bottom of a reservoir is not representative, filter differential monitoring, breather condition, and the discipline that most plants lack, which is filtering new oil before it goes in rather than assuming that new means clean.
Module 4.2 — Electrical and control system diagnosis (24 hours)
Control faults intimidate operators more than any other category, which is precisely why the module is structured around measurement rather than intuition. All work is taught within the plant’s electrical safety rules, with isolation and verification before any contact work.
Temperature control failure is the highest-frequency electrical fault on a molding machine, and it decomposes cleanly. An open thermocouple typically drives the display to a maximum or minimum reading and the controller into an alarm or a full-output state. A short-circuited solid-state relay produces continuous heating regardless of command, with the temperature climbing past set point without control. An open-circuit heater band produces a zone that never reaches set point, and it is confirmed by measuring the band resistance with the circuit isolated and comparing against the rated value calculated from the band voltage and power rating. Trainees perform all three diagnoses on a training rig, and learn that the correct first action for a runaway zone is to isolate the heating supply before investigating.
Servo and drive faults appear as following error alarms, position deviation, or a motion that no longer matches its commanded profile. The taught approach is to read the drive’s own diagnostic data first, comparing commanded position against actual position and looking at the error magnitude over the motion profile. A following error that grows with speed suggests a tuning or load problem. A following error that appears suddenly at a fixed position suggests a mechanical obstruction. A drive that trips on overcurrent during acceleration suggests either a mechanical bind or a load that has increased, for example from a dry linear guide.
Encoder and homing faults. Lost pulses produce cumulative position error that grows through a shift and disappears after a homing cycle, which is a highly diagnostic pattern. Causes covered are cable shield and grounding faults, connector contamination, electrical noise coupling from a drive cable routed alongside a signal cable, and mechanical coupling slip. Homing failure is taught separately: the trainee checks the home sensor output physically, the sensor mounting, the approach direction and speed parameters, and whether a mechanical stop has shifted.
Communication faults. Fieldbus dropouts between the mainstream industrial PLC platform, the standard HMI panel, the temperature control modules and the drives are traced by physical layer first. Termination resistance of 120 ohms at each end of the bus segment is verified with the bus powered down, shield continuity and single-point grounding are checked, cable routing is inspected for parallel runs alongside power cables, and node addressing is confirmed for duplicates. Only after the physical layer is proven does the trainee move to configuration and firmware questions.
Safety circuit faults. The safety chain covering gate interlocks, the light curtain and the emergency stop devices is taught as a dual-channel architecture where a discrepancy between channels latches a fault. Trainees learn to identify which device in the chain opened, using the diagnostic display and the input status view, to understand why a safety relay requires a proper reset rather than a power cycle, and to recognize that a chain that resets only after several attempts is reporting a genuine intermittent fault that must be found, not tolerated.
Online input and output monitoring is the skill that unifies this module. The trainee learns to open the control system’s live status view, to correlate a physical action with the expected signal change, and to determine in one step whether a fault lies in the sensor, the wiring, the input module, the program logic, the output module, or the actuator. This single skill typically cuts diagnosis time by more than half.
Module 4.3 — Mechanical systems and precision (18 hours)
Mechanical faults develop slowly and then present suddenly, which makes measurement against a commissioning baseline the central discipline of this module.
Indexing table positional accuracy in the region of plus or minus 0.05 mm is what makes multi-cavity injection blow molding possible at all, because the core rods must enter injection and blow cavities with minimal clearance. Trainees learn to measure repeatability with a dial indicator against a fixed reference over at least twenty index cycles, to distinguish repeatability from absolute accuracy, and to trace degradation to drive backlash, worn locating pins, bearing wear or a loosened index cam.
Clamp parallelism is measured across the platen faces at four positions with the clamp under partial load. Loss of parallelism produces flash on one side of the tool and short shots on the other, a pattern that is often misdiagnosed as a manifold balance problem for months. Correction involves tie bar adjustment and, where present, toggle or linkage inspection.
Core rod alignment is checked at every mold change and measured formally at the scheduled interval. Trainees learn a fixture-based method for concentricity and straightness, the acceptance limit derived from the neck tolerance, and the relationship between a bent rod and the resulting wall thickness signature, which allows a trained technician to identify a bent rod from the container alone.
Guide and bearing wear on tie bars, linear guides and the index bearing is monitored by clearance measurement and by listening. The module includes basic vibration awareness: a bearing that has begun to fail changes its acoustic signature well before it fails completely, and a technician who walks the machine at a fixed point in every shift will hear it.
Check ring and screw tip assessment closes the module. A worn check ring allows melt to flow backward during injection, producing unstable cushion, drifting container weight and inconsistent fill. The taught test is the cushion stability study: run 50 consecutive shots, record the cushion value for each, and evaluate the spread. A stable process holds a tight cushion band; a spread that widens progressively through the study is a strong indicator of check ring wear. Trainees then perform a screw pull, inspect the tip assembly, measure wear and reassemble with correct torque.
8. Structured fault diagnosis methodology
The methodology matters more than any individual fault, because the fault list is never complete and the method always transfers. Level 4 teaches a six-step sequence that a technician follows regardless of whether the symptom is a pressure loss, a temperature alarm or an unexplained dimensional shift.
- Classify the symptom. Is it a hard stop with an alarm, a soft degradation without an alarm, an intermittent event, or a quality shift with no machine indication? Each class has a different starting point, and misclassification wastes the first hour.
- Read the alarm history, not just the active alarm. The active alarm is frequently a consequence. The alarm that fired three seconds earlier is frequently the cause. Trainees are taught to export or photograph the alarm log before resetting anything.
- Monitor inputs and outputs live. Correlate physical events with signal states to isolate whether the fault is in sensing, logic or actuation before opening any panel.
- Isolate by subsystem. Separate electrical from hydraulic from mechanical with a decisive test. Can the axis be moved manually with power off, which points away from mechanical binding? Does the pressure appear at the valve inlet, which points downstream? Does the signal exist at the input module, which points upstream to the sensor.
- Verify the signal chain end to end. Follow one path completely rather than sampling several paths partially. The most common diagnostic failure is stopping at the first plausible finding.
- Compare and roll back parameters. Before concluding that hardware has failed, compare the current parameter set against the archived baseline. Aibim machines support parameter storage and transfer via an SD card, which makes a parameter difference check and a rollback to a known-good configuration a two-minute operation rather than an afternoon of manual comparison. A surprising share of apparent hardware faults are undocumented parameter changes.
| Simulated fault | Subsystem | Presenting symptom | Expected diagnostic path | Target time |
|---|---|---|---|---|
| Thermocouple open circuit on a barrel zone | Electrical | Zone reads extreme value, controller alarm | Display check, isolate, measure thermocouple continuity, verify with a substitute, replace | 30 minutes |
| Solid-state relay short circuit | Electrical | Zone overheats with no command | Isolate heating supply, observe output command against actual, measure relay, replace | 45 minutes |
| Heater band open circuit | Electrical | Zone never reaches set point | Isolate, measure band resistance against rated value, inspect terminals, replace | 40 minutes |
| Partially closed cooling water valve | Utilities and mechanical | Cycle lengthens, container deformation at stripping | Circuit flow measurement, inlet and outlet differential, valve inspection | 35 minutes |
| Main relief valve set low | Hydraulic | Clamp slow, insufficient injection pressure | Gauge at pump outlet, compare against schematic setting, adjust and verify | 50 minutes |
| Air ingress in the clamp circuit | Hydraulic | Creeping, jerky clamp motion | Observe direction dependence, inspect suction side, bleed circuit systematically | 60 minutes |
| Proportional valve zero drift | Hydraulic and control | Slow drift with no command, asymmetric speeds | Compare command against feedback, run zero calibration, evaluate contamination | 60 minutes |
| Fieldbus termination missing | Control | Intermittent communication loss between panel and drive | Power down, measure termination at 120 ohms, inspect shield and routing, restore | 45 minutes |
| Home sensor misaligned | Control and mechanical | Homing fails or completes at the wrong position | Check sensor output physically, inspect mounting, verify approach parameters | 40 minutes |
| Worn check ring | Mechanical | Container weight drifts, cushion unstable | Fifty-shot cushion study, screw pull, tip inspection and measurement | 90 minutes |
| Index locating pin wear | Mechanical | Intermittent flash at the neck, positional variation | Twenty-cycle repeatability measurement, pin and bushing inspection | 75 minutes |
| Safety chain channel discrepancy | Safety | Machine will not reset after gate close | Identify the opened device from input status, inspect both channels, correct and verify | 40 minutes |
| Module | Hours | Content focus | Hands-on task | Pass criterion |
|---|---|---|---|---|
| 4.1 Hydraulic diagnosis | 22 | Circuit reading, pressure loss, creeping, oil above 55 degrees Celsius, proportional valve drift, accumulator pre-charge, NAS class 8 cleanliness | Diagnose and correct three hydraulic faults on a training rig or live machine | All three correctly diagnosed, safe procedure throughout |
| 4.2 Electrical and control diagnosis | 24 | Thermocouple, solid-state relay and heater band faults; servo following error; encoder loss; homing; fieldbus with 120 ohm termination; safety chain reset | Diagnose four control faults using live input and output monitoring | Correct isolation of sensing, logic or actuation in each case |
| 4.3 Mechanical systems | 18 | Index accuracy at plus or minus 0.05 mm, clamp parallelism, core rod alignment, guide wear, check ring assessment | Perform a full precision measurement set and one screw pull with tip inspection | Measurements within procedure, correct interpretation against baseline |
| 4.4 Diagnosis methodology | 12 | Six-step sequence, alarm history, subsystem isolation, parameter difference and rollback | Apply the method to two unseen faults, narrating each step | Method followed in order with no step skipped |
| 4.5 Preventive maintenance system design | 12 | Five-tier plan, wear part life ledger, mean time between failures and mean time to repair | Author a complete preventive maintenance plan for the plant | Plan accepted by the plant engineer, all five tiers populated |
| 4.6 Assessment | 8 | Simulated fault examination | Locate and repair three faults from different subsystems | Each fault resolved within 90 minutes with correct documentation |
9. Training differences across Aibim machine platforms
A curriculum is only executable on a specific machine, and the machine changes roughly fifteen percent of the content. The process modules are platform-independent because the physics of injection blow molding do not change, but the safety walk-around, the control interface, the maintenance schedule and the troubleshooting emphasis all shift with the platform. Aibim, a Wanplas factory, builds three-station one-step injection blow molding machines across three platforms, and the training deltas between them are set out below.
All three platforms share the same architectural decisions that shape the curriculum: a three-station one-step process with injection, blow and stripping; a single-crossbeam, double-pole clamping framework with enlarged mold setting space; CE certification with a long-distance digital laser sensor at the stripper station for mold protection and a light curtain for personal safety; PREFILL technology together with variable displacement pump pressurizing in the hydraulic system for a minimum 35 percent energy saving; and parameter storage on an SD card that allows a verified recipe to be carried between machines. That last feature has a direct training consequence, because it turns recipe management from a transcription exercise into a controlled document practice.
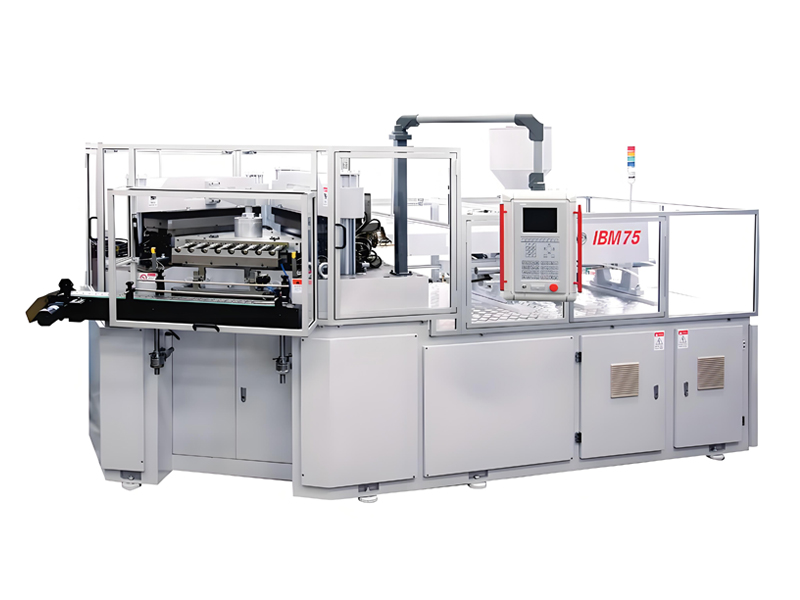
Aibim IBM75 — the primary training platform
The IBM75 is the platform most plants use as their main training machine because it covers the widest container range and the widest cavity count, which means a trainee certified on it can transfer to the smaller platforms with minimal additional instruction rather than the reverse.
| Parameter | IBM75 representative configuration | Why it matters in training |
|---|---|---|
| Process | Three-station, one-step injection blow molding | Sets the entire Module 1.2 anatomy and sequence content |
| Clamping framework | Single crossbeam, double poles, enlarged mold setting space | Changeover module: better access shortens internal work time |
| Container volume range | Up to 1000 ml within the 3 to 1000 ml series capability | Widest product exposure for trainees, including large-container cooling behavior |
| Cavity count | Multi-cavity, typical range depends on container size and mold design | Cavity-to-cavity balance study is only meaningful at higher cavitation |
| Core rod temperature control | Oil temperature controller, working band typically 80 to 130 degrees Celsius | Central parameter for Level 2 and Level 3 stretch and wall thickness work |
| Blow mold temperature control | Chilled water circuit, typical working band 8 to 20 degrees Celsius | Cycle compression pathway steps 2 to 4 |
| Hydraulic system | PREFILL technology with variable displacement pump pressurizing | Level 4 hydraulic module: the diagnostic approach differs from fixed-displacement circuits |
| Energy performance | Minimum 35 percent energy saving versus a conventional hydraulic arrangement | Level 3 energy module verifies this on the plant’s own meter |
| Safety devices | CE certified; digital laser sensor at the stripper station; light curtain | Module 1.1 daily functional verification content |
| Parameter management | SD card storage and transfer of parameter sets | Level 4 parameter difference and rollback step; Level 2 recipe recall discipline |
| Processable materials | PE including HDPE, LDPE and LLDPE; PP; PS; ABS; SAN; TPU; PC; PCTG | Defines the scope of the Level 2 materials module |
Configuration values above are representative for training planning. Final specifications for a specific order, including screw diameter, injection capacity, clamping force and installed power, are confirmed by the Aibim engineering team against the container drawing, cavity count and material.
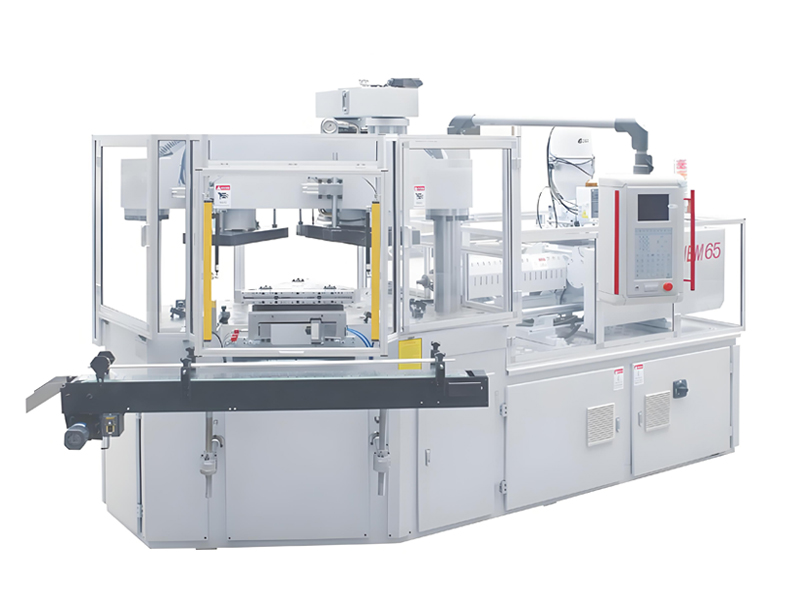
Aibim IBM65 — the mid-range platform
The IBM65 sits between the two other platforms and is the most common choice for plants running small to mid-size containers in pharmaceutical, cosmetic and food applications. In training terms it is the platform where operators spend most of their productive hours, which makes it the natural home for Level 2 changeover practice.
| Parameter | IBM65 representative configuration | Why it matters in training |
|---|---|---|
| Process | Three-station, one-step injection blow molding | Identical process modules to the IBM75, no retraining required |
| Typical container focus | Small to mid-size containers within the 3 to 1000 ml series capability | High cavitation practice, faster cycles, tighter neck tolerance discipline |
| Clamping framework | Single crossbeam, double poles | Changeover technique transfers directly from the IBM75 |
| Cycle behavior | Shorter cycles than large-container work on the IBM75 | Higher shot count per shift makes statistical process control studies faster to complete |
| Core rod set | Higher rod count per set for small containers | Core rod alignment and handling discipline becomes the dominant changeover risk |
| Hydraulic system | PREFILL technology with variable displacement pump pressurizing | Same Level 4 hydraulic content as the IBM75 |
| Safety devices | CE certified; digital laser sensor at the stripper station; light curtain | Same Module 1.1 verification routine |
| Parameter management | SD card storage and transfer | Recipes can be moved between IBM65 machines in a multi-machine plant |
| Processable materials | PE, PP, PS, ABS, SAN, TPU, PC, PCTG | Same materials module scope |
| Training role | Primary production and Level 2 changeover practice platform | Highest changeover frequency in a typical plant |
Aibim IBM55 Hybrid Electric — the energy and precision platform
The IBM55 hybrid electric platform is selected where energy targets or motion precision requirements are strictest. It changes the Level 4 curriculum more than any other platform difference in the lineup, because diagnostic weight shifts from hydraulic pressure and fluid condition toward servo drive behavior and feedback integrity.
| Parameter | IBM55 Hybrid Electric representative configuration | Why it matters in training |
|---|---|---|
| Drive architecture | Hybrid electric: servo-driven motion elements combined with a hydraulic circuit for clamping duty | Level 4 adds servo diagnostics; hydraulic content is reduced but not removed |
| Process | Three-station, one-step injection blow molding | Level 1 to Level 3 process content is unchanged |
| Typical container focus | Small containers, precision applications within the 3 to 1000 ml series capability | Pharmaceutical and cosmetic work with tight neck tolerance |
| Energy performance | Lowest energy per 1000 pieces of the three platforms | Level 3 energy module compares measured consumption across platforms |
| Motion repeatability | Servo-controlled positioning on driven axes | Level 4 measures following error and encoder integrity instead of valve response |
| Standby behavior | Lower standby load than a continuously running hydraulic pump | Changes the taught standby and break-time practice |
| Maintenance emphasis | Servo drive parameters, encoder cables, linear guide lubrication, plus a reduced hydraulic circuit | Preventive maintenance plan is re-weighted rather than rewritten |
| Safety devices | CE certified; digital laser sensor at the stripper station; light curtain | Same Module 1.1 verification routine |
| Additional Level 4 hours required | 8 to 12 hours of servo-specific content | Budget this explicitly when planning a mixed-platform plant |
The training delta table
A mixed-platform plant should not run three separate curricula. It should run one curriculum with a documented delta module per platform, which is both cheaper to maintain and easier to audit.
| Curriculum element | IBM75 | IBM65 | IBM55 Hybrid Electric |
|---|---|---|---|
| Level 1 safety and anatomy | Baseline, 16 hours | Identical | Identical plus servo isolation awareness, add 1 hour |
| Level 1 start-up and shutdown | Baseline, 10 hours | Identical | Different standby practice, add 1 hour |
| Level 2 materials | Baseline, 10 hours | Identical | Identical |
| Level 2 parameters | Baseline, 14 hours | Identical | Identical |
| Level 2 changeover | Baseline, 16 hours | Higher rod count handling, add 2 hours | Smaller tooling, subtract 2 hours |
| Level 3 optimization and statistical process control | Baseline, 80 hours | Faster data accumulation, same content | Same content, tighter capability targets typical |
| Level 4 hydraulic diagnosis | Baseline, 22 hours | Identical | Reduced to about 14 hours |
| Level 4 electrical and control | Baseline, 24 hours | Identical | Extended to 32 to 36 hours for servo content |
| Level 4 mechanical | Baseline, 18 hours | Identical | Add linear guide and coupling content, 2 hours |
| Total program hours | 280 | 282 | 286 to 290 |
10. The five-tier preventive maintenance program
Preventive maintenance is not a Level 4 topic that happens to involve operators. It is an operator-owned system that happens to involve Level 4. Roughly 70 percent of the tasks in a well-designed program are performed by Level 1 and Level 2 personnel during normal shift work, which is precisely why the plan is taught as part of the training curriculum rather than handed to the maintenance department as a separate document.
| Tier | Interval | Owner | Representative tasks | Typical duration | Machine state |
|---|---|---|---|---|---|
| Tier 1 Shift |
Every shift | Level 1 operator | Twelve-item daily check sheet; safety gate, light curtain and one emergency stop device functional test; oil level and temperature below 55 degrees Celsius; air pressure 0.6 to 1.0 MPa; cooling flow per circuit; heating deviation within plus or minus 2 degrees Celsius; visual leak walk-around; product against control sample; work area and material area cleanliness | 15 to 25 minutes | Running and at shift start |
| Tier 2 Weekly |
Every 7 days | Level 2 operator with Level 4 spot check | Clean laser sensor and photoelectric device lenses; inspect and clean stripper area; check hydraulic filter differential indicator; grease points per lubrication chart; inspect hoses and quick couplers; verify blow air filtration and drain the water trap; check granulator screen and blades; download and archive parameter set to SD card | 60 to 90 minutes | Planned stop |
| Tier 3 Monthly |
Every 30 days | Level 4 technician | Hydraulic oil sample and cleanliness assessment against NAS class 8; cooler performance and water side inspection; heater band current measurement on all zones; thermocouple verification against a reference; electrical cabinet cleaning and terminal torque check; safety circuit dual-channel test; index repeatability measurement over 20 cycles; core rod alignment verification | 3 to 5 hours | Planned stop |
| Tier 4 Quarterly |
Every 90 days | Level 4 technician with process technician | Accumulator nitrogen pre-charge verification; proportional valve zero calibration; clamp parallelism measurement under load; mold cooling channel flow benchmark against commissioning data and descaling if drifted; vent inspection and cleaning to 0.01 to 0.02 mm; screw and check ring cushion stability study; full mold inspection report | 8 to 12 hours | Extended planned stop |
| Tier 5 Annual |
Every 12 months | Level 4 with supplier support | Hydraulic oil change or condition-based decision with full filter replacement; screw pull, tip and barrel wear measurement; drive and gearbox inspection; complete electrical safety verification; index drive and locating pin overhaul; control system backup and firmware review; wear part ledger reconciliation; recalibration of measurement instruments | 2 to 4 days | Shutdown |
The wear part life ledger
A preventive maintenance plan without a wear part ledger is a calendar, not a system. Level 4 trainees build the ledger as a course deliverable, recording for each wear item the installed date, the shot count or running hours at installation, the expected service life, the observed life at each replacement, and the reorder trigger point. Over two or three replacement cycles the ledger converts guesses into a plant-specific life expectancy, and the reorder trigger moves from anxiety to arithmetic.
Typical ledger items for an injection blow molding machine are core rods, neck inserts, check ring and screw tip assembly, heater bands by zone, thermocouples, hydraulic and air seals, hydraulic filter elements, blow air filter elements, quick couplers, proportional valve, index locating pins and bushings, stripper components, and the sensors at the stripper station.
Failure metrics that make the system visible
Two indicators are taught and tracked. Mean time between failures measures how often the machine stops unexpectedly, and it is the honest measure of whether preventive maintenance is working. Mean time to repair measures how quickly the team recovers, and it is the honest measure of whether Level 4 training is working. A plant that improves mean time to repair while mean time between failures stays flat has trained its technicians but not fixed its maintenance system. A plant that improves both has done the job.
11. Skill matrix, staffing and shift coverage
The skill matrix is what turns a training curriculum into a management tool. It is a simple grid: people down the left, competencies across the top, and a coded cell showing each person’s certified level. Posted visibly, it answers three questions instantly that most plants otherwise answer by asking around: can this shift run tonight, who is the single point of failure, and who is next in line for development.
| Person | Safety and daily checks | Start-up and shutdown | Parameter adjustment | Mold changeover | Quality judgment | Process optimization | Fault diagnosis | Certified level |
|---|---|---|---|---|---|---|---|---|
| Operator A, shift 1 | Certified | Certified | Boundary only | In training | Certified | Not started | Not started | Level 1 plus |
| Operator B, shift 1 | Certified | Certified | Certified | Certified | Certified | In training | Not started | Level 2 |
| Operator C, shift 2 | Certified | Certified | Boundary only | Not started | In training | Not started | Not started | Level 1 |
| Operator D, shift 2 | Certified | Certified | Certified | Certified | Certified | Not started | Not started | Level 2 |
| Technician E, day | Certified | Certified | Certified | Certified | Certified | Certified | In training | Level 3 |
| Technician F, day | Certified | Certified | Certified | Certified | Certified | Certified | Certified | Level 4 |
| Trainer G, day | Certified assessor | Certified assessor | Certified assessor | Certified assessor | Certified assessor | Certified | Certified | Level 4 plus assessor |
| Shift 2 coverage gap | Covered | Covered | Covered | Single point of failure | Thin | None resident | None resident | Action required |
Read the bottom row of that matrix and the staffing decision writes itself: shift 2 has exactly one person able to perform a mold changeover, which means an unplanned absence stops the changeover schedule. The remedy is to move Operator C into Level 2 changeover training within the quarter, not to hire.
Minimum coverage rules
Three rules keep a matrix honest and prevent the slow erosion that follows staff turnover.
- Two-deep rule. Every competency required to run a shift must be held by at least two people on that shift. One is a single point of failure regardless of how good that person is.
- Level 3 access rule. Every production shift must have access to Level 3 judgment within a defined response time, either resident on shift or reachable by an agreed escalation route. Without it, a Level 2 operator facing an unfamiliar defect will either guess or stop the machine, and both outcomes are expensive.
- Level 4 residency rule. A plant running four or more machines should hold Level 4 capability on site. Below four machines, a Level 4 contract or supplier support arrangement with a defined response commitment is usually the better economic choice.
12. Industry-specific training content and end products
The base curriculum covers the machine. The industry module covers what happens to the container after it leaves the machine, and that determines which defects are cosmetic and which are critical. Aibim machines serve four principal application fields, and each one changes the emphasis of the quality and documentation modules without changing the technical content.
Pharmaceutical packaging
End products include tablet and capsule bottles, oral liquid bottles, dropper bottles, eye drop containers, nasal spray bottles and small-volume diagnostic containers. This is the most demanding application because the container is primary packaging and the plant is audited. The training additions are substantial: cleanroom behavior and gowning discipline, particle control and the reasons behind it, documentation practice sufficient to survive an audit trail review, change control so that no parameter moves without a record, and a capability target commonly raised from 1.33 to 1.67 for critical dimensions such as the neck inner diameter and thread profile. Defect tolerance narrows sharply: a black speck that would be cosmetic on a cleaning product bottle is a reject on a pharmaceutical container.
Food and beverage containers
End products include sauce and condiment bottles, dairy and yogurt drink containers, honey and syrup jars, spice containers and small juice bottles. The training additions center on food contact compliance awareness, material traceability from the incoming batch to the finished container, cleaning and changeover discipline between products where allergen or flavor carryover is a concern, and closure fit verification because a food container that does not seal is a recall risk rather than a customer complaint.
Cosmetic and personal care
End products include cream jars, lotion bottles, serum and dropper bottles, nail polish containers, deodorant containers and sample-size travel bottles. Here the training emphasis shifts toward appearance because the container is the product’s shelf presence. Modules gain content on clarity and haze evaluation under controlled lighting, color matching and color changeover discipline, surface finish preservation during handling and packing, and the wall thickness uniformity that determines whether a transparent container looks premium or looks cheap. Decoration compatibility also enters the discussion, because a container destined for silk screening or hot stamping must hold tighter dimensional and surface consistency than one that will carry a wrap label.
Household and industrial chemicals
End products include small chemical bottles, additive containers, lubricant bottles and laboratory reagent containers. Training additions cover chemical compatibility awareness so that operators understand why a material substitution is not their decision, wall thickness minimums driven by content compatibility and transport, top-load and drop performance verification, and the leak testing regime that a chemical container must pass.
| Application field | Representative end products | Added training content | Capability target | Documentation load |
|---|---|---|---|---|
| Pharmaceutical | Tablet bottles, oral liquid bottles, dropper and eye drop containers, nasal sprays | Cleanroom discipline, particle control, change control, audit-ready records, tightened defect criteria | Capability index 1.67 on critical dimensions | Very High |
| Food and drink | Sauce bottles, dairy drink containers, honey jars, spice containers | Food contact awareness, batch traceability, changeover cleaning, closure and seal verification | Capability index 1.33 to 1.67 | High |
| Cosmetic and personal care | Cream jars, lotion and serum bottles, nail polish containers, travel sizes | Clarity and haze evaluation, color changeover, surface protection, decoration compatibility | Capability index 1.33 with appearance standards | Medium |
| Household and industrial chemical | Chemical bottles, additive and lubricant containers, reagent bottles | Chemical compatibility awareness, wall minimum enforcement, top-load and drop testing, leak testing | Capability index 1.33 | Medium |
13. Choosing a training program for your plant
Not every plant needs all 280 hours immediately, and buying more training than the plant can absorb is as wasteful as buying too little. The table below maps plant profile to a recommended program, an Aibim platform and a delivery sequence. Program investment is expressed against a training program cost index in which a five-day on-site course equals 100 points, so plants can compare options internally without any reference to commercial terms.
| Plant profile | Recommended platform | Recommended training package | People to certify | Program cost index | Delivery sequence |
|---|---|---|---|---|---|
| Start-up, first machine, single product family, one shift | Aibim IBM65 | Level 1 for all operators plus Level 2 for one lead | 3 to 4 people | 100 to 180 points | Commissioning week on site, Level 2 at month 3 |
| Small plant, one machine, multiple products, two shifts | Aibim IBM65 or IBM75 | Level 1 for all, Level 2 for two per shift | 5 to 6 people | 180 to 280 points | Level 1 at commissioning, Level 2 staged across months 2 to 5 |
| Growing plant, two to three machines, two shifts, mixed containers | Aibim IBM75 plus IBM65 | Level 1 and 2 full coverage, one Level 3 technician | 8 to 10 people | 300 to 450 points | Levels 1 and 2 in quarter 1, Level 3 in quarter 2 |
| Established plant, four or more machines, three shifts | Aibim IBM75 fleet with IBM65 support | Full four-level program with internal trainer certification | 14 to 20 people | 500 to 800 points | Levels 1 and 2 in quarter 1, Level 3 in quarter 2, Level 4 in quarter 3, train-the-trainer in quarter 4 |
| Pharmaceutical or medical packaging plant, audited environment | Aibim IBM55 Hybrid Electric or IBM65 | Full four-level program plus the pharmaceutical documentation module and 12-month recertification | 10 to 16 people | 600 to 900 points | Level 1 and 2 before validation runs, Level 3 and 4 during the validation period |
| Contract manufacturer with frequent product changes | Aibim IBM75 | Level 1 and 2 with extended changeover module, one Level 3, Level 4 by supplier support | 10 to 14 people | 400 to 600 points | Changeover-intensive front loading, Level 3 at month 4 |
| Plant replacing older-generation equipment with existing skilled staff | Aibim IBM75 or IBM55 Hybrid Electric | Condensed Level 1, full Level 2 delta, Level 4 platform conversion module | 6 to 10 people | 250 to 400 points | Condensed delivery during installation, Level 4 conversion in month 2 |
14. Delivery mechanics: instructors, e-learning, recertification, records
Curriculum content is roughly half of a training program’s effectiveness. The other half is how it is delivered, by whom, how often it is refreshed, and whether anyone can prove it happened.
Instructor qualification and the mentoring model
An instructor must hold certification at least one level above the material being taught, must have delivered the module under observation at least twice before teaching independently, and must be re-qualified on the same 12 to 24 month cycle as everyone else. Subject knowledge alone is insufficient: the most common failure mode in industrial training is the excellent technician who demonstrates rather than teaches, performing the task quickly and correctly while trainees watch and learn nothing.
Mentoring pairs each Level 1 trainee with a Level 2 or Level 3 mentor for a defined consolidation period, typically four to six weeks. The mentor is accountable for the trainee’s check sheet accuracy and escalation behavior, not merely available for questions. A structured mentoring log with weekly sign-off keeps the relationship real. Plants that skip this stage routinely find that certified operators revert to informal habits within two months, because certification without consolidation does not survive contact with production pressure.
Blended delivery at 30 percent theory and 70 percent hands-on
The evidence from industrial training is consistent: theory delivered immediately before the corresponding hands-on task is retained, and theory delivered as a block at the start of a week is not. The recommended structure delivers theory modules through e-learning that trainees complete before arriving at the machine, then uses the full instructor-led session for practice. E-learning suits safety fundamentals, material behavior, parameter theory, defect galleries and the diagnostic methodology. It does not suit changeover, alignment, defect judgment by touch and sight, or fault diagnosis, all of which require the physical machine.
| Module type | E-learning share | Hands-on share | Rationale |
|---|---|---|---|
| Safety fundamentals and rules | 40 percent | 60 percent | Rules can be studied; lockout tagout must be performed |
| Machine anatomy and process principle | 50 percent | 50 percent | Animations teach the three-station sequence efficiently |
| Start-up, shutdown, material change | 20 percent | 80 percent | Sequence discipline is built by repetition |
| Materials and processing windows | 50 percent | 50 percent | Data-heavy content suits self-paced study |
| Parameters and boundaries | 40 percent | 60 percent | Theory first, then guided parameter exercises |
| Mold changeover | 10 percent | 90 percent | Physical skill, timing and teamwork |
| Quality judgment | 20 percent | 80 percent | Calibration against physical samples is irreplaceable |
| Statistical process control | 50 percent | 50 percent | Method online, plant data analysis on site |
| Fault diagnosis | 25 percent | 75 percent | Method online, simulated faults on the machine |
| Program average | 30 percent | 70 percent | Matches the recommended overall split |
Recertification and skill decay
Certification expires. The recommended interval is 24 months for Level 1 and Level 2 in general manufacturing, 12 months in pharmaceutical and food environments, and 24 months for Level 3 and Level 4 with additional mandatory refresh triggered by events rather than by calendar. Event triggers that require immediate retraining regardless of the calendar are: a new machine platform, a new material family, a new mold type, a control system revision, any safety incident or near miss, a return from an absence longer than six months, and any repeated defect escape traced to operator judgment.
Training records and traceability
An audited plant needs a per-person training file containing the curriculum version taught, attendance records with dates and hours, the completed assessment sheet with the assessor’s signature, the certification date and expiry, the mentoring log for the consolidation period, and evidence of retraining after any triggering event. Version control on the curriculum itself matters more than most plants expect: when a module changes, the plant must be able to show which version each person was trained against and how the gap was closed.
Multilingual materials and remote support
Aibim serves customers in more than 40 countries, and training content that a trainee cannot read is training that did not happen. Practical measures that work are: machine interface language matched to the operator population; laminated bilingual work instructions posted at the machine covering the start-up sequence, the daily check list and the defect matrix; the defect library labeled in the local language with the technical English term alongside so that operators can communicate with support engineers; and remote sessions scheduled with an interpreter present where required. Remote support is most effective when the plant has a Level 3 or Level 4 person on the call who can execute instructions and describe symptoms in technical terms, which is another argument for developing those levels internally.
15. Measuring training effectiveness without guesswork
Training programs are cut when they cannot show a result, and they cannot show a result when nobody recorded the starting point. The single most important action a plant takes before training begins is to capture a baseline of the indicators it intends to improve.
| Indicator | How to measure | Baseline capture point | Realistic target after full rollout | Attribution confidence |
|---|---|---|---|---|
| Scrap rate | Rejected pieces divided by total produced, by product | Four weeks before training | From 6.5 percent down to 1.8 percent is achievable in plants starting from informal operation | High |
| Changeover time | Machine stop to first good piece, timed | Last five changeovers before training | From 150 minutes down to 60 minutes | Very High |
| Start-up scrap per changeover | Counted pieces before first article approval | Last five changeovers | 60 to 75 percent reduction | High |
| Overall equipment effectiveness | Availability times performance times quality | Four weeks before training | 8 to 15 percentage point gain | Medium, multiple contributing factors |
| Energy per 1000 pieces | Machine meter reading divided by counted output | One full week before training | 8 to 20 percent reduction | Medium to High |
| Mean time to repair | Fault occurrence to production resumed, logged | Six months of history | 50 to 70 percent reduction after Level 4 | Very High |
| Mean time between failures | Running hours divided by unplanned stop count | Six months of history | Doubling is common after the five-tier plan is in place | High |
| Rework man-hours per shift | Timesheet or production log | Four weeks before training | Substantial reduction, often the most visible change to supervisors | High |
| Defect escape to customer | Complaint count per million pieces shipped | Twelve months of history | Reduction of at least half | Medium |
| Time to competence for a new hire | Weeks from start to Level 1 certification | Historical average | From 12 or more weeks down to 5 to 8 weeks | Very High |
| Program scope | Investment level | Program cost index | Man-hours removed from production | Expected return level | Payback signal to watch |
|---|---|---|---|---|---|
| Level 1 only, single shift | Low | 100 points | 40 hours per person | Medium | Start-up scrap and safety incident count |
| Levels 1 and 2, full operator coverage | Medium | 250 to 350 points | 104 hours per person | High | Changeover time and shift yield |
| Levels 1 to 3 | High | 400 to 550 points | 184 hours for the technician track | Very High | Cycle time, capability index, energy per 1000 pieces |
| Full four-level program with internal trainers | Very High | 600 to 900 points | 280 hours for the full track | Premium | Unplanned downtime share and mean time to repair |
| Annual recertification and refresh | Low | 60 to 120 points per year | 16 to 40 hours per person per year | High, protects the gains already made | Indicator drift between recertification cycles |
16. Standards and certification context
Training content does not exist in a vacuum. Several standards impose requirements that the curriculum must satisfy, and mapping the curriculum to them explicitly saves considerable effort at audit time.
- ISO 9001. Requires that personnel performing work affecting product conformity are competent on the basis of education, training or experience, and that records of competence are retained. The four-level framework, the assessment rubrics and the per-person training file satisfy this directly.
- ISO 15378. Applies good manufacturing practice principles to primary packaging materials for medicinal products. It adds requirements for training on hygiene, contamination control, change control and documentation, which is why the pharmaceutical module raises the documentation load to Very High and shortens recertification to 12 months.
- Good manufacturing practice for cleanroom production. Where containers are produced in a controlled environment, operators require additional training on gowning, material transfer, environmental monitoring awareness and behavior that affects particle counts. This content is additive to the base curriculum, not a replacement for it.
- IEC 60204-1. Governs the electrical equipment of machines, covering isolation, emergency stop function, protective bonding and marking. Level 1 safety training and Level 4 electrical training both reference its principles, particularly the isolation and verification sequence.
- ISO 13849. Defines performance levels for safety-related parts of control systems. It is the reason the safety chain is dual-channel and the reason a channel discrepancy latches a fault rather than allowing a silent reset. Level 4 technicians must understand this to avoid defeating a safety function while troubleshooting it.
- CE marking. Aibim machines carry CE certification, which brings machinery safety requirements including guarding, the light curtain at the operator approach and the digital laser sensor at the stripper station. The training obligation that follows is verification: certified protective devices only protect people when they are tested and maintained.
| Standard | Requirement affecting training | Curriculum element that satisfies it | Evidence at audit |
|---|---|---|---|
| ISO 9001 | Demonstrated competence and retained records | Four-level framework with assessment rubrics | Skill matrix plus per-person training file |
| ISO 15378 | Good manufacturing practice training for primary packaging | Pharmaceutical module, change control content, 12-month recertification | Versioned curriculum, signed assessments, retraining records |
| Cleanroom good manufacturing practice | Behavior and contamination control training | Gowning, transfer and particle control content | Attendance and periodic re-qualification records |
| IEC 60204-1 | Safe isolation and emergency stop function | Module 1.1 lockout tagout, Module 4.2 electrical safety | Practical assessment sheets and written safety test scores |
| ISO 13849 | Integrity of safety-related control functions | Dual-channel safety chain content in Module 4.2 | Safety circuit test records in the Tier 3 maintenance log |
| CE marking | Protective devices maintained and verified | Daily functional test of gate, light curtain and emergency stop | Completed daily check sheets |
17. Training, service and support from Aibim
Aibim treats training as part of the machine, not as an accessory sold alongside it. A three-station injection blow molding machine only produces what the people running it can extract from it, and the factory’s service structure is built around that reality.
Testing and training before shipment
Every machine is tested before it leaves the plant, and customers are invited to attend. The pre-shipment test is also the best training opportunity in the entire project timeline: the machine is accessible from every side, there is no production schedule pressing on it, and the engineers who designed and built it are in the same building. Plants that send two or three key people to witness the test consistently commission faster than plants that do not. Aibim operates its own CNC center for machine part production, and visitors are able to see how the parts that matter most for precision are made.
Installation, commissioning and on-site engineer support
Aibim engineers travel to site for installation supervision, utility verification, first molding trials and production ramp-up, and the Level 1 curriculum plus the Level 2 changeover module are delivered during this window on the customer’s own machine, mold and material. Training on the plant’s actual configuration is worth considerably more than training on a demonstration unit, because the trainee learns their specific recipe, their specific mold set and their specific utility layout.
Open factory and hands-on training at the plant
Wanplas maintains an open factory policy across its factories, and Aibim welcomes customer personnel for hands-on training at the plant. This route suits Level 3 and Level 4 content particularly well, because faults can be simulated safely on a machine that is not in production, screws can be pulled, hydraulic circuits can be opened and safety chains can be interrupted deliberately for diagnostic practice. None of that is comfortable to do on a customer’s production machine during a scheduled run.
Remote support and continuous improvement
After commissioning, support continues remotely. Because parameter sets can be stored and transferred on an SD card, a plant experiencing an unexplained process shift can compare its current configuration against the archived commissioning baseline and share the difference with an Aibim engineer, which usually converts a long diagnostic conversation into a short one. Remote sessions also handle recipe development for new containers, cycle optimization reviews and refresher training when a plant hires new operators.
Spare parts and the Wanplas service commitment
Aibim applies the group-wide Wanplas service policy: USD 500 in free parts every year, free replacement of parts damaged within the warranty period, a transportation guarantee, a production capacity guarantee and a quality standards guarantee. For an injection blow molding machine, the recommended initial spare parts holding aligns directly with the wear part ledger taught at Level 4: heater bands in the most-used zone sizes, thermocouples, a spare check ring and screw tip assembly, hydraulic and air seal kits, filter elements for hydraulic and blow air circuits, quick couplers, index locating pins and bushings, stripper station sensors, and a spare set of core rods for the highest-running mold.
Factory background in brief
Aibim, a Wanplas factory, has more than twelve years of machine manufacturing experience with roughly twenty years of accumulated experience in injection blow molding specifically, operates from a plant acquired in 2022 with capacity for more than 100 machines per year, runs its own CNC center for machine part production, and serves customers in over 40 countries across pharmaceutical, food, drink and cosmetic packaging. Machines cover containers from 3 ml to 1000 ml in PE, PP, PS, ABS, SAN, TPU, PC and PCTG. The Wanplas brand carries its mission of warming global customers with China plastic machinery, and training is where that commitment becomes tangible after the crate is opened.
18. Frequently asked questions
How long does it take to train a completely new injection blow molding operator?
The Level 1 Foundation course runs five days or 40 hours and produces an operator who can start up, run and shut down a machine safely under supervision. Independent unsupervised running of a single established product typically requires that course plus four to six weeks of mentored floor time. Full Level 2 proficiency, including independent mold changeover and reliable defect judgment, generally takes six to nine months of combined training and production experience. Plants that promise independence after a week are describing an aspiration rather than a plan.
What is the difference between operator training for injection blow molding and extrusion blow molding?
Extrusion blow molding training centers on parison control, wall thickness programming and flash trimming. Injection blow molding produces no flash and requires no trimming, so training centers instead on injection parameters, core rod temperature control, indexing accuracy and neck finish dimensional control to roughly plus or minus 0.05 mm. An experienced extrusion blow molding operator still needs the full Level 1 and Level 2 program, because the three-station indexing sequence and the injection unit are genuinely new territory and the confidence carried over from the other process can be actively unhelpful.
How many training hours should a plant budget per operator per year?
A practical benchmark is 40 to 60 hours in the first year for a new hire, 16 to 24 hours per year to maintain certification at Level 1 and Level 2, and 24 to 40 hours per year for Level 3 and Level 4 personnel who must keep pace with new molds, new materials and control revisions. Recertification intervals of 12 to 24 months, shorter in regulated environments, keep the skill matrix truthful rather than decorative.
What is the right split between classroom and hands-on training?
A 30/70 split works best: roughly 30 percent theory delivered through e-learning or classroom sessions, and 70 percent supervised hands-on work at the machine. Safety rules and material science tolerate a higher theory share. Mold changeover, defect judgment and fault diagnosis must be practiced physically, because they depend on tactile and visual skills that no slide deck transfers. Delivering theory immediately before the corresponding practical task retains far better than delivering it as a block at the start of the week.
How do you assess whether an operator is genuinely competent?
Assess against observable, countable criteria rather than a written test alone. Level 1 requires an independent start-up and shutdown, one eight-hour shift with no major error, and a daily check sheet completed with 100 percent accuracy. Level 2 requires an independent mold changeover inside the target window, a single-shift yield of at least 96 percent, and defect identification accuracy of at least 90 percent on a blind sample set. Level 3 requires a documented optimization project delivering at least 8 percent improvement. Level 4 requires locating and repairing three simulated faults from different subsystems within 90 minutes each.
Does the same curriculum apply to hybrid electric and hydraulic machines?
The process modules are identical, because the molding physics do not change with the drive technology. The differences appear at Level 4: a hybrid electric platform such as the IBM55 shifts diagnostic weight from hydraulic pressure and oil condition toward servo drive parameters, following error and encoder feedback, while still retaining a hydraulic circuit for clamping duty. Budget roughly 8 to 12 additional hours at Level 4 for servo-specific content, and reduce the hydraulic module correspondingly rather than simply adding hours.
How is training effectiveness measured without quoting money figures?
Use process indicators the plant already collects. Scrap rate before and after, for example a reduction from 6.5 percent to 1.8 percent. Changeover time compressed from 150 minutes to 60 minutes. Overall equipment effectiveness gain in percentage points. Energy expressed as kWh per 1000 pieces. Mean time between failures and mean time to repair in hours. Rework man-hours per shift. Time to competence for a new hire in weeks. A training program cost index in which a five-day on-site course equals 100 points lets a plant compare program options internally without disclosing any commercial terms.
Who should deliver the training, the machine supplier or an internal trainer?
The most durable model is supplier-led train-the-trainer followed by internal delivery. Aibim engineers deliver the initial program during installation and commissioning, certify two or three internal trainers, and hand over module materials, check sheets and assessment forms. Internal trainers then run onboarding cycles at the pace the plant hires, while the supplier provides remote support and periodic refresher sessions when new molds, materials or control revisions arrive. Pure supplier dependence is fragile because it makes every new hire wait for a visit; pure internal delivery drifts because nobody outside the plant ever challenges the content.
What records does an audited plant need to keep for operator training?
Pharmaceutical and food packaging audits expect a per-person training file containing the curriculum version taught, attendance records with dates and hours, the assessment sheet with the assessor’s signature, the certification date and expiry, the mentoring log, and evidence of retraining after any process, material or equipment change. A visual skill matrix mapping every person against every competency is the fastest way to demonstrate coverage during an audit, and it doubles as the plant’s staffing tool the rest of the year.
Can training be delivered before the machine arrives?
Yes, and it should be. Theory modules covering safety fundamentals, process principle, material behavior and parameter effects can be completed through e-learning during the manufacturing lead time. Two or three key staff can attend the pre-shipment test at the Aibim factory for hands-on exposure. This front-loading typically shortens the commissioning period because the team arrives at start-up already fluent in the vocabulary and the sequence, and it converts commissioning week from a lecture into supervised practice.
19. Conclusion and next step
A structured IBM machine operator training curriculum is the highest-leverage investment available to an injection blow molding plant, because it is the only one that improves scrap, cycle time, changeover speed, energy consumption, downtime and safety simultaneously. The four-level framework set out here, 280 hours across Foundation Operator, Proficient Operator, Advanced Process Technician and Expert Troubleshooting, exists to make that improvement repeatable rather than personality-dependent.
The essentials are worth restating. Start with safety and never treat it as completed. Teach Level 1 operators to run to recipe and escalate rather than to adjust, because parameter discipline is worth more than parameter knowledge at that stage. Build Level 2 around materials, parameter boundaries, changeover in 45 to 90 minutes and defect recognition at 90 percent accuracy. Develop Level 3 into the owner of the process window, capable of designed experiments, root cause analysis, mold condition management and a capability index of at least 1.33. Grow Level 4 into the diagnostic and preventive maintenance authority who can locate a fault in any of the three subsystems within 90 minutes and who keeps the five-tier maintenance plan alive. Then hold it all together with a visible skill matrix, recertification every 12 to 24 months, a 30/70 blend of theory and practice, and training records that survive an audit.
The machine matters too, and it is worth choosing one built by people who will teach you to run it. Aibim, a Wanplas factory with more than twelve years of machine manufacturing experience and roughly twenty years in injection blow molding, builds three-station one-step IBM75, IBM65 and IBM55 Hybrid Electric machines for containers from 3 ml to 1000 ml in PE, PP, PS, ABS, SAN, TPU, PC and PCTG, serving pharmaceutical, food, drink and cosmetic packaging producers in more than 40 countries. Every machine is CE certified with a digital laser sensor at the stripper station and a light curtain for personal safety, uses PREFILL technology and variable displacement pump pressurizing for a minimum 35 percent energy saving, and stores parameter sets on an SD card so that a verified recipe travels with the product rather than with a person’s memory.
If you are planning a training program, send the details of your operation: how many machines you run and on which platforms, how many shifts, your current scrap rate and changeover time, the container types and materials in production, and whether you operate in a regulated environment. The Aibim engineering team will map those inputs onto the four-level framework and return a training plan with module selection, hour allocation, delivery sequence and assessment criteria tailored to your plant. If you are also evaluating equipment, send your container drawing, target output and material and the team will propose a machine configuration alongside the training plan. You are welcome to bring your operators to the factory for hands-on training during the pre-shipment test, and to run a sample trial on your own mold before the machine ships.