Flash reduction in injection blow molding is the single most direct lever for cutting post-processing labor, improving container cosmetics, and protecting the sterile integrity of pharmaceutical and cosmetic bottles. Unlike extrusion blow molding, where a bottom weld and a parting-line flash are structurally unavoidable, injection blow molding (IBM) is engineered to produce a finished bottle with no flash at the neck finish and minimal material at the bottom pinch-off. When flash does appear on an IBM line, it is almost always a signal that clamping, mold geometry, process parameters, or material condition has drifted outside its validated window. This guide explains where IBM flash forms, why it forms, and exactly how to eliminate it with concrete, field-proven adjustments.
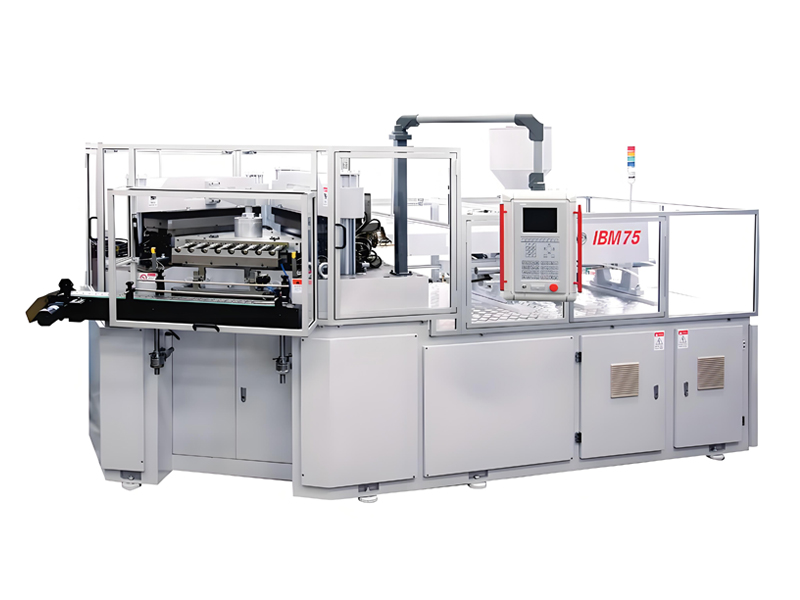
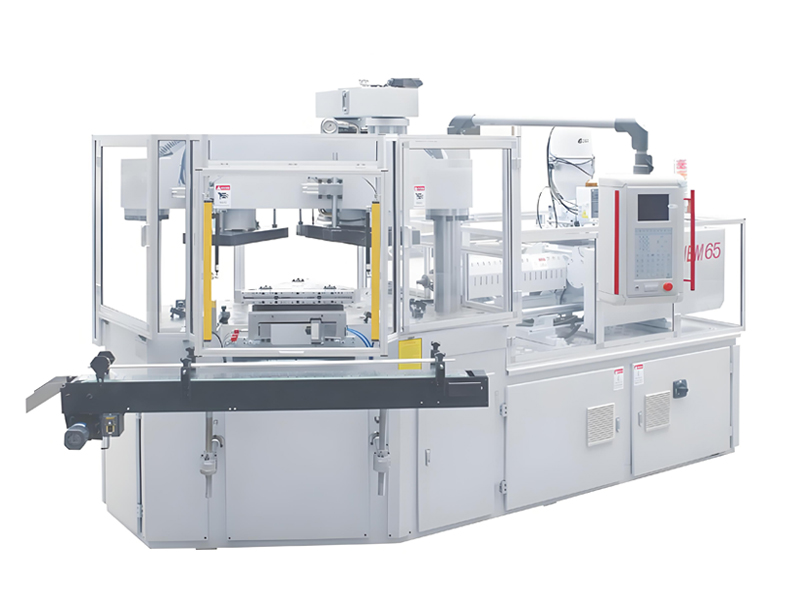
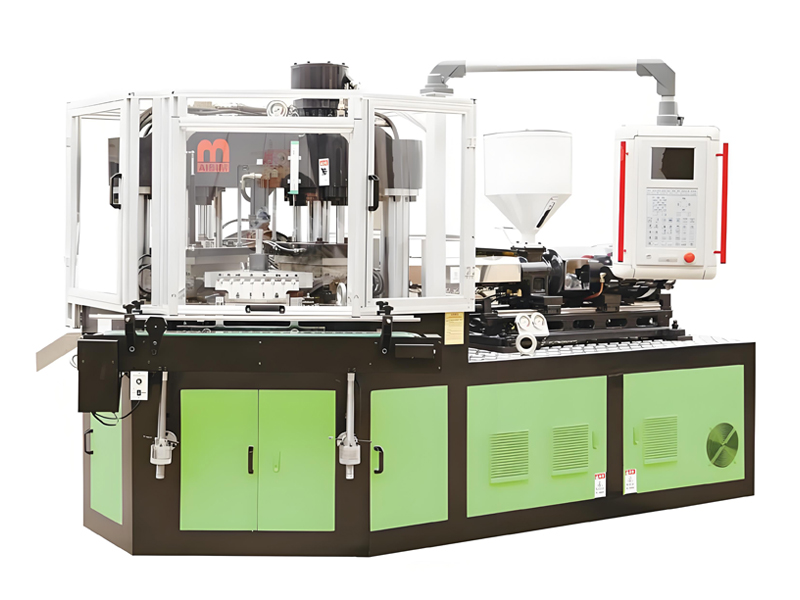
Flash on an IBM machine is more than a cosmetic nuisance. Every gram of flash that must be trimmed is a gram of regrind handling, a manual touch point, and a potential source of particulate contamination. For the 3 ml to 1000 ml precision containers that Aibim, a Wanplas factory, builds on its IBM75, IBM65, and IBM55 Hybrid platforms, the difference between a flash-free and a flash-prone process can be the difference between an automated, closed, clean production cell and a labor-intensive trimming operation. The technical framework below applies to any three-station, one-step IBM line, whether supplied by Aibim, جومار, Milacron-Uniloy, or Bekum, because the mechanics of flash formation are governed by the same cavity-pressure and parting-surface physics.
Across this article you will learn to calculate the clamping force that actually holds the parting line closed, diagnose flash against nine distinct root-cause categories, build a symptom-to-parameter correction matrix, set mold and machine maintenance limits that keep flash out by design, and grade flash so that first-pass yield can be controlled statistically. The end goal is not merely to shave a burr but to remove the trimming station from the value stream entirely, which is the defining economic promise of IBM over extrusion blow molding.
1. فهم الفلاش في الحقن والنفخ: أين يتشكل ولماذا يهم
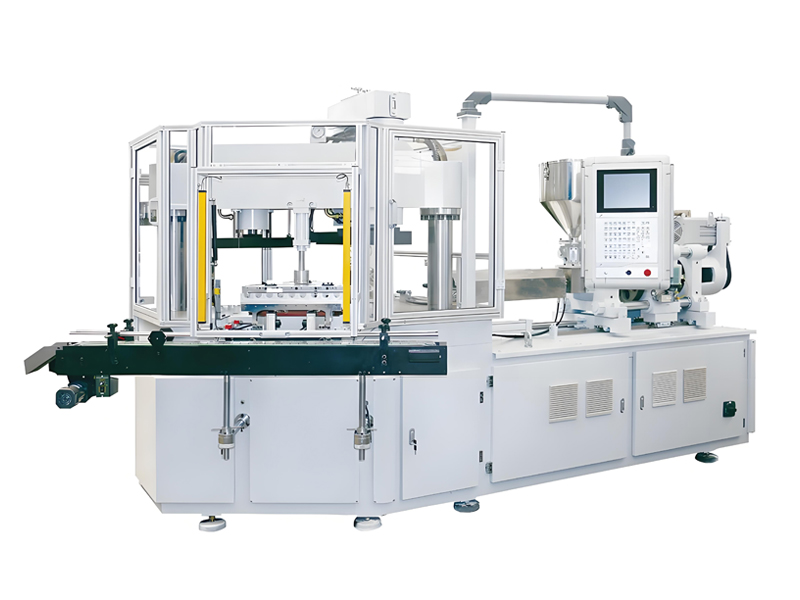
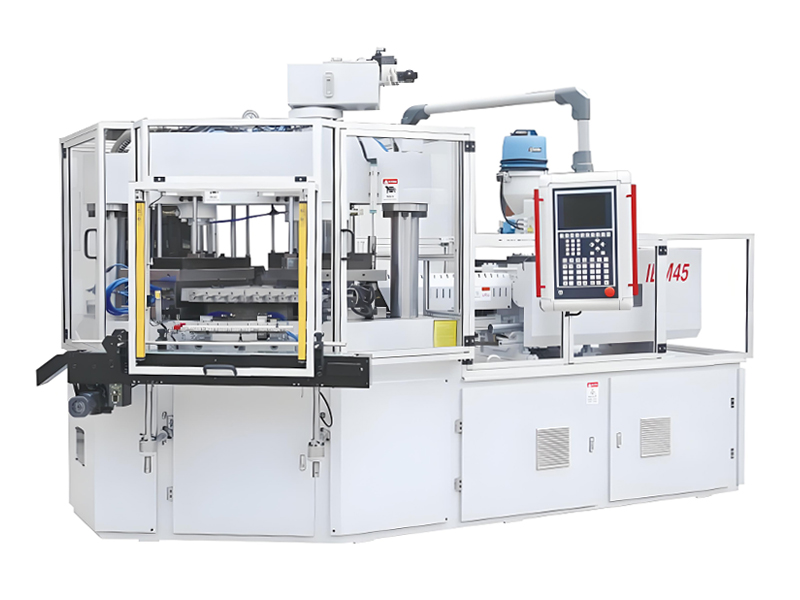
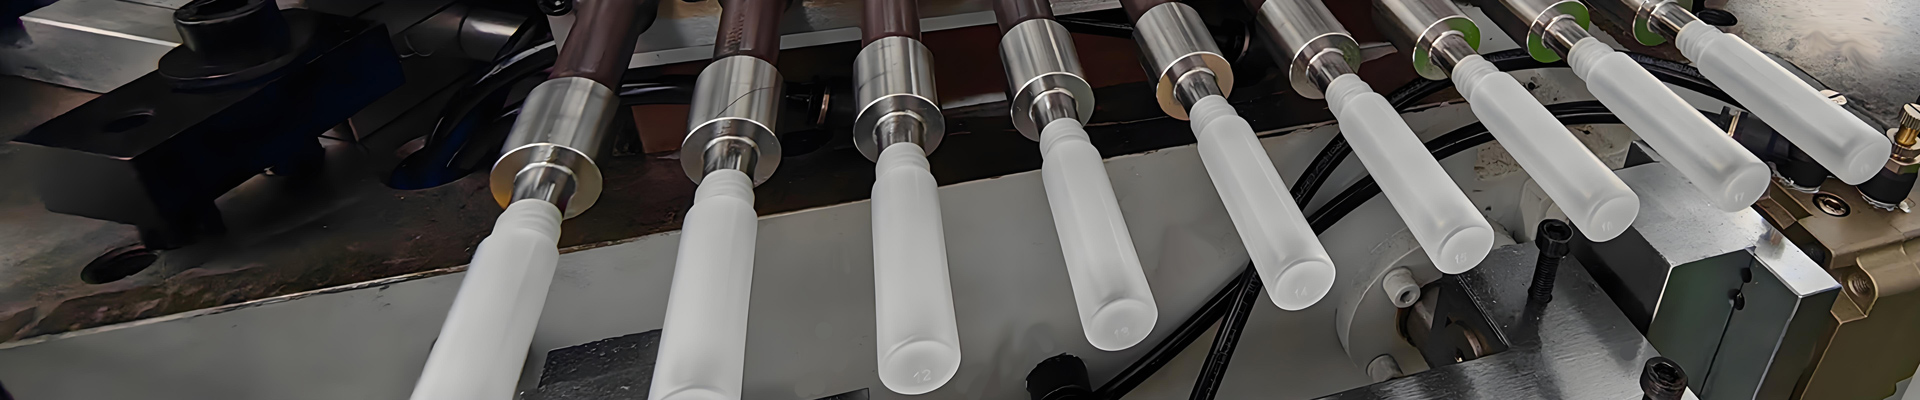
الحقن blow molding is a three-station, one-step hollow molding process. In the first station, the injection unit plasticizes polymer in the barrel and screw, then injects it into an injection cavity where the melt wraps around a heated core rod to form a hollow preform (often called the parison in IBM terminology) complete with a finished neck thread. The core rod then indexes to the blow station, where a blow pin expands the preform against a cold blow mold to form the bottle, and finally to the ejection station. Because the neck finish is molded, not cut or welded, a correctly running IBM machine should deliver bottles with a clean neck and only a very small bottom pinch-off scar that is sealed inside the mold.
Flash in IBM is therefore a deviation from the process intent, not a built-in feature. Recognizing the five characteristic flash locations is the first step to suppression, because each location maps to a different mechanical or process cause. A misdiagnosis that treats a neck-thread flash as a clamping-force problem will waste hours and may never resolve the defect.
1.1 النتوء على خط الفصل في قالب الحقن
This is the most common and visible flash. It forms as a thin fin along the split line of the injection cavity where the two cavity halves meet. The cause is almost always that the cavity-opening force generated by melt pressure exceeds the local clamping pressure at the parting plane, or that the parting faces themselves have lost flatness. On the IBM75 and similar machines, the injection cavity is held by the clamp system; if projection-area math is wrong or the toggle is worn, the cavity breathes open under pressure and melt bleeds into the gap.
1.2 نتوءات خيوط العنق (الميزة الأساسية يفترض أن تكون خالية من نتوءات العنق)
The defining selling point of injection blow molding is a flash-free neck finish. When neck thread flash appears, it means melt has entered the microscopic间隙 between the core rod shoulder and the neck ring that defines the thread. Because the neck is injected under high pressure, any gap at the neck-ring closure larger than roughly 0.01 mm will fill with melt and produce a star-shaped or radial flash on the finish. This is especially damaging for pharmaceutical and cosmetic bottles, where the finish must seal against a closure without secondary machining.
1.3 تجاوز التداخل بين القضيب الأساسي وحلقة الرقبة
The core rod is the central steel shaft on which the preform is molded and transferred. The neck ring closes around the rod to form the finish. Overflow at this interface is driven by core-rod wear, loss of coaxial alignment between the rod and the ring, or a neck-ring clamp that has lost preload. Unlike parting-line flash, this flash is concentrated at the finish and is hard to trim without damaging the thread, which is why prevention at the dimensional level is mandatory.
1.4 النتوء عند خط الفصل في قالب النفخ
At the blow station, the expanded bottle can produce a parting-line flash if the blow mold halves are not fully closed, if the blow-mold temperature is uneven, or if the preform is over-inflated against a misaligned cavity. Because the blow mold runs cold (8 to 20 degrees Celsius), blow-parting flash tends to be brittle and more visible than injection-parting flash. It is frequently confused with injection-parting flash during troubleshooting, so the inspector must identify which station the artifact originated from by its position on the bottle.
1.5 نتوء القرص السفلي (هالك القاع)
IBM still requires a bottom pinch-off where excess material is squeezed and severed as the bottle base is formed. A small, contained bottom scar is normal and acceptable. Excessive bottom flash indicates the pinch-off land is worn, the bottom mold temperature is too high, or the preform length and transfer timing are off so that too much material accumulates at the base. This is the one flash location that is partly inherent to IBM, which is why the grading standard treats the base differently from the neck.
Flash matters operationally for four reasons. First, every flash unit consumes a manual or mechanical trimming step that adds cost at a Medium level and creates a touch point that breaks clean-room discipline. Second, flash at the finish can prevent proper capping and cause leak failures at a High severity for medical and cosmetic lines. Third, flash is wasted material that lowers yield and raises regrind handling. Fourth, flash is the most reliable early-warning indicator of clamping or mold drift, so a flash trend is a leading process-control signal long before dimensional specs are violated.
2. الأسباب الجذرية التسعة لفلاش IBM: قائمة مراجعة تشخيصية
Flash in injection blow molding is governed by a simple inequality: if the separating force from cavity pressure exceeds the available clamping force projected onto the parting plane, melt enters the gap. In practice, nine distinct failure modes break that inequality or open a path around it. The table below summarizes them; the prose that follows gives the mechanism and the field-verified correction for each.
2.1 جدول التشخيص للأسباب التسعة
| No. | Root Cause | Typical Flash Location | Primary Verification | First Correction |
|---|---|---|---|---|
| 1 | Insufficient clamping force | الحقن and blow parting lines | F = projected area x cavity pressure x safety factor 1.1 to 1.3 | Raise clamp tonnage or reduce cavities per shot |
| 2 | Parting-face wear, flatness out of spec | الحقن parting line | Flatness must be 0.02 mm per 300 mm | Hand-scrape and re-lap parting faces |
| 3 | Platen parallelity and uneven tie-bar load | One-sided parting flash | Four tie-bar strain difference 5 percent or less | Re-level platens, re-torque tie bars |
| 4 | الحقن or holding pressure too high | الحقن parting line, neck | الحقن 60 to 120 MPa; hold 50 to 70 percent of injection | Lower injection and holding pressure |
| 5 | Melt temperature too high, viscosity too low | All locations, thin flash | PP 190 to 230 C, PE 180 to 210 C, PS 200 to 240 C, PET 265 to 285 C | Reduce barrel and nozzle temperature |
| 6 | Poor venting, trapped-gas back pressure | Local flash opposite vents | Vent depth 0.015 to 0.03 mm, width 3 to 6 mm | Clean or re-cut exhaust grooves |
| 7 | Uneven mold temperature | Asymmetric parting flash | الحقن 40 to 90 C, blow 8 to 20 C | Balance mold-temperature loops |
| 8 | Core-rod wear, coaxial error, neck-ring gap | Neck thread overflow | Neck-ring closure gap 0.01 mm or less | Rebuild or replace core rod, re-seat ring |
| 9 | Indexing-table position error | Misaligned flash at any station | Repeatability plus or minus 0.02 mm | Recalibrate indexing cam and sensor |
2.2 السبب 1: قوة تثبيت غير كافية
The clamp must counteract the opening force, which equals cavity pressure times the projected area of every cavity that shares the clamp. When the machine is sized for too many cavities, or when cavity pressure drifts upward, the parting line opens microscopically and flash appears along the entire split. This is corrected by raising clamp tonnage within the machine limit, reducing cavity count, or reducing the pressure that opens the cavity. The calculation is detailed in Section 3.
2.3 السبب 2: تآكل سطح الفصل وعدم مطابقة الاستواء للمواصفات
Even with adequate clamp, a parting face that has lost flatness will leak. Steel surfaces erode from abrasive fills, regrind, and repeated impact. The acceptance limit is 0.02 mm per 300 mm of face length. When the face is out of flat, the clamp load is carried on high spots, and the low spots become channels for melt. The fix is hand-scraping and lapping back to spec, verified by the dye-contact method described in Section 5.
2.4 السبب 3: توازي اللوحة وعدم انتظام حمل قضبان الربط
The four tie bars must share clamp load evenly. If one tie bar carries more strain than the others, the platen tilts and the parting line opens on the low-load side. The strain difference across the four bars should be 5 percent or less. Parallelity is restored by shimming the platen and re-torquing the tie bars to the factory preload specification. This cause produces characteristically one-sided flash and is easy to miss if only the clamp tonnage readout is checked.
2.5 السبب 4: ضغط الحقن وضغط التثبيت مرتفعان جداً
الحقن pressure for IBM typically sits between 60 and 120 MPa. Holding pressure should be 50 to 70 percent of the injection pressure. When these are set too high to compensate for a short shot or a cold cavity, the excess pressure overwhelms the local clamp at the neck and parting line. The correction is to reduce pressure in small steps while monitoring short-shot risk, and to solve the underlying short shot with temperature or speed rather than brute pressure.
2.6 السبب 5: درجة حرارة الذوبان مرتفعة جدًا
Every resin has a processing window. PP runs 190 to 230 degrees Celsius, PE 180 to 210, PS 200 to 240, and PET 265 to 285. Above the upper limit, melt viscosity collapses and the low-viscosity material penetrates gaps that would otherwise seal. The flash from overheating is characteristically thin and spreads across all locations. The correction is to lower barrel and nozzle setpoints and to verify actual melt temperature with a pyrometer rather than trusting the controller.
2.7 السبب 6: ضعف التهوية والضغط الخلفي للغاز المحبوس
Air trapped in the cavity cannot escape if exhaust grooves are clogged or too shallow. The compressed gas acts as a back pressure that locally prevents the cavity from filling, which the operator then “solves” by raising injection pressure, which in turn forces flash elsewhere. Exhaust grooves should be 0.015 to 0.03 mm deep and 3 to 6 mm wide. Cleaning or re-cutting these grooves frequently removes flash that was wrongly attributed to clamping force.
2.8 السبب 7: درجة حرارة قالب غير متساوية
The injection cavity runs warm at 40 to 90 degrees Celsius to keep the preform malleable, while the blow mold runs cold at 8 to 20 degrees Celsius to set the bottle quickly. A hot spot on the injection half lowers local viscosity and promotes parting flash; an uneven blow mold causes asymmetric expansion and blow-parting flash. Closed-loop mold-temperature control with balanced flow is the corrective.
2.9 السبب 8: تآكل القضيب الأساسي وفجوة حلقة العنق
The core rod and neck ring define the finish. Wear on the rod shoulder, loss of coaxial alignment, or a neck-ring gap above 0.01 mm lets melt into the finish. This cause is specific to the neck and is the most damaging for sealed containers. The fix is dimensional: rebuild or replace the core rod, re-seat the neck ring, and verify coaxiality with a dial indicator. It cannot be corrected by process pressure alone.
2.10 السبب 9: خطأ موضع طاولة الفهرسة
The three-station dial must place the core rod into each station within plus or minus 0.02 mm. If the index cam or sensor drifts, the preform is misaligned in the blow cavity and the parting line shifts, producing flash that appears at inconsistent positions. Recalibrating the indexing cam, replacing the worn Geneva mechanism, and verifying repeatability with a test indicator restores alignment.
3. حساب قوة التثبيت والتحقق الميداني
Clamping force is the foundation of flash control. The separating force at the parting line equals the cavity pressure multiplied by the total projected area of all cavities opened by that pressure. To hold the line closed with margin, multiply by a safety factor. The working formula, stated without symbolic notation, is: required clamping force equals projected area in square centimeters, times cavity pressure in bar, times a safety factor between 1.1 and 1.3.
Projected area is the area of the cavity as seen from the clamp direction, summed across every cavity that shares the clamp at one station. For a multi-cavity IBM injector, this is the sum of all cavity footprints plus the runner and neck-ring footprint. Cavity pressure is not the hydraulic pressure at the injection unit; it is the pressure acting inside the cavity, which for IBM typically ranges from 350 to 700 bar depending on resin stiffness, wall thickness, and flow length. Thin-wall, high-flow jobs push toward the top of the range.
3.1 مثال تطبيقي
Consider an eight-cavity PP bottle job. Each cavity has a projected area of 40 square centimeters, giving a total projected area of 320 square centimeters. Assume a cavity pressure of 500 bar and a safety factor of 1.2. Required clamping force equals 320 times 500 times 1.2, which is 192,000 newtons, or about 192 kilonewtons. If the installed machine provides a rated clamp of 750 kilonewtons, the process has ample margin, and flash from insufficient clamp is unlikely. If the same cavities are run on a 150 kilonewton clamp, the parting line will open and flash is guaranteed regardless of how clean the mold is.
3.2 التحقق الميداني بما يتجاوز القراءة
The clamp tonnage readout on the HMI is a commanded value, not a guaranteed value. Real clamp at the parting line should be verified by at least three methods. First, use pressure-sensitive film or a parting-line tonnage gauge placed between the cavities to measure actual contact pressure; the reading should be above the calculated requirement with margin. Second, measure the strain on each of the four tie bars with a portable strain gauge; the four readings should agree within 5 percent, confirming the platen is parallel and load is shared. Third, perform a gradual clamp-reduction test: lower tonnage in steps until flash first appears, then set production tonnage one safe step above that threshold to avoid wasting energy and over-stressing the toggle.
قاعدة عامة: اضبط المشبك عند أقل حمولة تحافظ على الفلاش في الدرجة A. التشغيل بأقصى مشبك يسرع تآكل العضو المفصلي وقضبان الربط ويخفي مشكلات أساسية في سطح الفصل أو قضيب القلب ستظهر لاحقًا كخردة.
3.3 عندما يكون ضغط التجويف هو العامل الحقيقي
Because clamping force scales directly with cavity pressure, the most energy-efficient flash fix is often to reduce the pressure that opens the cavity rather than to buy a bigger clamp. Lowering barrel temperature toward the process floor, reducing injection speed to limit flow resistance, and improving venting all reduce required cavity pressure. The safety factor of 1.1 to 1.3 absorbs normal batch-to-batch and temperature variation; running at 1.1 is acceptable only with tight statistical process control, while 1.3 is appropriate for mixed-regrind or variable-resin operations.
4. مصفوفة تحسين المعاملات: مطابقة عرض الفلاش مع الإجراء التصحيحي
Once the flash location and likely cause are identified, the fastest path to a flash-free process is a symptom-to-parameter matrix. The table below pairs each observable flash phenomenon with a preferred first adjustment, the recommended adjustment magnitude, the side effect to watch, and how to verify the fix. Adjust one variable at a time and document the result; simultaneous multi-variable changes make it impossible to know what worked.
| Flash Phenomenon | Preferred Adjustment | Adjustment Magnitude | Side Effect to Watch | Verification Method |
|---|---|---|---|---|
| Full injection parting-line fin | Raise clamp tonnage | Step up 5 to 10 percent to threshold | Toggle and tie-bar wear; energy rise | Tonnage film at parting line; visual Grade check |
| One-sided flash | Re-level platen, balance tie bars | Bring strain spread under 5 percent | None if done correctly | Four-bar strain gauge comparison |
| Neck thread flash | Reduce injection and holding pressure | Hold to 50 to 70 percent of injection | Short shot if reduced too far | Finish thread gauge; leak test |
| Thin flash across all areas | Lower barrel and nozzle temperature | Drop 5 to 15 C within window | Cold slug, flow marks | Melt pyrometer; short-shot review |
| Local flash opposite a vent | Clean or deepen exhaust grooves | Depth 0.015 to 0.03 mm, width 3 to 6 mm | Weak edge if over-cut | Burning and short-shot observation |
| Asymmetric blow-parting flash | Balance blow-mold temperature | Blow mold 8 to 20 C, even per zone | Cycle time if over-cooled | Per-zone thermocouple log |
| Finish overflow at rod shoulder | Rebuild or replace core rod, reseat ring | Neck-ring gap to 0.01 mm or less | Downtime for tooling | Coaxial dial indicator; finish gauge |
| Inconsistent position flash | Recalibrate indexing table | Repeatability plus or minus 0.02 mm | Station timing shift | Indicator test at each station |
| Excessive bottom pinch-off | Reduce preform length, cool base | Trim 1 to 3 mm transfer; base 8 to 20 C | Weak base if over-trimmed | Base burst test; pinch-off gauge |
4.1 كيفية استخدام المصفوفة دون إحداث عيوب جديدة
The side-effect column is as important as the adjustment. For example, raising clamp tonnage to kill parting flash will eventually accelerate toggle and tie-bar wear and raise energy cost at a Medium level, so it should be the last resort after venting, temperature, and pressure are optimized. Reducing injection pressure to fix neck flash can cause a short shot that itself forces an operator to slow the cycle or add material; the correct response is to confirm the cavity is fully vented and at temperature before blaming pressure. Always verify with the method column, because a visual “flash gone” that hides a developing short shot is a net loss.
4.2 توثيق التصحيح كوصفة
Every successful adjustment should be saved as a machine recipe. Aibim machines support parameter storage on an SD card so that a validated flash-free recipe can be reinstalled across the IBM75, IBM65, and IBM55 Hybrid fleet without re-deriving settings. This converts one engineer’s troubleshooting into a repeatable plant standard and is the most durable form of flash prevention.
5. معايير صيانة القالب لإنتاج IBM الخالي من الفلاش
Flash prevention is won or lost in mold maintenance. A mold that is geometrically correct will stay flash-free across a wide process window; a mold that has drifted will demand ever-tighter clamp and slower cycles. The standards below are the maintenance limits that keep IBM molds within their flash-free envelope.
5.1 تجليخ سطح الفصل والتحقق من تلامس الصبغة
After any disassembly or at the first sign of parting flash, the cavity parting faces are hand-scraped and lapped to a flatness of 0.02 mm per 300 mm. Verification uses the dye-contact (color-check) method: a thin coat of marking dye is applied to one face, the halves are mated under light pressure, and the contact pattern is inspected. A flash-free parting requires a contact ratio of at least 85 percent, meaning 85 percent of the face shows transferred dye. Below 85 percent, the unsupported low areas become melt channels. This check is cheap, fast, and far more reliable than trusting a feeler gauge alone.
5.2 استبدال الإدخال وسطح القرص
The neck ring, blow inserts, and bottom pinch-off land are wear items. Neck rings should be replaced or re-cut when the closure gap exceeds 0.01 mm or when thread definition degrades. The bottom pinch-off land wears from the severing action and should be rebuilt when the base scar grows beyond Grade B. Establishing a replacement interval based on shot count, rather than waiting for flash, converts an unplanned stop into a scheduled, low-cost changeover.
5.3 درجة التلميع وإنهاء السطح
الحقن cavity surfaces that contact melt should be polished to a specification that prevents melt adhesion and supports clean release; for cosmetic and medical bottles a high mirror polish on the cavity and a controlled matte on demold-help zones is typical. Over-polishing the parting line, however, can remove the micro-bite that helps the faces seat, so the parting line is finished to flatness rather than to maximum gloss. The blow cavity is usually satin-finished to aid release and control crystallinity on PP and PE.
5.4 درجة الفولاذ والصلابة وخلوص الموجهات
IBM cavities and core rods are commonly built from martensitic stainless tool steels such as S136 or 2316, heat-treated to a hardness of HRC 48 to 52. This hardness resists the abrasive wear from regrind and filled resins while remaining machinable for maintenance. Guide pins and bushings should hold a running clearance of 0.01 to 0.02 mm; beyond this, the cavity can shift and open a parting gap. Periodic measurement of guide clearance with a pin gauge catches drift before it becomes flash.
| Mold Element | Maintenance Limit | Verification Tool | Action if Exceeded |
|---|---|---|---|
| Parting-face flatness | 0.02 mm per 300 mm | Surface plate, dye contact | Hand-scrape and lap |
| Dye-contact ratio | 85 percent or higher | Color-check pattern | Re-lap parting faces |
| Neck-ring closure gap | 0.01 mm or less | Dial indicator, feeler | Rebuild or replace neck ring |
| Guide pin and bushing clearance | 0.01 to 0.02 mm | Pin gauge set | Replace guide set |
| Cavity steel hardness | HRC 48 to 52 (S136, 2316) | Portable hardness tester | Re-harden or replace insert |
| Exhaust groove depth | 0.015 to 0.03 mm | Micro-depth gauge | Re-cut groove |
5.5 انضباط التنظيف
Resin degradation, dust, and cardboard fibers from packaging are the quiet enemies of the parting line. A single fiber trapped on the parting face becomes a flash channel for thousands of cycles until someone scraps the tool. Daily parting-face cleaning with a lint-free cloth and a non-abrasive solvent, plus weekly inspection under magnification, keeps the faces seating. This is the lowest-cost, highest-leverage maintenance task in the entire flash program.
6. صيانة دقة الآلة: التثبيت والهيدروليك وأجهزة الاستشعار
The best mold in the world cannot stay flash-free on a machine whose clamp, hydraulics, or sensors have drifted. The IBM machine is a precision mechanism: the three-station indexing, the clamp, the injection unit, and the blow station must all hold their geometry shot after shot. The maintenance items below protect that geometry.
6.1 تزييت وتآكل المرفاع (التوغل) والوصلات
On toggle-clamp IBM machines, the linkage multiplies hydraulic force into clamp tonnage. Worn or dry links lose efficiency, so the commanded tonnage no longer reaches the platen. The toggle should be greased on the manufacturer schedule with the specified grade, and link pins should be measured for clearance periodically. A clamp that reads correct on the HMI but delivers less at the platen is a classic hidden cause of intermittent parting flash.
6.2 التسرب الداخلي للأسطوانة الهيدروليكية
The clamp is actuated by a hydraulic cylinder. Internal leakage past seals lets the clamp creep down during the hold phase, so tonnage that was adequate at close drops below threshold under cavity pressure and flash appears mid-run. Internal leakage is detected by monitoring clamp pressure decay with the pump stopped, or by a gradual drift in parting tonnage film readings. Replacing worn seals restores hold. Note that the hydraulic cylinder here is a legitimate actuator, distinct from the plasticizing barrel, which must never be called a cylinder in IBM terminology.
6.3 معايرة مستشعر الضغط
الحقن pressure, holding pressure, and cavity-pressure transducer readings drift with temperature cycles and wear. A transducer that reads 10 percent low lets the operator believe pressure is at 100 MPa when it is actually 110, and the extra opening force flashes the neck. Pressure sensors should be calibrated on a fixed cycle, typically every six to twelve months depending on run hours, against a reference gauge. Calibration records should be part of the machine passport.
6.4 إعادة فحص عزم الشد المسبق لقضبان الربط
The tie bars are pre-tensioned to a specified torque so that the clamp load is shared and the platen stays parallel. Thermal cycling and repeated stress relax the preload over time. Re-checking and re-torquing the tie bars to specification, and confirming the four-bar strain spread stays within 5 percent, keeps the parting line parallel and eliminates one-sided flash. This is a monthly to quarterly task on high-run machines.
6.5 الفهرسة ومحاذاة المحطات
The Geneva or servo indexing table must return the core rod to each station within plus or minus 0.02 mm. Misindex shows as flash that wanders around the bottle or as inconsistent wall thickness. The index cam, servo tuning, and station-lock pins should be inspected and the repeatability verified with a test indicator monthly. Many “mold” flash complaints are actually indexing complaints, so this check should precede any tooling teardown.
7. عوامل المواد: معدل تدفق المصهور وإعادة الطحن والتجفيف
لا يمكن لأي قدر من التثبيت أو الصيانة أن يعوض مادة معرضة بطبيعتها للنتوءات. يتم تحديد اللزوجة عند خط الفصل بواسطة درجة الراتنج ومحتوى الطحن المعاد ومستوى التجفيف، وجميعها الثلاثة قابلة للتحكم على مستوى المادة.
7.1 معدل تدفق الذوبان وحساسية النتوء حسب الراتنج
Melt flow rate, abbreviated MFR, is the inverse of viscosity: a higher MFR means a lower-viscosity melt that penetrates smaller gaps and flashes more readily. The table below lists typical MFR windows for the IBM-relevant resins and their relative flash sensitivity. Keeping MFR in the lower half of the recommended window is the material-side flash control.
| Resin | Typical MFR Window (g per 10 min) | Relative Flash Sensitivity | Notes for IBM |
|---|---|---|---|
| PP (homopolymer and copolymer) | 2 to 12 | Medium to High | Common for pharma and cosmetic; keep toward 2 to 6 |
| HDPE | 3 to 15 | Medium | Stiffer than LDPE; moderate flash risk |
| LDPE | 8 to 30 | High | Low viscosity flashes easily; tight clamp needed |
| PS (GPPS, HIPS) | 4 to 14 | Low to Medium | Forgiving; watch degradation at high temp |
| PET | MLR low, IV 0.70 to 0.84 | Low | Requires drying; stiff melt resists flash |
7.2 نسبة إعادة الطحن وانحراف اللزوجة
Regrind from in-house sprues and rejected preforms is routinely re-fed, but each re-processing lowers molecular weight and raises effective MFR, so the blend becomes more flash-prone with every pass. The regrind ratio must be capped and the blended MFR monitored. A common plant rule is to limit regrind to a fixed percentage and to mix it homogeneously with virgin so that cavity pressure stays predictable. Sudden flashes that coincide with a new regrind batch are almost always an MFR excursion rather than a mechanical fault.
7.3 التجفيف، خاصةً للـ PET
PET is hygroscopic and must be dried to a dew point of minus 40 degrees Celsius for about four hours before IBM, otherwise hydrolytic chain scission drops IV and MFR rises, while moisture flashes to steam in the cavity and creates both splay and flash-like fins. PE, PP, and PS are not moisture-sensitive, but surface condensation from cold storage should be avoided. A dehumidifying dryer with a verified dew point is a front-line flash-control device for any PET IBM line, including Aibim’s IBM machines running PCTG and PET grades.
7.4 التباين بين الدفعات والموردين
Even within one MFR grade, different lots vary. Incoming MFR verification on a melt flow rate tester, with lot-level records, lets the process engineer pre-adjust barrel temperature or clamp before flash appears. Treating material as a controlled input rather than a variable nuisance is what separates a stable flash-free line from a reactive one.
8. تصنيف الفلاش ومعايير القبول مع SPC
لجعل الفلاش خاصية جودة مُدارة بدلاً من حكم تقديري، يجب أن يستخدم الإنتاج مقياسًا من ثلاث درجات مرتبطًا بارتفاع الفلاش المقاس، مع تحكم إحصائي في العملية يقود قرار القبول.
| Grade | Flash Height | Disposition | Process Implication |
|---|---|---|---|
| Grade A | Up to 0.05 mm | No trimming required | Target state; fully automated |
| Grade B | 0.05 to 0.15 mm | Light dressing allowed | Investigate trend; avoid manual touch |
| Grade C | Above 0.15 mm | Scrap | Stop and correct root cause |
8.1 التحكم الإحصائي في العمليات والقدرة
Flash height should be measured on a sampled basis with a comparator or vision gauge and plotted on a control chart. The objective is not merely to sort good from bad but to keep the process centered so that Grade C is statistically rare. The capability index Cpk should be at least 1.33, meaning the process spread fits within the spec limits with comfortable margin. When Cpk falls below 1.33, the process is at risk of drifting into Grade C even when the current mean looks acceptable, so corrective action is triggered on capability, not on the first scrap unit.
8.2 حيث يتم تدريج القاعدة بشكل مختلف
Because a small bottom pinch-off is inherent to IBM, the base scar is often graded with slightly more tolerance than the neck and parting line, provided it stays within the sealed, cosmetic, and burst-test limits. The neck finish, by contrast, is held to Grade A because any finish flash compromises capping and appearance for pharmaceutical and cosmetic bottles. Grading must therefore be location-aware, which is why the inspector records flash by station, not by a single global number.
8.3 ربط الدرجة بالأسباب التسعة
Each grade excursion should be traced back to one of the nine causes through the diagnostic table. A run of Grade B at the neck points to cause 8 (core rod or neck ring); a Grade B at the parting line with rising cavity pressure points to cause 4 or 5; a wandering Grade B across stations points to cause 9 (indexing). Closing this loop turns the grading system into a continuous-improvement engine rather than a sorting gate.
9. فوائد إلغاء أعمال إزالة الفلاش بعد المعالجة
إن الأساس التجاري لتقليل الوميض ليس الجرامات الموفرة من البوليمر؛ بل هو إزالة عملية التشذيب بأكملها وعواقبها. يلخص الجدول أدناه فئات الفوائد باستخدام مستويات تكلفة وأثر نسبية بدلاً من الأرقام المطلقة.
| Benefit | Magnitude | Effect on Operation |
|---|---|---|
| Removed trimming-station labor | Cost level Medium | One or more operators freed per shift |
| Reduced secondary contamination | Severity High for pharma and cosmetic | Cleaner bottles, fewer particle complaints |
| Yield improvement | 1.5 to 3 percentage points | Fewer Grade C scrapped units |
| Cycle-time shortening | Percent reduction Low to Medium | No trim dwell; smoother flow |
| Capital intensity of fix | Mostly Low to Medium | Tuning and maintenance, not new machine |
9.1 العمالة والتلوث
A trimming station is a manual touch point. Removing it eliminates the associated labor at a Medium cost level and, more importantly, removes a contamination pathway that is especially serious for pharmaceutical and cosmetic bottles where the interior must stay sterile. Flash-free IBM is what makes a fully enclosed, automated, clean production cell realistic, which is precisely why medical and personal-care brands specify IBM over extrusion blow molding despite the higher machine cost.
9.2 الإنتاجية وزمن الدورة
Removing Grade C scrap and Grade B rework typically lifts first-pass yield by 1.5 to 3 percentage points. Because no trim dwell is needed and the process can run at the lowest adequate clamp, cycle time shortens by a Low to Medium percentage. Across a 100-plus-lines-per-year Aibim installation running continuously, that yield and cycle gain compounds into a material capacity increase without additional machines.
9.3 تأطير التكلفة دون عملة
To keep the analysis vendor-neutral and locally meaningful, all cost effects are expressed as relative levels: Low, Medium, High, Very High, or Premium. A trimming station carries a Medium recurring labor cost; contamination risk for medical lines carries a High consequence; the capital to fix flash through tuning and maintenance is mostly Low to Medium, because the corrective actions are process and tooling care rather than new equipment purchase. This relative framing lets each plant substitute its own local economics.
10. قائمة مراجعة الوقاية من الفلاش يوميًا وأسبوعيًا وشهريًا
التحكم في النتوءات (الفلاش) هو انضباط وليس حدثًا. تحول قائمة التحقق أدناه الأسباب التسعة ومعايير الصيانة إلى روتين يمكن للمشغلين والفنيين تنفيذه دون تفسير. لكل بند مسؤول وسجل.
| Frequency | Checklist Item | احصل على عرض أسعارance | Record |
|---|---|---|---|
| Daily | Verify clamp tonnage at parting line | Above calculated requirement | Shift log |
| Daily | Clean injection and blow parting faces | No fiber or residue | Operator sign-off |
| Daily | Clear exhaust grooves | Depth 0.015 to 0.03 mm open | Visual check |
| Daily | Inspect core rods for wear and coaxiality | Neck-ring gap 0.01 mm or less | Dial indicator note |
| Daily | First-article flash grade approval | Grade A at neck and parting | QA stamp |
| Weekly | Measure parting-face flatness | 0.02 mm per 300 mm, 85 percent contact | Maintenance ticket |
| Weekly | Re-torque neck-ring clamps | To spec; gap verified | Torque log |
| Weekly | Check indexing repeatability | Plus or minus 0.02 mm | Indicator test |
| Weekly | Review flash-grade trend and Cpk | Cpk at least 1.33 | SPC report |
| Monthly | Calibrate pressure sensors | Within reference tolerance | Calibration cert |
| Monthly | Inspect toggle and hydraulic cylinder wear | No leakage, no excess clearance | الخدمة report |
| Monthly | Re-check tie-bar preload torque and strain | Four-bar strain spread 5 percent or less | Strain log |
10.1 جعل قائمة الفحص دائمة
A checklist that is not recorded is a hope. Each item above should write to a log that the shift leader reviews and that the plant manager samples. Over time, the logs become the evidence that flash is controlled by design, which supports both internal quality audits and external certifications such as ISO and CE that Aibim and the Wanplas group maintain across their factories. The discipline is what converts a one-time fix into a permanently flash-free line.
الأسئلة الشائعة
لماذا لا يزال النفخ بالحقن ينتج نتوءات السن اللولبي للعنق عندما يفترض أن تكون العملية خالية من النتوءات عند التشطيب؟
IBM forms the neck finish by injecting melt against a neck ring mounted on the core rod. Flash appears when the neck-ring clamp gap exceeds roughly 0.01 mm, when the core rod is worn or out of coaxial alignment, or when injection pressure overcomes the local clamp at the threaded section. The root cause is almost always a dimensional or pressure issue at the neck-ring and core-rod interface rather than the blow station.
كيف تُحسب قوة الإغلاق المطلوبة لآلة قولبة النفخ بالحقن؟
Use the relationship that required clamping force equals the projected area of all cavities in square centimeters, multiplied by cavity pressure in bar, multiplied by a safety factor of 1.1 to 1.3. Cavity pressure typically ranges from 350 to 700 bar depending on material and wall thickness. For an eight-cavity PP job with 40 square centimeters projected area per cavity and 500 bar cavity pressure at a 1.2 factor, required force is about 192 kilonewtons.
ما المادة الأكثر حساسية للنتوءات في قولبة النفخ بالحقن؟
Materials with a high melt flow rate are the most flash-sensitive because low-viscosity melt penetrates the smallest parting gaps. LDPE and broad-MFR PP grades flash most readily, while PET and PS with controlled MFR are more forgiving. Keeping MFR in the lower half of the recommended window and limiting regrind addition reduces flash tendency.
ما مستوى استواء خط الفصل المطلوب لتجنب النتوءات على قوالب IBM؟
The mold parting surfaces should hold a flatness of 0.02 mm per 300 mm and a dye-contact, or color-check, ratio of at least 85 percent after hand-scraping. When flatness exceeds the limit or contact drops below 85 percent, melt squeezes through the gap and produces a continuous parting-line flash that must be trimmed.
كيف يؤثر توزيع درجة حرارة القالب على النتوءات (flash) في قولبة النفخ بالحقن؟
The injection mold runs at 40 to 90 degrees Celsius while the blow mold runs much colder at 8 to 20 degrees Celsius. Local hot spots on the injection half lower viscosity and push melt into the parting line, whereas uneven blow-mold temperature causes asymmetric expansion and blow-parting flash. Balanced, closed-loop mold-temperature control is essential.
ما قائمة الفحص العملية اليومية والأسبوعية والشهرية للوقاية من النتوءات؟
Daily: verify clamp tonnage, clean parting faces, clear exhaust grooves, inspect core rods, and approve the first-article. Weekly: measure parting flatness, re-torque neck-ring clamps, check indexing repeatability, and review flash-grade trend. Monthly: calibrate pressure sensors, inspect toggle and hydraulic cylinder wear, re-check tie-bar preload, and confirm cavity-pressure setpoints.
كيف يتم تصنيف النتوءات (Flash) وما هو معيار القبول؟
Grade A is flash up to 0.05 mm and needs no trimming; Grade B is 0.05 to 0.15 mm and is lightly dressed; Grade C exceeds 0.15 mm and is scrapped. Production should be controlled by statistical process control with a process capability of Cpk at least 1.33 so that Grade C occurrences stay statistically rare.
ما الفوائد القابلة للقياس للتخلص من أعمال إزالة النتوءات بعد المعالجة؟
Removing trimming stations cuts labor at a Medium cost level, reduces secondary contamination risk that is critical for pharmaceutical and cosmetic bottles, lifts yield by roughly 1.5 to 3 percentage points, and shortens cycle time by a Low to Medium percentage. The combined effect improves overall equipment effectiveness without capital-intensive retrofits.
الخلاصة
Flash reduction in injection blow molding is achieved not by a single knob but by disciplined control of the force balance at every parting surface. The neck finish, the injection parting line, the blow parting line, and the bottom pinch-off each have distinct causes, and the nine-cause diagnostic table plus the symptom-to-parameter matrix give a repeatable path from symptom to fix. The clamping-force relationship, anchored by a safety factor of 1.1 to 1.3 and verified with tonnage film and four-bar strain checks, sets the foundation; mold maintenance to a 0.02 mm per 300 mm flatness and 85 percent dye contact keeps the seal; machine-precision care on the toggle, hydraulic cylinder, sensors, and tie bars preserves it; and material control of MFR, regrind, and drying removes the viscosity that flash needs.
For Aibim, a Wanplas factory, the payoff is built into the value proposition of its IBM75, IBM65, and IBM55 Hybrid machines: a flash-free, neck-finished bottle that needs no trimming station, protecting both cost and cleanliness for pharmaceutical, food, drink, and cosmetic customers across more than 40 countries. By grading flash with Grade A, B, and C limits and controlling the process to Cpk at least 1.33, a plant turns flash from a recurring complaint into a managed, and ultimately eliminated, characteristic. The daily, weekly, and monthly checklist is what makes that elimination permanent. When flash is designed out, the trimming operation disappears, yield climbs by 1.5 to 3 percentage points, cycle time shortens, and the IBM line delivers exactly the clean, finished container it was engineered to produce.