Table of Contents
- Why Blow Pressure Is a System, Not a Single Number
- The Physics of Blow Pressure in Bottle Forming
- The Two-Stage Pressure System: Preblow and Final Blow
- How Blow Pressure Couples With Temperature, Timing, and Mold
- Optimal Blow Pressure Settings by Material
- Pressure Correction by Bottle Shape and Wall Thickness
- Step-by-Step Pressure Tuning Methodology
- Pressure-Related Defects: Symptom and Adjustment Quick Reference
- Pneumatic System and Energy Efficiency
- Safety of High-Pressure Air Systems
- Quality Verification Methods
- Relative Cost and Energy Profile
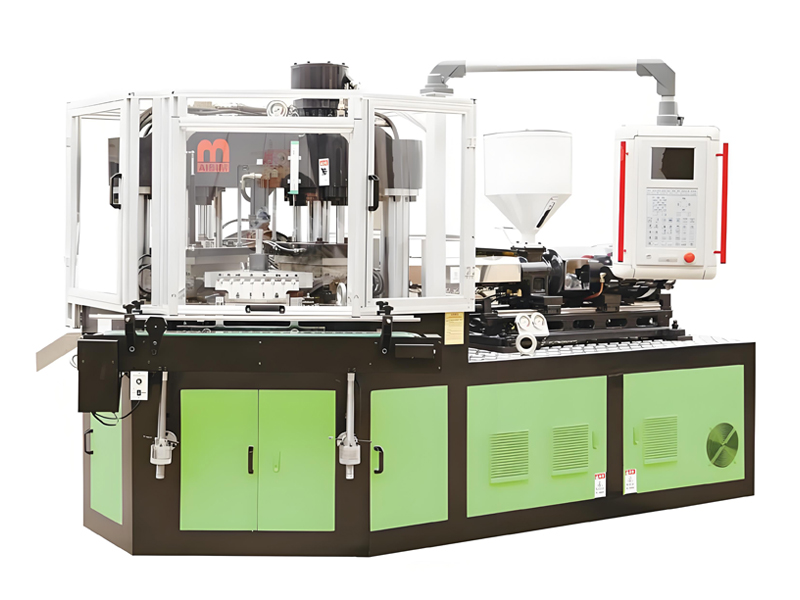
- Aibim Injection Blow Molding Machines
- Application Industries and Material Suitability
- Selection Guide: Requirement to Model
- Service and Support
- Frequently Asked Questions
- Conclusion
Why Blow Pressure Is a System, Not a Single Number
Aibim, a Wanplas factory based in Zhangjiagang, has manufactured injection (stretch) blow molding machines for more than 12 years, with 20 years of accumulated know-how in the injection blow molding field. Our lines serve customers in over 40 countries, run from our own CNC machining center, and produce more than 100 lines per year from a new factory established in 2022. Container sizes span from 3 ml medical droppers to 1000 ml cosmetic and food bottles. The single most misunderstood parameter among new operators is blow pressure. Many buyers ask for “the right blow pressure” as if it were one number printed on a dial. In reality, blow pressure is a system. It is the combination of a low-pressure preblow stage and a high-pressure final blow stage, multiplied by timing, material behavior, parison or preform temperature, mold temperature, and bottle geometry.
This guide explains blow pressure as a controllable process window rather than a fixed setpoint. We cover the physics of gas pressure pushing molten polymer against a cold mold cavity, the two-stage pressure architecture used on Aibim three-station one-step IBM machines, how pressure interacts with temperature and timing, and a full material-by-material table of optimal pressure windows. Whether you run PET, PP, PE, PS, SAN, PC, ABS, or TPU, the methodology below lets you move from a generic starting point to a verified, repeatable pressure recipe stored on the machine’s SD card.
Key Statistics
– Aibim: 12+ years of machine manufacturing, 20 years in injection blow molding know-how
– Exported to 40+ countries; 100+ lines per year capacity
– Container range 3 ml to 1000 ml; three-station one-step IBM process
– PREFILL hydraulic technology saves a minimum of 35% energy versus conventional hydraulic lines
– CE certified with light curtain and laser sensor safety systems
The Physics of Blow Pressure in Bottle Forming
Blow pressure exists for one physical purpose: to drive the molten polymer of the parison or preform outward until it contacts every surface of the blow mold cavity, then to hold it there while it freezes and takes the final shape. In injection blow molding the parison is injected as a tubular blank at the first station, transferred to the blow station, and expanded by compressed air. The air pressure does mechanical work against the polymer’s viscosity and against the heat-transfer rate of the mold wall.
When blow pressure is too low, the polymer cannot overcome its own viscosity and the mold’s cooling effect before it solidifies. The result is poor mold contact, shallow detail, thick-and-thin wall distribution, and weak structural zones. When blow pressure is too high, the polymer is forced into a thin, over-stretched skin that loses mechanical strength, develops internal stress, risks burst during the cycle, accelerates mold wear, and wastes compressed-air energy. The correct pressure is therefore a balance point where the material fully contacts the cavity with the minimum air energy required.
Air pressure also interacts with the rate of pressure rise. A steep, instant step from zero to maximum pressure can trap the material unevenly and create localized stress marks, while a controlled ramp that begins with a gentle preblow and rises to final blow gives the material time to distribute before it sets. This is why a two-stage system outperforms a single fixed pressure for bottles with non-uniform geometry.
The pressure required to move the polymer is a function of its extensional viscosity at the moment of blowing. A polymer that is still hot and soft extends at low pressure; the same polymer a few seconds later, after the mold has pulled heat from its surface, may need double the pressure to move the same distance and will instead tear or thin. This is the central reason blow pressure cannot be set without also controlling temperature and time. The operator is, in effect, racing the freeze front: pressure must arrive while the material is still mobile enough to flow, but not so early or so hard that it stretches the wrong zone.
Another physical factor is the surface area the air must push against. As the bubble grows, its internal volume rises with the cube of the radius while the wall area rises with the square, so the local stress in the wall drops as the bottle expands, provided the material keeps thinning evenly. If the pressure is too low, the bubble stalls before it reaches the cavity corners and the wall freezes in a thick, uneven state. If the pressure is too high, the bubble reaches the wall so fast that the material has no time to redistribute, producing a thin spot opposite the injection point and a thick ring near the neck. Reading the wall-thickness profile after a trial shot tells you far more about the correct pressure than the pressure gauge alone.
The Two-Stage Pressure System: Preblow and Final Blow
On Aibim IBM machines the pneumatic circuit is divided into two controlled stages. Understanding the role of each stage is the foundation of correct tuning.
Preblow Pressure (Low-Pressure Stage)
The preblow stage applies a low air pressure the moment the parison or preform enters the blow mold. Its job is to begin the expansion, establish the initial bubble shape, and guide where the material will go before the high pressure arrives. Preblow pressure and preblow timing together decide the wall-thickness distribution more than any other single variable. If the preblow is too weak or arrives too late, the material collapses onto the mold base before it has spread upward, leaving a thick bottom and a thin shoulder. If the preblow is too strong or arrives too early, the material stretches prematurely and thins in the zone that still needs material later.
Typical preblow windows by material are detailed in the material table below, but as a concept the preblow for oriented materials such as PET or PCTG often sits around 8 to 16 bar, while soft materials such as LDPE or TPU sit closer to 4 to 9 bar.
Final Blow Pressure (High-Pressure Stage)
The final blow stage applies the high pressure that completes cavity contact, forms fine detail such as embossing or threads, and sets the bottle dimensions. Final blow pressure is held for a defined dwell, then vented. For PET the final blow commonly ranges 25 to 40 bar; for PP, PE, PS, and PC the windows differ and are listed per material. After the high-pressure dwell, a short exhaust and cooling phase lets the part solidify enough for transfer to the ejection station.
The Injection Blow Molding Difference
In IBM the parison is injection-molded with precise wall distribution, then blown in a separate station on the same machine. Compared with extrusion blow molding, where the parison is extruded and hotter with more sag, IBM parisons are cooler and more controlled, so the blow pressure requirement is steadier and the scrap rate lower. Compared with two-step stretch blow molding of PET, IBM performs the blow on a preform that was just injected rather than re-heated, which removes the reheat oven variable but still requires correct blow pressure and timing for full orientation.
How Blow Pressure Couples With Temperature, Timing, and Mold
Blow pressure is never tuned in isolation. It belongs to a triangle of pressure, temperature, and timing. Changing one side forces a change in the others.
- Temperature coupling: A warmer parison or preform flows at lower pressure. If you raise the barrel or mold temperature, you can often lower the blow pressure and still get full contact. A colder part needs more pressure, but pushing too much pressure on cold material creates stress and burst risk.
- Timing coupling: Preblow delay and final-blow dwell are timing levers. A delayed preblow shifts material downward; a longer final dwell improves detail but extends the cycle and energy use.
- Mold temperature coupling: Mold temperature controls freeze rate. A cold mold lets you use higher pressure for crisp detail but risks stress; a warm mold for crystallizable materials such as PP controls crystallization yet needs adjusted pressure to avoid sag.
- Clamping force coupling: Blow pressure acts against the internal cavity surface. Adequate clamping force prevents flash at the parting line. Raising blow pressure without enough clamping force produces flash rather than better bottles.
The practical rule: set the temperature window first, then preblow to set distribution, then final blow for contact, then trim timing. Never chase a defect by moving only the pressure number while ignoring temperature and timing.
Parison Wall Design and Its Effect on Blow Pressure
In injection blow molding the parison is not a neutral tube; its wall thickness profile is set at the injection station and directly determines how much blow pressure is needed and where. A parison with a heavier base and lighter shoulder will need less final blow pressure at the bottom and more at the top. A parison with uniform wall needs a more uniform pressure ramp. Because the parison wall is programmable through the injection and core-rod design, the blow pressure window is really the second half of a two-part control system: injection sets the material budget, blow pressure spends it.
This coupling means a pressure problem is sometimes solved at the injection end rather than the blow end. If a bottle consistently shows a thin shoulder regardless of final blow pressure, the parison is likely too light at the shoulder and no amount of air will move material that is not there. Adding parison weight at that zone, or shifting the core-rod program, reduces the required blow pressure and improves the result. Conversely, an over-heavy parison forces you to raise pressure merely to spread excess material, which wastes energy and stresses the mold. Treating parison design and blow pressure as one loop is the fastest route to a stable recipe.
Stretch Rod Interaction
On machines that include a stretch step, the stretch rod physically lengthens the preform before the air arrives. The rod sets the axial orientation; the blow pressure sets the radial orientation. If the rod moves too far before the preblow, the material is already thin axially and the final blow will over-thin the side wall. If the rod moves too late, the preblow alone must do the axial work and will need a higher pressure than the material tolerates. The pressure recipe therefore includes the stretch rod speed and start point as hidden variables, especially for PET and PCTG where biaxial orientation defines quality.
Optimal Blow Pressure Settings by Material
The table below gives engineering windows for each material processed on Aibim IBM machines. These are typical starting ranges, not guaranteed setpoints; always verify on the actual mold and material grade, and store the confirmed recipe on the SD card. Process temperature is the melt temperature in the barrel; mold temperature is the blow cavity temperature; hold time is the final-blow dwell.
Read the table as a band, not a point. Within each band, the correct value depends on wall thickness, bottle size, and cavity count. A thicker-wall bottle sits at the lower edge of the final-blow band because the material has more mass to push but less distance to travel; a thin-wall large bottle sits higher because the air must drive a light shell fully into a large cavity before it freezes. When moving between grades of the same polymer, raise the pressure slightly for higher molecular weight or higher filler content, and lower it for easier-flow grades. The per-material notes that follow explain the behavior behind each band so you can reason about adjustments instead of guessing.
| Material | Process Temp (°C) | Preblow (bar) | Final Blow (bar) | Hold Time (s) | Mold Temp (°C) | Typical Defect Linkage |
|---|---|---|---|---|---|---|
| PET | 260–285 | 8–16 | 25–40 | 1.5–3.0 | 10–25 | Low orientation if preblow weak; haze if over-pressured |
| PCTG | 255–280 | 8–15 | 24–38 | 2.0–3.5 | 20–40 | Stress marks if cooled too fast |
| PP (clarified) | 220–260 | 6–12 | 20–34 | 2.0–4.0 | 20–60 | White stress marks if pressure ramps too fast |
| HDPE | 200–230 | 5–10 | 16–30 | 2.0–4.0 | 10–40 | Softness; needs good cooling before eject |
| LDPE / LLDPE | 180–220 | 4–9 | 14–26 | 2.0–4.0 | 10–40 | Low rebound; risk of sticking |
| PS | 200–240 | 6–12 | 18–30 | 1.5–3.0 | 20–50 | Brittle; bursts if final blow too high |
| SAN | 210–250 | 7–13 | 20–32 | 2.0–3.5 | 40–70 | Needs warm mold for gloss; sensitive to over-pressure |
| PC | 280–320 | 10–18 | 30–45 | 3.0–6.0 | 80–120 | High dry requirement; stress cracks if over-pressured |
| ABS | 210–250 | 7–13 | 22–36 | 2.5–4.5 | 50–80 | Opaque; tolerant, medium pressure |
| TPU | 190–230 | 4–9 | 14–26 | 3.0–6.0 | 20–60 | Soft elastic; sticking and rebound control needed |
PET and PCTG
PET and PCTG are orientation-sensitive. PET must be dried below about 50 ppm moisture before processing, and the preblow establishes the biaxial orientation that gives the bottle its strength and clarity. A weak preblow leaves the material un-oriented and cloudy; a correct preblow followed by a 25–40 bar final blow gives a clear, strong bottle. PCTG is less moisture-sensitive than PET but still benefits from a controlled ramp; over-pressure on a fast-cooling cavity produces stress whitening rather than crisp detail.
PP
PP is crystallizable and temperature-sensitive. Clarified PP for transparent bottles needs a warm enough mold to control crystallization, yet too warm a mold causes sag that must be countered by adjusting pressure timing rather than by raising pressure blindly. A gentle pressure ramp reduces the white stress marks common in PP. The window of 6–12 bar preblow and 20–34 bar final blow suits most PP bottles.
PE (HDPE, LDPE, LLDPE)
Polyethylene is soft and has low rebound, so it needs relatively low blow pressure. HDPE suits 16–30 bar final blow; LDPE and LLDPE need even less because they are more flexible and tend to stick to the cavity. Cooling and demolding control matter more than raw pressure for PE. Over-pressuring PE wastes air and can flash at the parting line without improving the bottle.
PS and SAN
PS is intrinsically transparent but brittle. Final blow above the material’s comfort band causes burst or micro-cracks. A gentle, well-timed pressure rise is essential. SAN is similar but more chemical-resistant and glossy; it wants a warmer mold (40–70 °C) for surface gloss and a moderate pressure that does not over-stress the part.
PC
PC has high viscosity and demands high drying (below about 50 ppm) plus high process temperature (280–320 °C) and a warm mold (80–120 °C) to avoid stress. Blow pressure is among the highest of the common materials, 30–45 bar final, but the pressure must rise smoothly to avoid internal stress cracking. PC bottles are usually for medical or reusable drinkware where dimensional stability is critical.
ABS
ABS is opaque, tough, and forgiving. Medium pressure (22–36 bar final) is enough. It is chosen for cosmetic and personal-care jars where color and surface finish matter more than clarity. No special drying beyond normal drying is required, and the mold can run warm for good surface.
TPU
TPU is soft and elastic. It needs low pressure (14–26 bar final) and careful demolding because the elastic memory can cause sticking and rebound. Longer hold and cooling before ejection reduce deformation. TPU bottles appear in specialty medical and soft-touch cosmetic applications.
Pressure Correction by Bottle Shape and Wall Thickness
A pressure recipe that works for a round 100 ml bottle may fail on a 750 ml asymmetric bottle with a handle. The table below gives correction rules you apply on top of the material base window.
| Bottle Type | Preblow Correction | Final Blow Correction | Timing Note |
|---|---|---|---|
| Thin wall (≤ 0.4 mm) | Slightly higher to avoid early contact | High, for full cavity contact | Shorten high-pressure dwell to limit thinning |
| Thick wall (≥ 1.2 mm) | Lower and later | Extend dwell and hold | Longer hold for complete freeze |
| Large volume (> 500 ml) | Lower, delayed preblow | Extend final dwell | Manage cooling, watch cycle time |
| Small volume (< 50 ml) | Higher preblow | Moderate final | Fast cycle, short dwell |
| Handle or asymmetric | Zone-balanced | Higher at fill stage for handle | Delay to fill recessed zones |
| Wide mouth | Lower preblow | Moderate final | Watch neck finish |
| Narrow neck | Moderate | Ensure base fills first | Confirm base before neck pressure |
Step-by-Step Pressure Tuning Methodology
Use the following decision flow whenever you start a new material, a new mold, or a new bottle size. The flow keeps pressure, temperature, and timing in the correct order.
| Step | Action | Set / Adjust | Verify |
|---|---|---|---|
| 1 | Fix material temperature window | Barrel and mold temp per material table | Melt flows, no degradation |
| 2 | Set preblow to form bubble | Preblow bar and delay per material | Even early expansion, no collapse |
| 3 | Set final blow for contact | Final blow bar and ramp rate | Full cavity contact, detail formed |
| 4 | Fine-tune timing | Preblow delay, final dwell, exhaust | Wall distribution balanced |
| 5 | Validate the part | Measure wall, volume, burst, top load | Within spec; no stress marks |
| 6 | Save and reuse | Store recipe on SD card | Same recipe runs on sister machines |
Begin at the low end of the final-blow window and increase only until full cavity contact is achieved. Every increase above the minimum is wasted compressed-air energy. Document the accepted numbers so the recipe can be reloaded on another IBM65 or IBM75 without re-tuning from zero.
Pressure-Related Defects: Symptom and Adjustment Quick Reference
The following table maps common blow defects to the pressure-related adjustment direction. Treat it as a first-response card; always confirm with temperature and timing checks.
| # | Symptom | Likely Pressure Cause | Adjustment Direction |
|---|---|---|---|
| 1 | Poor mold contact / incomplete forming | Final blow too low or delayed | Raise final blow; check preblow timing |
| 2 | Thin wall in shoulder or side | Preblow too early/strong, uneven parison | Lower or delay preblow; adjust parison temp |
| 3 | Thick wall / material pooling at base | Preblow too late, final too low | Advance preblow; raise final blow |
| 4 | Bottle burst during cycle | Final blow too high or ramp too steep | Lower final blow; soften ramp |
| 5 | White stress marks (PP/PE) | Pressure ramp too fast, cold material | Reduce pressure rate; raise temp |
| 6 | Flash at parting line | Final blow exceeds clamping force | Lower final blow; verify clamping force |
| 7 | Neck or finish deformation | Local over-pressure at neck | Reduce blow at neck; check mold temp |
| 8 | Unstable base / rocking | Preblow timing wrong, base not set | Adjust preblow timing; lower final slightly |
| 9 | Poor detail / embossing unclear | Final blow too low or dwell short | Raise final blow; extend dwell |
| 10 | Internal stress cracking (PC/PS) | Over-pressure, fast cooling | Lower pressure; raise mold temp; anneal |
| 11 | Ovality / distortion after eject | Pressure-cooling imbalance | Balance pressure with cooling time |
| 12 | Weld line at handle | Insufficient fill-stage pressure | Raise final at handle stage; adjust parison |
| 13 | Surface haze from over-pressure | Final blow too high for material | Reduce final blow |
| 14 | Short shot / incomplete fill | Air volume or final blow insufficient | Raise final blow; check air supply volume |
| 15 | Pinch-off too thin / leak | Clamping and pressure mismatch | Verify clamping; tune pressure |
| 16 | Residual pressure trap | Exhaust timing too late | Advance exhaust; check valve |
Common Pressure-Setting Mistakes
Even experienced operators repeat a few errors that the method above is designed to prevent. Recognizing them shortens the tuning time.
- Setting pressure before temperature: With the wrong barrel or mold temperature, any pressure number is meaningless. Fix temperature first.
- Chasing one defect with more pressure: A thin shoulder is rarely fixed by raising final blow; it is fixed by parison weight or preblow timing. More pressure just moves the problem elsewhere.
- Using one recipe across materials: PET and PP are not interchangeable; the recipe must change with the resin grade.
- Ignoring the ramp rate: The peak number matters less than how fast it arrives. A soft ramp prevents burst and stress marks.
- Not saving the recipe: A verified recipe on the SD card is lost knowledge if it is not stored and labeled by material and bottle.
- Over-pressuring for safety margin: A 20% pressure margin over the minimum rarely helps and always wastes air and wears the mold.
Pneumatic System and Energy Efficiency
Compressed air is one of the largest hidden costs in blow molding. Aibim machines use PREFILL technology and a variable displacement pump pressurizing system in the hydraulic circuit, and a staged high-low pressure air system for the blow function. The energy-saving design reduces consumption by a minimum of 35% compared with conventional hydraulic lines.
Air quality matters. For food, pharmaceutical, and cosmetic bottles the compressed air should be oil-free and dried to a clean class consistent with ISO 8573-1 concepts (oil, water, and particle limits). Contaminated air leaves odors or particles in the bottle and can foul valves. A staged supply separates the low-pressure preblow line from the high-pressure final-blow line so the compressor does not run everything at maximum pressure.
Air recovery, where practical, captures vented blow air or recovers expansion energy, lowering the effective energy per bottle. Even without full recovery, right-sizing the receiver, stabilizing line pressure, and only using the minimum final blow needed already cut air cost substantially. The table below compares energy and air indices using a baseline of 100 index points.
| Configuration | Air Energy Index | Relative Cost | vs Baseline |
|---|---|---|---|
| Conventional fixed pump, single pressure | 135 | High | 1.35× baseline |
| Staged high-low air, no recovery | 110 | Medium | 1.10× baseline |
| Aibim PREFILL + variable pump + staged air | 65 | Low | 0.65× baseline (35% saved) |
| Above with air recovery add-on | 52 | Low | 0.52× baseline |
Safety of High-Pressure Air Systems
Final blow pressures reach 25–45 bar, and compressed-air systems carry real hazard. Aibim machines are CE certified and include a light curtain for personal safety and a long-distance digital laser sensor at the stripper station for mold safety. Safety rules for the pneumatic circuit include:
- Never open a pressurized line; depressurize and lock out before maintenance.
- Fit and test pressure relief valves on receivers and the high-pressure circuit.
- Guard the blow station against burst fragments; the light curtain stops the cycle if the guard is opened.
- Inspect hoses, valves, and fittings on a schedule; replace per the maintenance plan.
- Train operators on emergency stop and on the meaning of pressure alarms.
Quality Verification Methods
A pressure recipe is only as good as the verification behind it. For each new recipe or material change, run these checks:
- Wall thickness by zone: Measure base, body, shoulder, and neck with a thickness gauge; confirm distribution matches the design.
- Volume: Fill to confirm the bottle meets declared capacity.
- Top load: Apply vertical load to confirm stack strength.
- Burst pressure: Pressurize to failure to confirm a safe margin above filling pressure.
- Appearance: Check for stress marks, haze, flash, and detail clarity.
- First-piece and batch sampling: Qualify the first piece fully, then sample at set intervals during the run.
Relative Cost and Energy Profile
The cost to run a bottle is dominated by material, energy, and scrap. The table below rates typical cost and energy tiers by material on Aibim IBM lines. Ratings use Low, Medium, High, Very High, and Premium bands with index points referenced to a baseline of 100.
| Material | Material Cost Band | Energy Index | Air Cost Band | Process Difficulty |
|---|---|---|---|---|
| HDPE / LDPE | Low | 90 | Low | Low |
| PP | Low | 95 | Low | Medium |
| PS | Medium | 100 | Medium | Medium |
| ABS | Medium | 105 | Medium | Low |
| SAN | Medium | 108 | Medium | Medium |
| PET | Medium | 110 | Medium | Medium |
| PCTG | High | 112 | Medium | High |
| TPU | High | 115 | High | High |
| PC | Very High | 130 | High | Very High |
Energy index is relative to a 100-point baseline for a standard PP bottle on an IBM65; PC is higher because of drying and warm mold demand. None of these figures are purchase prices; they describe relative running cost only.
Aibim Injection Blow Molding Machines
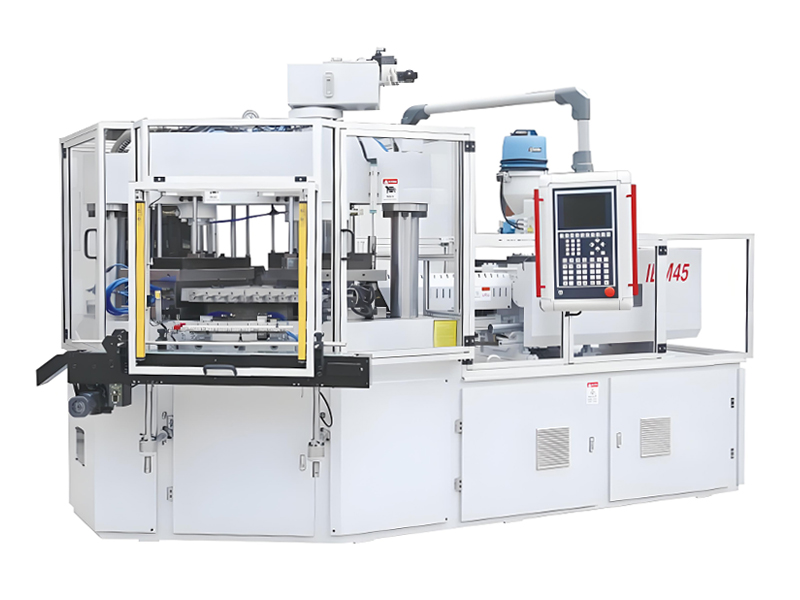
Aibim builds three core IBM series, each with a controlled pneumatic system for preblow and final blow. The specification ranges below are typical engineering windows; confirm exact figures against the factory datasheet for your mold and material.
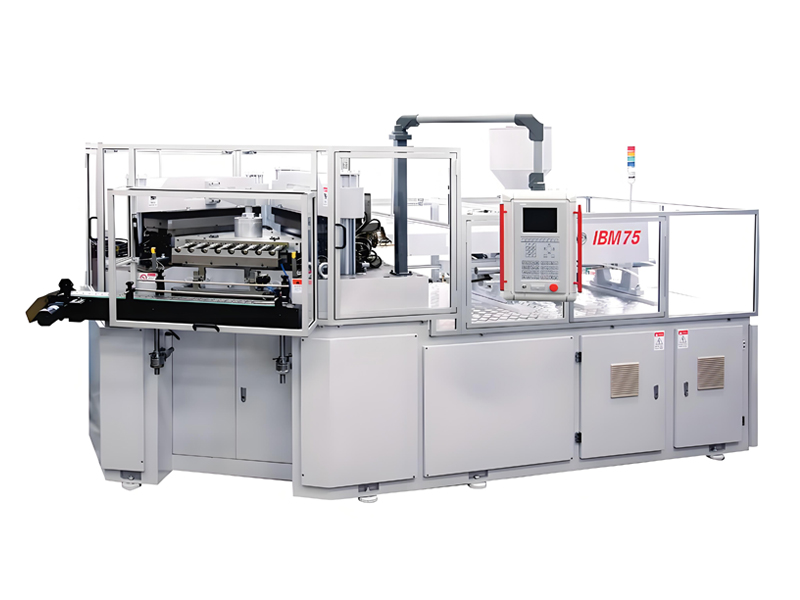
IBM75 Injection Blow Molding Machine
| Parameter | Typical Range |
|---|---|
| Model | IBM75 |
| Injection screw diameter (mm) | 45 |
| Shot size (g) | 80–150 |
| Clamping force (kN) | 750 |
| Container volume (ml) | 50–1000 |
| Stations | 3 (injection, blow, eject) |
| Air config (preblow + final blow, bar) | 6–16 + 20–40 |
| Installed power (kW) | 25–33 |
| Air consumption | Staged high-low; tuned per recipe |
| Cycle time (s) | 10–16 |
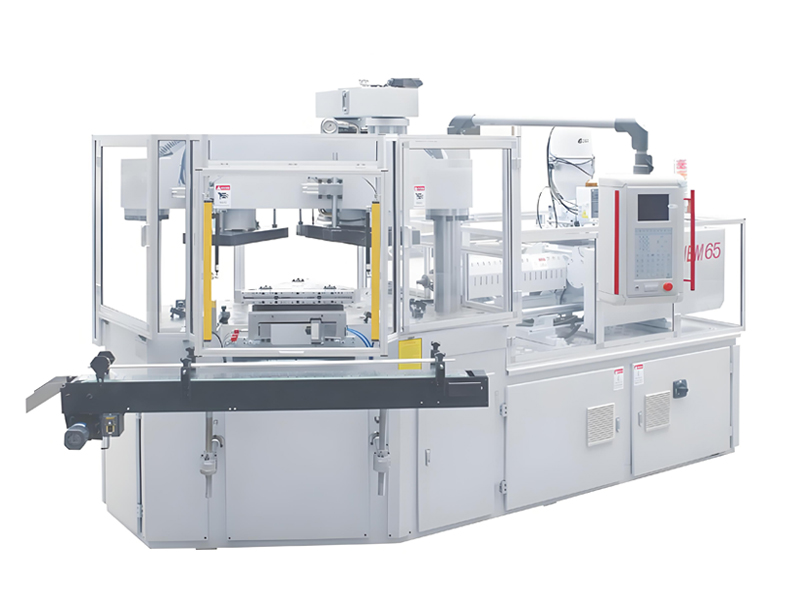
IBM65 Injection Blow Molding Machine
| Parameter | Typical Range |
|---|---|
| Model | IBM65 |
| Injection screw diameter (mm) | 40 |
| Shot size (g) | 60–110 |
| Clamping force (kN) | 650 |
| Container volume (ml) | 10–500 |
| Stations | 3 (injection, blow, eject) |
| Air config (preblow + final blow, bar) | 6–16 + 20–40 |
| Installed power (kW) | 18–25 |
| Air consumption | Staged high-low; tuned per recipe |
| Cycle time (s) | 9–14 |
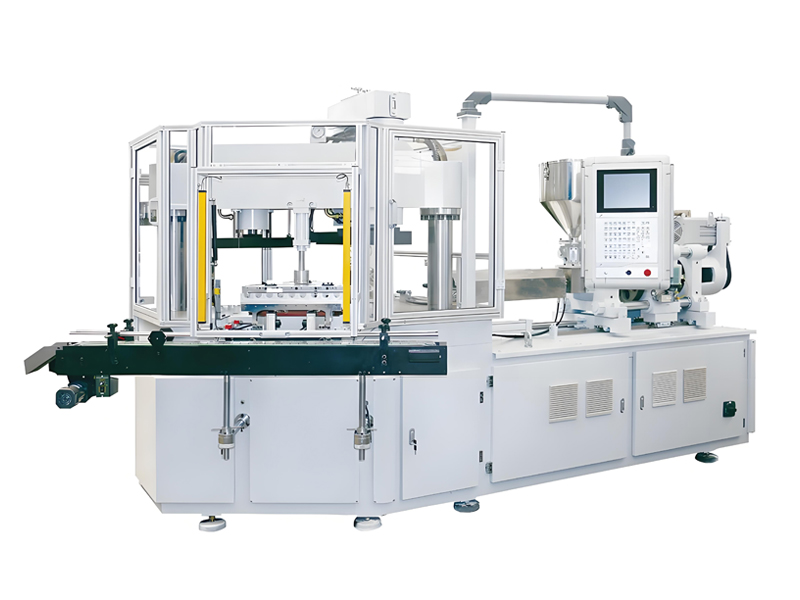
IBM55 Hybrid Electric Injection Blow Molding Machine
| Parameter | Typical Range |
|---|---|
| Model | IBM55 Hybrid Electric |
| Injection screw diameter (mm) | 35 |
| Shot size (g) | 40–80 |
| Clamping force (kN) | 550 |
| Container volume (ml) | 3–250 |
| Stations | 3 (injection, blow, eject) |
| Air config (preblow + final blow, bar) | 6–14 + 18–36 |
| Installed power (kW) | 12–18 (hybrid, lower draw) |
| Air consumption | Staged high-low; tuned per recipe |
| Cycle time (s) | 8–13 |
All three series share the PREFILL hydraulic technology and variable displacement pump pressurizing system, the SD card parameter storage for cross-machine recipe reuse, and the single-crossbeam double-pole clamping framework that enlarges mold setting space. The IBM55 hybrid adds electric servo motion for lower energy draw on small containers.
Application Industries and Material Suitability
Aibim IBM machines serve pharmaceutical, food, drink, and cosmetic industries. The pressure recipe follows the contents:
- Pharmaceutical: Oral liquid, eye drop, and diagnostic bottles in PE, PP, PS, and PC need clean, stress-free parts; low-pressure smooth ramps protect drug-contact surfaces.
- Food: Sauce, honey, and condiment bottles in PP and HDPE need secure necks; pressure tuned for seal integrity.
- Drink: Water and functional drink bottles in PET and PCTG need orientation for clarity and strength.
- Cosmetic: Cream jars in ABS and SAN, soft tubes in TPU, and clear jars in PET or PCTG need surface gloss and detail; pressure set for finish quality.
Processable materials across the Aibim range are PE (HDPE, LDPE, LLDPE), PP, PS, ABS, SAN, TPU, PC, and PCTG.
Selection Guide: Requirement to Model
Use this table to map a requirement to a machine and air configuration. Ranges are guidance; final selection depends on mold cavitation and output target.
| Material | Container Volume | Wall / Output | Recommended Model | Air Config |
|---|---|---|---|---|
| PET / PCTG | 100–1000 ml | Medium, high clarity | IBM75 | 8–16 + 25–40 bar |
| PP / HDPE | 50–500 ml | Medium, food grade | IBM65 | 6–12 + 20–34 bar |
| PS / SAN | 10–250 ml | Thin, glossy | IBM55 Hybrid | 6–13 + 18–32 bar |
| PC | 50–500 ml | Thick, medical | IBM75 | 10–18 + 30–45 bar |
| ABS | 10–500 ml | Medium, opaque | IBM65 | 7–13 + 22–36 bar |
| TPU | 3–250 ml | Soft, elastic | IBM55 Hybrid | 4–9 + 14–26 bar |
| Small pharma | 3–100 ml | High volume | IBM55 Hybrid | 6–14 + 18–36 bar |
Service and Support
Aibim, as a Wanplas factory, applies the Wanplas group service commitments. Before shipment each machine is test-run and inspected with the customer, CE certified with light curtain and laser sensor safety. Our engineers perform on-site installation and commissioning, and train your operators on pressure tuning and recipe storage.
The Wanplas shared policy provides USD 500 free parts per year and free replacement of damaged parts within the warranty period. Because recipes are stored on an SD card, a verified pressure setting can be carried to a second machine, which makes process transfer and capacity expansion straightforward. We also offer remote operation support, open our factory for customer visits, and guarantee transportation, production capacity, and quality standards.
Frequently Asked Questions
What is the difference between preblow and final blow pressure?
Preblow is the low-pressure stage that begins expansion and sets wall distribution; final blow is the high-pressure stage that completes cavity contact and forms detail. Tuning preblow first gives control over thickness, then final blow secures the shape.
How does material affect blow pressure in injection blow molding?
Each material has a different viscosity and freeze rate. Soft PE needs low pressure; rigid PC needs high pressure and a warm mold; brittle PS needs a gentle ramp. The material table in this guide gives the window for each.
Can I use the same blow pressure for PET and PP?
No. PET wants a preblow that builds orientation and a 25–40 bar final blow, while PP needs a gentler ramp and a mold temperature that controls crystallization. Using a PET recipe on PP causes stress marks; using a PP recipe on PET gives poor orientation and haze.
Why does my bottle burst even at moderate pressure?
Burst usually comes from a too-steep pressure ramp, cold material, or a thin local wall from wrong preblow timing. Lower the final blow or soften the ramp, raise the temperature slightly, and check preblow delay before increasing pressure.
How do I tune blow pressure for a new bottle design?
Follow the six-step method: set temperature first, set preblow for bubble shape, set final blow for contact, trim timing, validate wall and burst, then save to the SD card. Start at the low end of the final-blow window and increase only until full contact.
Does higher blow pressure mean better bottle quality?
No. Pressure above the minimum needed for contact only wastes air, increases mold wear, and can cause stress, burst, and haze. The goal is the lowest pressure that gives full, even cavity contact.
How does Aibim’s pneumatic system save energy?
Aibim uses PREFILL technology and a variable displacement pump in the hydraulic circuit plus a staged high-low air system for blow. This combination cuts energy use by a minimum of 35% versus conventional hydraulic lines, and staged air avoids running everything at maximum pressure.
What compressed air quality is required for blow molding?
For food, pharmaceutical, and cosmetic bottles the air should be oil-free and dried to a clean class aligned with ISO 8573-1 concepts. Clean air protects product safety and keeps valves free of oil buildup that would disturb pressure stability.
Conclusion
Blow pressure is not one number but a two-stage system of preblow and final blow, shaped by material, temperature, timing, and bottle geometry. The material table, shape-correction rules, tuning flow, and defect card in this guide give you a repeatable method to find the minimum pressure that delivers full cavity contact and a sound bottle. Aibim, a Wanplas factory, builds IBM75, IBM65, and IBM55 Hybrid machines with PREFILL technology, staged air, and SD-card recipe storage that make this method easy to apply and transfer across lines.
If you are qualifying a new material or bottle, send us your material grade and bottle drawing. We will prepare a material-specific pressure process package and a machine configuration suggestion, and we welcome you to send samples for trial molding and to visit our factory for machine inspection and test runs. Our team will help you lock in a verified, energy-efficient pressure recipe before you scale production.