Wall thickness uniformity is the single most important quality attribute of an injection blow molded bottle, and it is also the attribute that separates injection blow molding (IBM) most clearly from extrusion blow molding and stretch blow molding. For cosmetic bottles, pharmaceutical vials, oral liquid bottles, eye drop bottles and other small precision containers from 3 to 500 mL, the customer rarely cares about the exact gram weight as long as the wall is even, the container is stiff enough, and the finish seats the cap. This guide explains, step by step, how wall thickness is created inside an IBM machine, which four process stages decide whether the wall is uniform, how material and measurement methods affect the result, and how to diagnose and correct the common defects that appear when thickness drifts. The content is written for process engineers, tooling designers, quality technicians and buyers who need a practical, data-driven understanding of IBM wall control rather than a marketing summary.
How Wall Thickness Is Formed in Injection Blow Molding
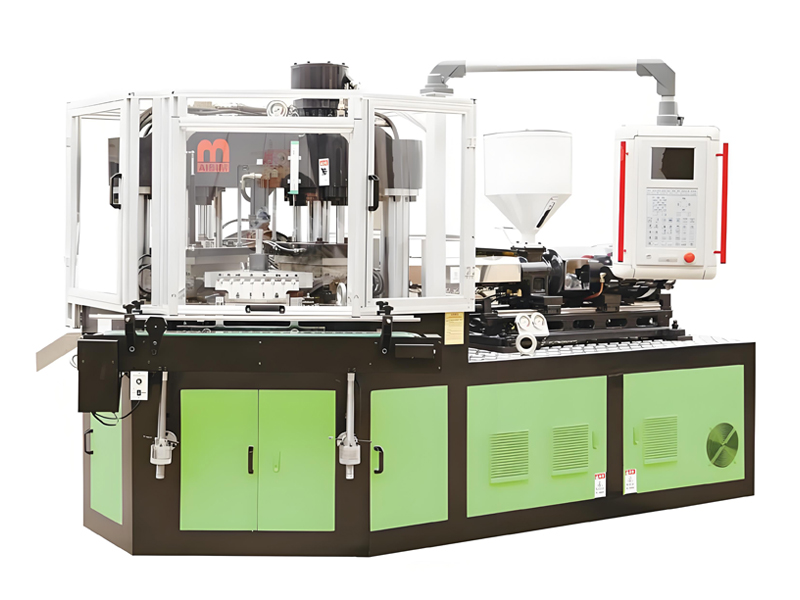
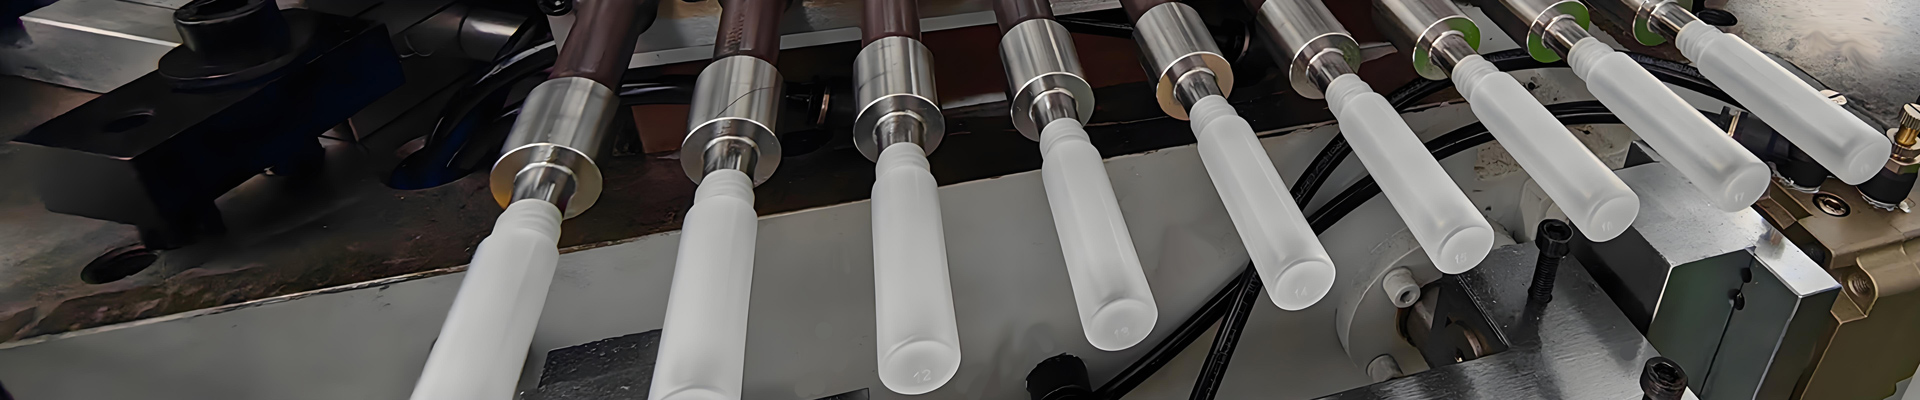
IBM is a three-station, one-step process. At the first station the plastic melt is injected into a preform cavity that surrounds a heated core rod, forming a hollow tube-like preform (sometimes called a parison in IBM terminology) with a finished neck and a controlled wall thickness. At the second station the core rod, still carrying the hot preform, rotates 120 degrees to the blow station, where the preform is transferred into the blow cavity and expanded with compressed air until it conforms to the bottle shape. At the third station the core rod rotates another 120 degrees to the ejection station, where the finished bottle is stripped off and the core rod returns to the injection station. The core rod therefore indexes through three positions, each separated by a 120-degree rotation of the indexing table or rotary core rod carrier.
The fundamental point for thickness control is that the wall thickness of the finished bottle is fixed first at the injection station, not at the blow station. In IBM the preform wall is established by the gap between the core rod surface and the preform cavity wall. Where the cavity is tight, the wall is thin; where the cavity is wide, the wall is thick. The blow air only pushes the already-uniform preform wall against the blow cavity, so it can improve surface definition and remove slight local thinning, but it cannot redistribute material that was never injected into the right place. This is the essential difference from extrusion blow molding, where a thick-walled parison is extruded from a die head and its local wall is actively profiled by a parison programmer (a moving die lip or moog programmer) and by the rate at which the parison is lowered into the mold. In EBM, thickness is a function of die gap plus programmer motion plus parison sag. In IBM, thickness is a function of cavity geometry plus core rod accuracy plus melt and temperature balance.
Stretch blow molding is different again. In injection stretch blow molding (ISBM) a preform is first injected, then reheated and biaxially stretched; the final wall is governed largely by the stretch ratio between the preform and the bottle, by the reheating profile, and by the stretch rod timing. ISBM can produce very thin, lightweight bottles with high material orientation, but its wall uniformity depends on a homogeneous reheat of the preform, which is a separate control problem. IBM skips the separate reheat oven and the stretch rod, which is why IBM finish (neck) geometry is molded directly and extremely precise, and why the wall is governed almost entirely by the injection cavity. For this article the focus is the bottle body wall; the finish accuracy and thread seating are established by the preform cavity and need only be noted here, because a companion article on this site covers finish and seal tuning in detail.
Because the wall is set at injection, the four decisive stages for uniformity are the core rod, the preform cavity, the temperature of the preform as it leaves injection and moves to blow, and the blow setting that finally forms the bottle. The remaining sections take each stage in turn, then cover material, measurement, defects and capability.
Key principle: in injection blow molding the bottle wall is determined at the injection station by the cavity-to-core-rod gap, not by a parison programmer. Control the cavity and the core rod and the rest of the process becomes fine-tuning.
Step 1 — Core Rod Precision and Temperature Control
The core rod is the heart of IBM thickness control. Every bottle wall is a negative impression of the gap between the core rod and the cavity, so any error on the core rod is reproduced in every cavity on every shot. Four rod characteristics matter most: straightness, concentricity, surface finish and temperature uniformity.
Straightness should be at or below 0.02 mm measured over the full molding length. A rod that bows transfers that bow into a consistent thin side on every bottle. Concentricity, the alignment between the rod axis and the locating datum that seats the rod in the cavity, should be at or below 0.015 mm. Because the cavity is fixed and the rod is the moving, rotating member, a concentricity error creates a rotating thin spot only if the rod is free to rotate relative to the cavity; in practice the rod is located repeatably, so a concentricity error produces a fixed thin side across all cavities. Surface roughness on the molding land should be Ra 0.2 to 0.4 micrometer. A rougher surface drags the melt, raises shear heating locally, and increases the chance that the preform sticks or picks up a knurled texture that translates into a measured thickness variation after blow.
Temperature control is the second half of core rod quality. The rod carries an internal water circuit, usually with a bore of 4 to 6 mm, fed by a mold temperature controller. The rod temperature window for most IBM jobs is 60 to 110 degree C, and it must be held within plus or minus 2 degree C. If the rod runs cold, the melt freezes too quickly at the rod surface, builds a thick skin, and the preform wall grows unevenly; if it runs hot, the preform can soften and sag or lose shape before the blow station. The rod temperature is not uniform along its length by design: the neck section is intentionally kept 15 to 25 degree C lower than the body section to prevent finish deformation, while the shoulder region is run warmer to keep the preform soft where the most stretch occurs during blow.
Two practical notes. First, the rod expands when heated, so the effective cavity gap shrinks as the rod warms. A rod sized at room temperature must include a thermal expansion compensation so that at operating temperature the gap matches the target wall. Second, rods wear. After long runs the shoulder land erodes, the surface roughens, and concentricity drifts; this is a leading cause of cavity-to-cavity thickness differences. A documented rod inspection schedule, with re-grinding or replacement at a defined wear limit, keeps multi-cavity uniformity stable. Aibim, a Wanplas factory, builds these core rods on its own CNC center so that straightness, concentricity and the water-channel geometry are held to the same drawing across replacement rods, which matters more for thickness stability than the headline machine specification.
Step 2 — Preform Mold Cavity Design
If the core rod is the inner boundary of the wall, the preform cavity is the outer boundary. The cavity designer fixes the nominal wall, the stretch ratio, the gate location and the runner balance, and all four directly shape thickness uniformity.
Preform wall thickness is typically 1.5 to 4.5 mm. A thin preform wall (1.5 to 2.5 mm) reduces material and shortens cooling but leaves little margin for blow variation, so small process drift shows up as a visible wall defect. A thick preform wall (3.5 to 4.5 mm) is more forgiving but needs longer cooling and uses more resin. The preform length to bottle body stretch ratio normally falls between 1.8 and 3.0. Below 1.8 the preform is close to the bottle size and the blow does little work, which is fine for stiff, low-orientation containers but wastes the uniformity benefit of even expansion; above 3.0 the preform must stretch a long way, and a poorly balanced temperature profile will thin the shoulder or base. For a 30 mL eye drop bottle the ratio sits near the low end; for a 500 mL cosmetic bottle the ratio approaches the high end.
Gate location is the next decision. A bottom center-point gate, where the melt enters at the closed base of the preform and flows upward along the rod, gives the most axisymmetric fill and the most uniform starting wall, which is why it is preferred for high-uniformity pharmaceutical and cosmetic jobs. A side gate, entering near the base shoulder, is easier to separate and leaves a smaller vestige but can create a slight flow-length difference between the near and far sides of the cavity, which the nine-point map may later show as a thin far side. The gate vestige at the base is also the usual source of a thick base-center point (a stress concentration) when cold material packs at the gate; this is covered in the defect tree.
Runner balance decides whether all cavities in a multi-cavity mold receive the same melt at the same pressure and temperature. Natural balance is the preferred layout: a genuinely symmetrical runner tree where every cavity has equal flow length and equal pressure drop. Common IBM cavity counts are 4, 6, 8, 12 and 16, and the runner must be laid out so that each cavity is equidistant from the sprue in flow terms, not merely in drawing appearance. A 4-cavity H-pattern and an 8-cavity or 16-cavity radial pattern can be made naturally balanced; a 6-cavity or 12-cavity layout needs care because six or twelve points do not sit on a simple symmetric tree and are easily drawn with unequal legs. Where natural balance cannot be achieved, a tuned (artificially balanced) runner with deliberately different diameters compensates, but it is sensitive to viscosity change and therefore to material lot and temperature. For thickness uniformity across cavities, natural balance plus a hot runner with matched nozzle temperatures is the robust choice. Note that a hot runner with a temperature spread greater than 5 degree C between drop points is itself a documented cause of cavity-to-cavity wall differences.
Step 3 — Parison Temperature Distribution Across the Core Rod
The preform leaves the injection cavity at a defined temperature, travels on the rod to the blow station during the index time, and arrives with a temperature profile that the blow step must work with. The ejection (demold) temperature window is material dependent: PP 130 to 150 degree C, PE 100 to 125 degree C, PS 115 to 135 degree C, and PETG 95 to 115 degree C, with a general 110 to 150 degree C envelope for mixed jobs. The transfer (index) time is 0.8 to 2.5 seconds, during which the exposed preform loses roughly 5 to 15 degree C depending on ambient air, rod temperature and preform mass. That loss is not uniform: the thin neck cools fastest, the shoulder and body cool more slowly, and the base near the rod tip can stay warm.
The designed axial gradient is deliberate. The neck is held 15 to 25 degree C below the body so the finish keeps its shape and does not slump before blow (this is the rod temperature control from Step 1 made visible). The shoulder is run warmer than the mid body because the shoulder is where the preform must stretch the most to fill the blow cavity corners; a cold shoulder yields a short shot or a thick, poorly formed shoulder. The body and base should be warm enough to blow clear but not so hot that the wall sags under gravity during transfer. If the gradient is wrong, the bottle shows it immediately: a warm neck deforms, a cold shoulder stays thick, and a base that is too cold packs a thick center point.
Controlling this gradient is a combination of rod temperature profile, injection melt temperature, cooling time at the injection station, and the ambient conditions around the indexing table. Because the transfer time is fixed by the machine cycle, the practical levers are the rod setpoint profile and the injection cooling time. A longer injection cooling time lowers the demold temperature and shrinks the transfer loss, at the cost of cycle time; a higher rod body temperature keeps the shoulder hot. The aim is a preform that reaches the blow station with the neck set, the shoulder soft, and the body in a narrow, repeatable band so that the blow step always sees the same starting condition.
Repeatability beats absolute value. A preform that arrives at the blow station at 120 plus or minus 3 degree C, shot after shot, gives more uniform walls than one that averages 125 but swings plus or minus 12 degree C.
Step 4 — Blow Molding Parameters
By the blow station the wall thickness distribution is largely decided; the blow step finalizes the shape and removes minor local thinness. The main parameters are blow pressure, blow delay, hold time and blow mold temperature.
Blow pressure for PP and PE is normally 0.4 to 0.9 MPa; for PS it is higher, 0.6 to 1.2 MPa, because PS has less melt strength and needs more pressure to seat the wall into the cavity detail. Blow delay, the time between clamp close and air release, is 0.05 to 0.2 second; too long a delay lets the preform cool and the wall stiffen so it cannot fully form, while too short a delay can trap air or mark the neck. Hold time is 1.5 to 5 seconds, holding pressure after the bottle is formed so the wall sets against the cavity and the definition is locked in. Blow mold temperature is 8 to 25 degree C; a colder mold freezes the wall faster and gives a stiffer bottle with a crisper surface, while a warmer mold allows more relaxation and can hide minor thickness steps but risks sticking and longer cycle.
The relationship to uniformity is indirect but real. If pressure is too low, the wall does not fully contact the cavity, so the measured body wall near corners reads thin and the shoulder reads thick. If pressure is too high, the wall is driven hard against the cavity everywhere, which can over-thin the already-thin side of an eccentric preform and amplify an existing defect rather than fix it. The blow step cannot correct a cavity gap error; it only makes the preform wall conform to the bottle surface. This is why the first three steps carry most of the thickness-control weight, and why changing blow pressure is the wrong first response to a thin-side defect.
| Parameter | PP / PE window | PS window | Effect on wall uniformity |
|---|---|---|---|
| Blow pressure | 0.4 to 0.9 MPa | 0.6 to 1.2 MPa | Sets wall against cavity; too low leaves thin corners, too high amplifies eccentricity |
| Blow delay | 0.05 to 0.2 s | Long delay cools preform, thick shoulder and short body | |
| Hold time | 1.5 to 5 s | Locks wall definition; too short leaves soft, variable wall | |
| Blow mold temperature | 8 to 25 degree C | Colder mold freezes wall fast and crisp; warmer mold relaxes steps but risks stick | |
Material Selection and Its Effect on Thickness Uniformity
The resin determines how evenly the melt fills the preform cavity and how much the wall moves during cooling and blow. Melt flow rate (MFR) is the first lever. For PP homopolymer the useful IBM range is 10 to 35 g per 10 minutes; for HDPE it is 2 to 8 g per 10 minutes; for PS it is 6 to 15 g per 10 minutes. A higher MFR fills thin cavities more easily and gives a more uniform starting wall, but too high an MFR lowers melt strength and can thin the shoulder during blow. A lower MFR gives stiffness and melt strength but needs higher injection pressure and can leave a short shot in a tight cavity.
Melt flow balance between cavities is the practical concern. If the MFR shifts between resin lots, the fill pattern changes and the wall map shifts. This is why a documented incoming MFR check, and a single approved grade with a tight MFR band, protects thickness uniformity more than most operators expect. Crystallinity and shrinkage complete the picture. PP shrinks 1.2 to 2.0 percent, HDPE 1.5 to 3.0 percent, and PS only 0.4 to 0.7 percent. High shrinkage resins pull the wall inward as they cool, and if the cooling is uneven the shrink is uneven, so the measured wall varies around the bottle. PS, with its low shrink, is inherently easier to hold uniform, which is one reason PS is common for precision cosmetic and pharmaceutical bottles where wall consistency is the priority. Amorphous materials such as PS and PETG also hold dimension better than semi-crystalline PP and HDPE, at the cost of lower chemical resistance and impact.
| Material | MFR window (g/10 min) | Preform demold temp (degree C) | Blow pressure (MPa) | Shrinkage (%) |
|---|---|---|---|---|
| PP homopolymer | 10 to 35 | 130 to 150 | 0.4 to 0.9 | 1.2 to 2.0 |
| HDPE | 2 to 8 | 100 to 125 | 0.4 to 0.9 | 1.5 to 3.0 |
| PS | 6 to 15 | 115 to 135 | 0.6 to 1.2 | 0.4 to 0.7 |
| PETG | medium range | 95 to 115 | 0.6 to 1.2 | low, amorphous |
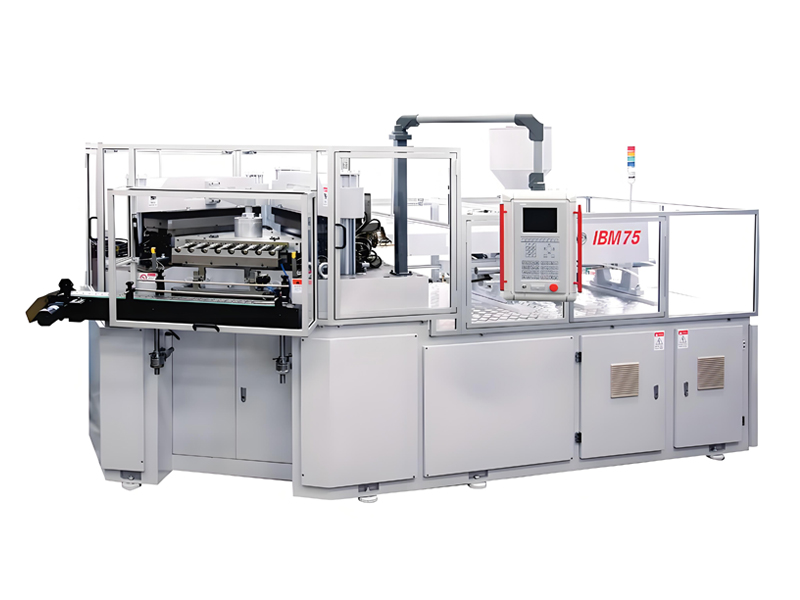
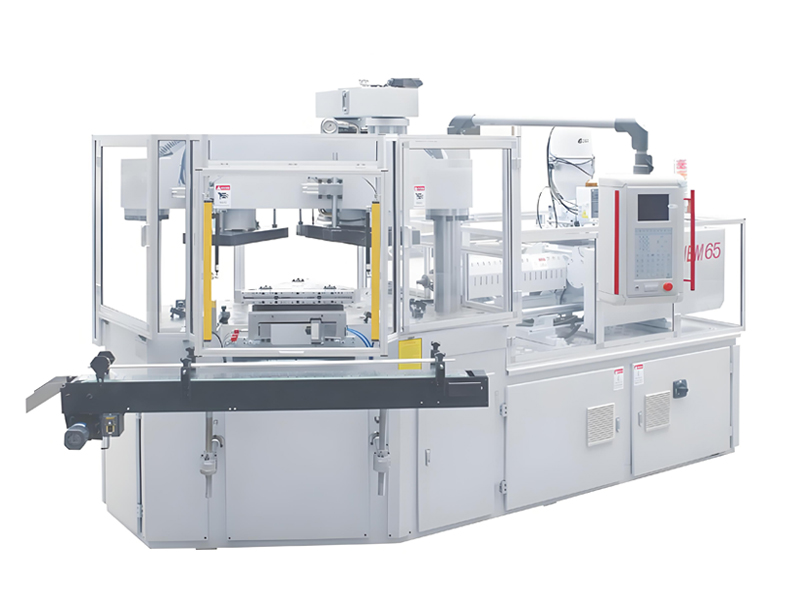
Color masterbatch and additives also matter. A high masterbatch let-down raises viscosity and can push the effective MFR down, changing fill balance; some pigments are abrasive and accelerate core rod wear, which slowly degrades concentricity. For a uniform wall, keep the masterbatch grade and let-down fixed, and watch rod wear more closely on colored runs. Aibim machines such as the IBM75, IBM65 and IBM55 Hybrid handle PP, PE, PS, ABS, SAN, TPU, PC and PCTG, and the material choice should be matched to the cavity and rod set that the wall spec demands rather than to availability alone.
Measurement and Inspection Methods
You cannot improve a wall you cannot measure. IBM thickness is checked by contact gauges, destructive sectioning, and imaging, and the results are reported against a fixed sampling map.
The magnetic thickness gauge is the daily workhorse. Used on the steel-backed wall area, it reads to plus or minus 0.01 mm and is fast enough for line-side checks, though it needs a flat or gently curved spot and a calibration on the actual resin. The slice-and-weigh method is the reference check: a bottle is cut at a defined height, the slice is weighed, and the wall is back-calculated from density and circumference; it is slow but absolute. Eddy-current gauges work on non-magnetic bottles and give a similar speed to magnetic gauges with comparable precision. CT scanning is the high-resolution option, building a full 3D wall map without cutting the bottle, useful for development and for auditing a new cavity, but it is a laboratory method rather than a line check.
The nine-point sampling method is the standard reporting grid. Nine positions are measured on each bottle: neck-down (just below the finish), shoulder, upper body, mid body, lower body, heel, base center, and two base corners. The base corner pair catches the thinning that occurs where the base meets the side wall, and the base center catches the gate vestige thick point. Each reading is compared to the target wall and to the tolerance band. For general containers the band is plus or minus 8 to 12 percent of nominal wall; for pharmaceutical-grade containers the band tightens to plus or minus 5 percent, because the wall directly affects dose uniformity, drop resistance and leachables control.
| Sampling point | Location on bottle | What it reveals | Tolerance target |
|---|---|---|---|
| 1. Neck-down | Just below finish | Finish-to-body transition, cooling effect | plus or minus 8 to 12 percent (plus or minus 5 pharma) |
| 2. Shoulder | Top curve of body | Temperature gradient, stretch ratio | plus or minus 8 to 12 percent (plus or minus 5 pharma) |
| 3. Upper body | Upper side wall | General uniformity | plus or minus 8 to 12 percent (plus or minus 5 pharma) |
| 4. Mid body | Center side wall | Reference point, cavity gap | plus or minus 8 to 12 percent (plus or minus 5 pharma) |
| 5. Lower body | Lower side wall | Eccentricity, flow length | plus or minus 8 to 12 percent (plus or minus 5 pharma) |
| 6. Heel | Body-to-base junction | Corner thinning, mold parting | plus or minus 8 to 12 percent (plus or minus 5 pharma) |
| 7. Base center | Center of base | Gate vestige, stress point | plus or minus 8 to 12 percent (plus or minus 5 pharma) |
| 8 to 9. Base corners | Two base edges | Base thinning, ejection mark | plus or minus 8 to 12 percent (plus or minus 5 pharma) |
Defect Diagnosis Tree for Non-Uniform Wall Thickness
When the nine-point map shows a pattern, the pattern points to a stage. The tree below maps the visible symptom to the most likely root cause and the first adjustment to try.
| Observed defect | Most likely root cause | First adjustment to try |
|---|---|---|
| One side consistently thin | Core rod eccentricity, mold parting-line misalignment, or unbalanced injection runner | Check rod concentricity (target at or below 0.015 mm) and runner balance before touching blow |
| Shoulder thick, base thin | Wrong parison temperature gradient or stretch ratio too high | Raise shoulder rod temperature, lower stretch ratio toward 1.8 to 3.0 |
| Thick base-center stress point | Gate cold material retained, or core rod tip too cold | Raise rod tip temperature, check gate vestige and pack time |
| Neck (finish) deformed | Core rod neck section too hot, or ejection too early | Lower neck rod temperature (keep 15 to 25 degree C below body), delay ejection |
| Difference between cavities | Unbalanced runner, uneven rod wear, or hot-runner point spread greater than 5 degree C | Audit natural balance, equalize hot-runner zone temperatures, inspect rods |
| Thin corners, heavy center body | Blow pressure too low or mold too warm | Raise blow pressure within material window, lower blow mold temperature toward 8 to 25 degree C |
| Wall steps at parting line | Mold clamp misalignment or flash at preform cavity | Check clamp and cavity parting, confirm core rod seats true |
The discipline that saves time is to read the map before changing settings. A thin side is almost never fixed by more blow pressure; it is fixed by the cavity gap. A thick base center is almost never fixed by lower pressure; it is fixed at the gate and the rod tip. Treating every defect as a blow-pressure problem is the most common reason IBM wall uniformity projects stall.
Process Capability and Statistical Process Control
Uniformity is not a one-time check; it is a capability that must hold across a production run and across cavities. The standard measure is Cpk, the process capability index that compares the spread of the measured wall to the tolerance band. For general containers the line should hold Cpk at or above 1.33; for pharmaceutical primary packaging the requirement rises to Cpk at or above 1.67. A Cpk of 1.33 means the process spread is comfortably inside the tolerance with margin for normal drift; 1.67 is tighter and expected where the wall affects patient safety or regulatory release.
SPC turns the nine-point map into a control system. A practical scheme samples a fixed number of bottles per cavity at a set frequency, say the first shot after any change and then one bottle per cavity per defined interval, plots the mid-body and shoulder readings on control charts, and acts when a point leaves the control limits or when a trend appears across cavities. The point of SPC is to catch the slow drift from rod wear, hot-runner aging or resin lot change before the wall leaves the tolerance band. Because the cost of scrap rises sharply once a batch is filled and labeled, the payback of SPC on an IBM line is high even at medium volume.
Capability also depends on the consistency of the inputs. A rod held to straightness at or below 0.02 mm and concentricity at or below 0.015 mm, a naturally balanced runner, a rod temperature within plus or minus 2 degree C, and a resin with a fixed MFR band are the four preconditions that let Cpk stay above target. Remove any one and the capability number falls even if the operator is skilled. This is why thickness uniformity is an engineering problem solved at the design and setup stage, maintained by measurement, and only occasionally corrected on the fly.
Relevant Standards and Compliance
IBM containers for pharmaceutical and food use must meet documented standards, and wall thickness is part of the evidence package. The main references are ISO 8362-4 for injection containers for injectables, USP less than 661 greater than for plastic packaging used in pharmaceuticals, EU 10/2011 for plastic materials and articles intended for food contact, GB 4806.7 for food-contact plastics in China, ISO 15378 for primary packaging materials for medicinal products under GMP, and ASTM D2103 for polyethylene film and tubing used as a related material reference. For cosmetic bottles the relevant frame is usually food-contact or cosmetic-contact regulation plus the brand’s own specification; for eye drop and oral liquid bottles the pharmaceutical set applies and the plus or minus 5 percent wall band is the working target.
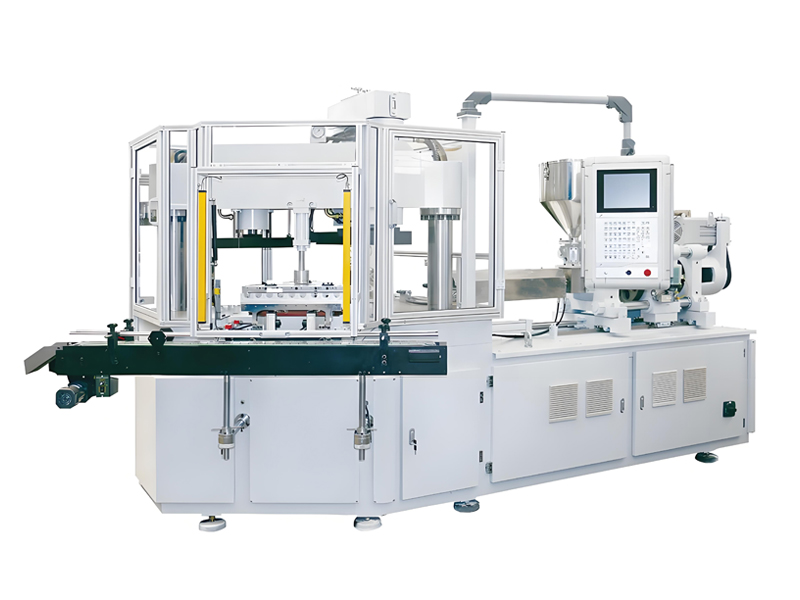
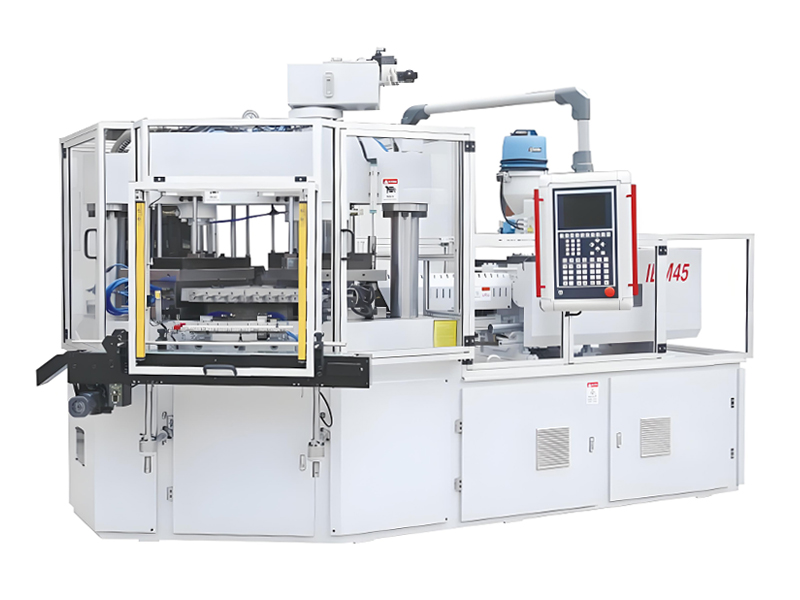
Standards do not dictate a single wall number; they require that whatever wall you claim is proven, repeatable and documented. That is exactly what the measurement method, the defect tree and the Cpk discipline in the previous sections provide. Aibim, as a Wanplas factory with 12 plus years in plastic machinery and 20 years in injection blow molding, supplies IBM75, IBM65 and IBM55 Hybrid machines with CE certification and an energy saving of at least 35 percent, and the Wanplas group backs its factories with shared quality commitments and spare-parts support, which helps a buyer keep the process stable long after commissioning.
Conclusion
Wall thickness uniformity in injection blow molding is won at the injection station and protected through the blow station. The wall is set by the gap between a precision core rod and a balanced preform cavity, not by a parison programmer, which is the structural reason IBM beats extrusion blow molding on concentricity. Hold the core rod to straightness at or below 0.02 mm, concentricity at or below 0.015 mm and surface roughness Ra 0.2 to 0.4 micrometer with a 60 to 110 degree C rod control within plus or minus 2 degree C; design the preform wall at 1.5 to 4.5 mm with a 1.8 to 3.0 stretch ratio, a bottom center gate where uniformity matters, and a naturally balanced runner; arrive at the blow station with a deliberate axial temperature gradient; and finish with the right pressure, delay, hold and mold temperature for the material. Measure with the nine-point map against a plus or minus 8 to 12 percent band, or plus or minus 5 percent for pharma, diagnose by pattern, and hold Cpk at or above 1.33, or 1.67 for drug packaging. Done consistently, these steps turn wall uniformity from a recurring complaint into a controlled, documented capability. For a complete IBM production setup, Aibim, a Wanplas factory, offers the IBM75, IBM65 and IBM55 Hybrid machines together with tooling and process support sized to cosmetic, pharmaceutical, oral liquid and eye drop bottles from 3 to 500 mL.
Frequently Asked Questions
Why is wall thickness in IBM set by the preform cavity rather than a parison programmer?
In injection blow molding the melt is injected into a closed preform cavity around a core rod, so the local cavity gap defines the wall. There is no free extruded parison and therefore no moving die lip or moog programmer shaping the wall, which is why IBM delivers tighter concentricity than extrusion blow molding, where wall is actively profiled by a parison programmer and die gap.
What core rod tolerances keep wall thickness uniform?
Target straightness at or below 0.02 mm, concentricity at or below 0.015 mm and surface roughness Ra 0.2 to 0.4 micrometer. The rod should carry a temperature-controlled water circuit of 4 to 6 mm bore held at 60 to 110 degree C within plus or minus 2 degree C, with the neck section intentionally 15 to 25 degree C cooler than the body to protect the finish.
How many thickness points should be measured per bottle?
Use the nine-point method: neck-down, shoulder, upper body, mid body, lower body, heel, base center and two base corners. Compare each reading to the target wall and to the tolerance band of plus or minus 8 to 12 percent for general containers or plus or minus 5 percent for pharmaceutical grade, and chart the results for SPC.
Which blow pressure and mold temperature work for PP, PE and PS?
For PP and PE use 0.4 to 0.9 MPa with a blow mold temperature of 8 to 25 degree C; for PS raise blow pressure to 0.6 to 1.2 MPa. Blow delay is typically 0.05 to 0.2 second and hold time is 1.5 to 5 seconds. These settings finalize shape but cannot correct a cavity-gap error established at injection.
What causes one side of a bottle to be thin?
A thin side is most often core rod eccentricity, mold parting-line misalignment or unbalanced injection runners. Confirm with the nine-point map, then check core rod concentricity and runner balance before changing blow settings, because added blow pressure will amplify rather than fix an eccentric wall.
Which standards apply to IBM pharmaceutical containers?
Primary references include ISO 8362-4 for injection containers, USP less than 661 greater than for plastic packaging, EU 10/2011 for food contact, GB 4806.7, ISO 15378 for pharmaceutical primary packaging GMP and ASTM D2103 for related polyethylene material, applied as relevant to the market and product.
Can a higher blow pressure hide a thin shoulder?
Only partially and at a cost. More pressure seats the wall harder against the cavity and can reduce a slight short shot, but if the shoulder is thick because the preform temperature gradient is wrong or the stretch ratio is too high, extra pressure over-thins the already-thin side and can create a weak corner. Fix the gradient and ratio first, then tune pressure inside the material window.
How does material shrinkage affect measured wall uniformity?
Semi-crystalline resins such as PP (1.2 to 2.0 percent) and HDPE (1.5 to 3.0 percent) shrink more than amorphous PS (0.4 to 0.7 percent), so uneven cooling produces uneven shrink and a varying measured wall. PS and PETG are inherently easier to hold uniform, which is why they are common for precision bottles where wall consistency is the priority.